

Adding a Guest User in Azure AD & Assigning Users in Sparkrock 365
About this document: This document provides the step-by step guide to add a guest user and then how to assign user licenses to your team.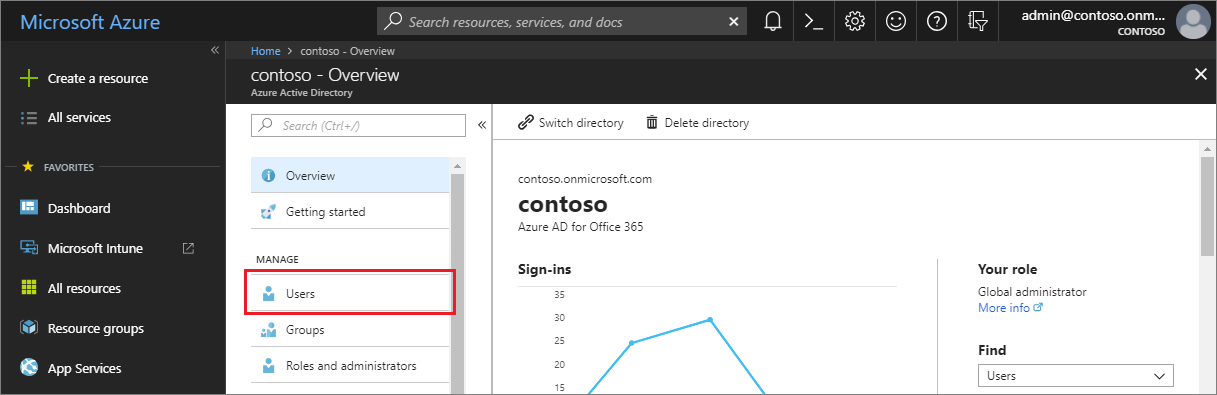
Note
Not all Microsoft services are available in all locations. Before a license can be assigned to a user, you must specify the Usage location. You can set this value in the Azure Active Directory > Users > Profile > Settings area in Azure AD. Any user whose usage location is not specified inherits the location of the Azure AD organization.
About this document: This document provides the step-by step guide to add a guest user and then how to assign user licenses to your team.
To add a guest user:
- Sign in to the Azure portal as an Azure AD administrator.
- In the left pane, select Azure Active Directory.
- Under Manage, select Users.
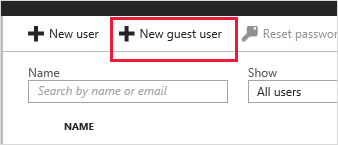
- Select New guest user.
- On the New user page, select Invite user and then add the guest user's information.
- Name. The first and last name of the guest user.
- Email address (required). The email address of the guest user.
- Personal message (optional) Include a personal welcome message to the guest user.
- Groups: You can add the guest user to one or more existing groups, or you can do it later.
- Directory role: If you require Azure AD administrative permissions for the user, you can add them to an Azure AD role.
- Setting a Usage Location for the user can be required to be able to assign licenses to them.
- Select Invite to automatically send the invitation to the guest user. A notification appears in the upper right with the message Successfully invited user.
- After you send the invitation, the user account is automatically added to the directory as a guest.
To assign a license to a user
- Sign in to the Azure portal as an Azure AD administrator.
- In the left pane, select Azure Active Directory.
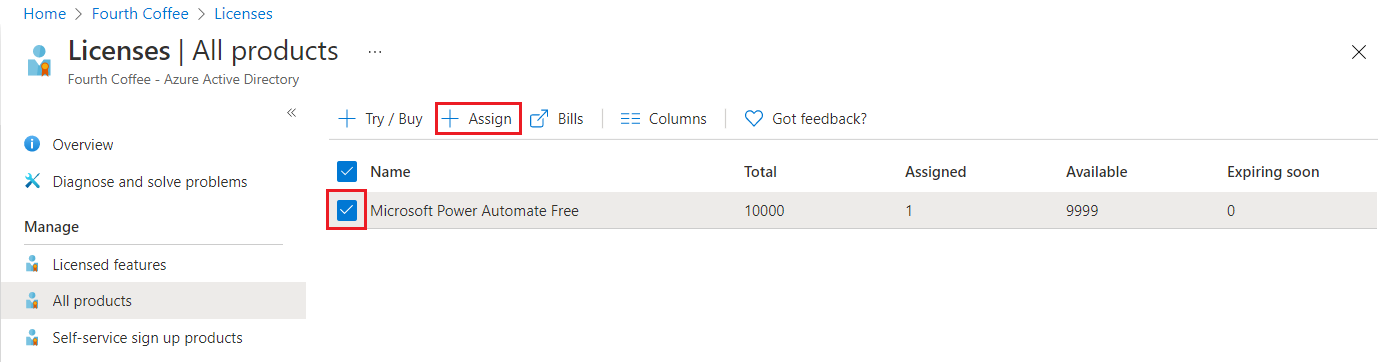
- Under Manage, select Licenses.
- On the Products page, select Business Central External Accountant if the user is a Sparkrock consultant, or Business Central Essentials for an internal full user.
- After you select the license plan, select Assign.
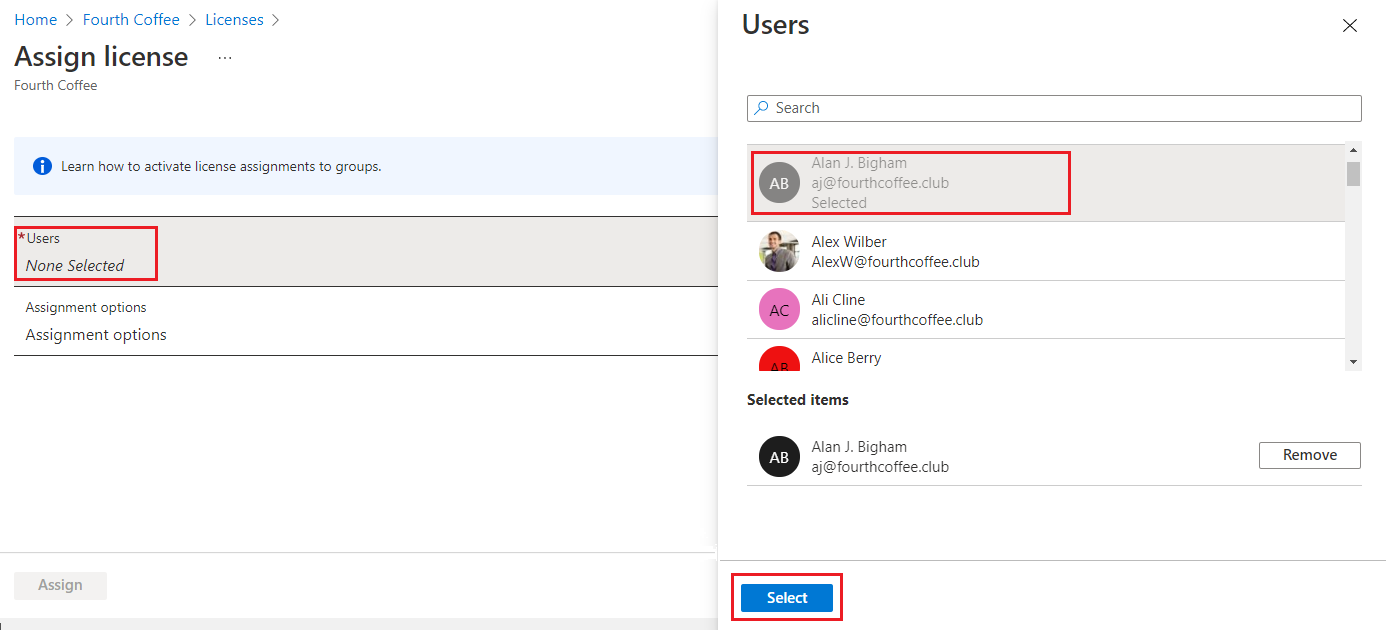
- On the Assign page, select Users and groups, and then search for and select the user you're assigning the license.
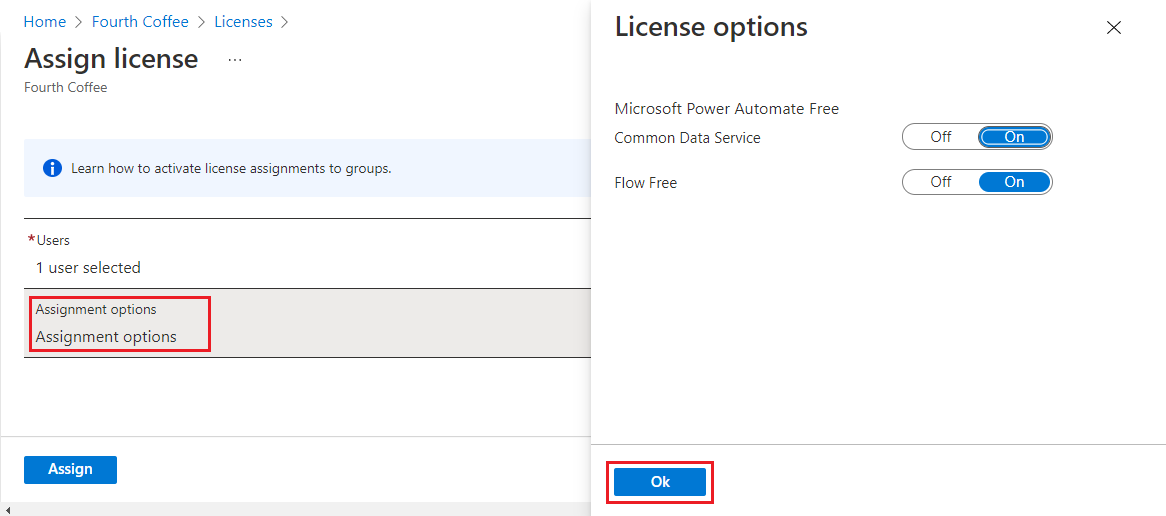
- Select Assignment options, make sure you have all license options turned on, and then select OK.
Note
Not all Microsoft services are available in all locations. Before a license can be assigned to a user, you must specify the Usage location. You can set this value in the Azure Active Directory > Users > Profile > Settings area in Azure AD. Any user whose usage location is not specified inherits the location of the Azure AD organization.
- Select Assign.