

Viewing your Balances
To view your balances:
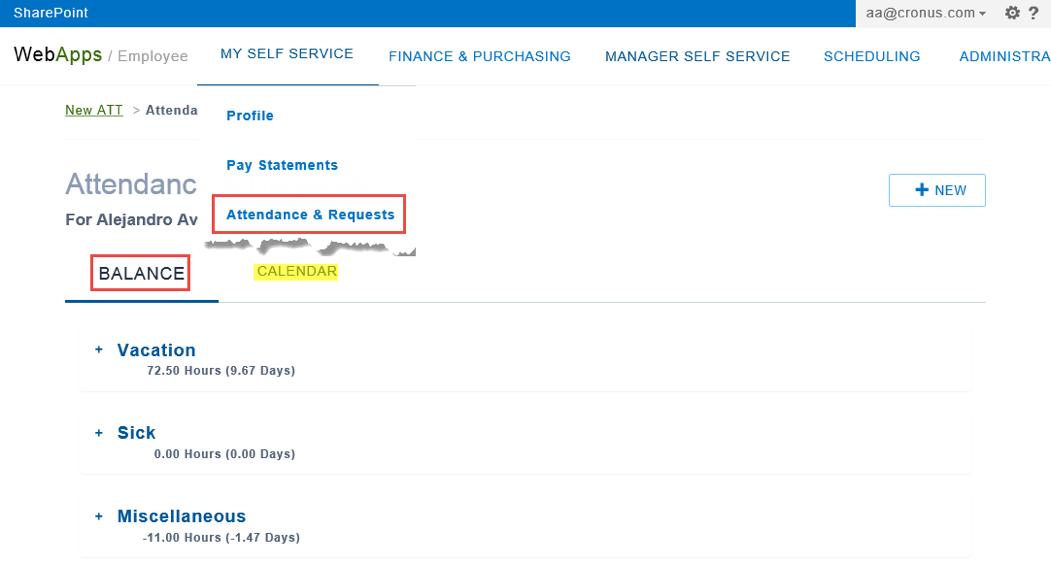
- From the My Self Service menu bar item, click the Attendance & Requests link.
The Attendance & Requests page opens displaying a list of balances. If you prefer, you may click on Calendar to view this information in a calendar format.
- To review the details of a balance, including accruals, days taken off, scheduled time off and requests pending approval, click to expand the type of balance for which you want to view details.
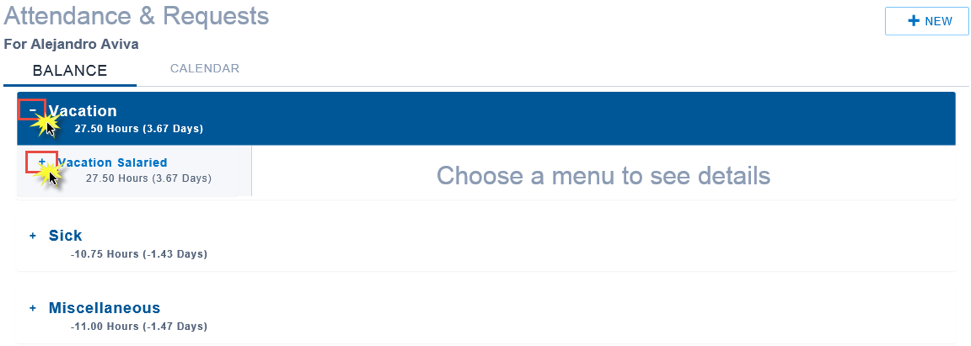
- Choose from the menu to see more details (for example Used).
The details display to the right of the menu.
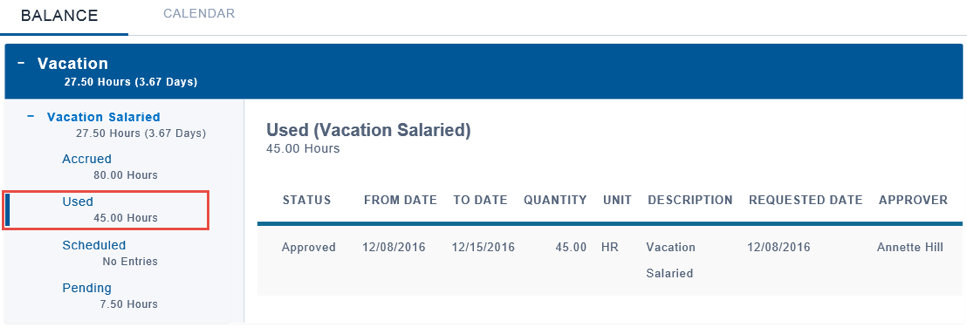
- Accrued displays any accrual entries applied by the payroll calculation or entries that you requested which are already approved.
- Used displays entries that you have requested and used.
- Scheduled displays entries that you have requested and have been approved or scheduled to be used.
- Pending displays entries that are pending your manager’s approval.
Requesting Time Off
To receive time off from work, you need to submit a request. The request must include details such as dates, reason, etc. Next the request is submitted to your manager, and to HR for review and approval.
To submit a request for time off from work:
- From the My Self Service menu bar item, click the Attendance & Requests link.
The Attendance & Requests page opens. - Click the New button in the top right corner of the page.

The Attendance & Request form displays.
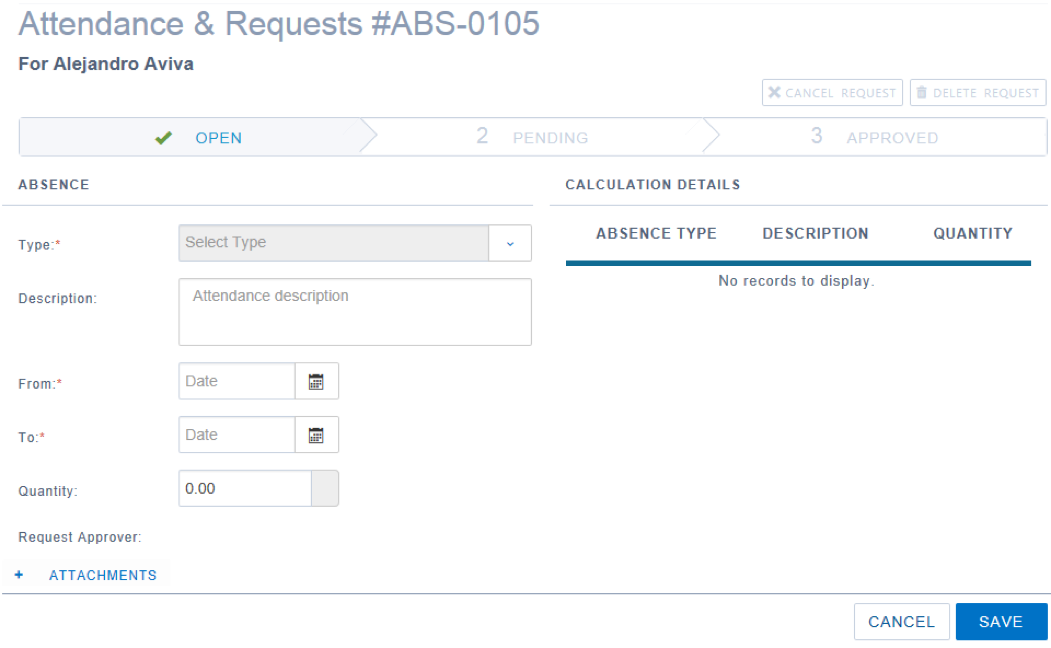
- From the Type field, select the absence type or cause of absence under which your request falls.
- In the Description field, may enter a short explanation for the entry. This field is not required, but the information is useful when you are reviewing a list of historical entries.
- In the From field, select the start date of the absence. Use the Calendar to select the start date.
- In the To field, select the end date of the absence. Use the Calendar picker to select the end date.
The Quantity field and the Request Approver field auto fill. - You may need to add an attachment or a web link to your request. In this case click to expand the Attachments collapsible section.

- For a link, add a description if it is required and add the link address in the appropriate field.
- If you want to upload a file, click to toggle to file, add a description and click the Browse button to upload. This may be necessary for example if your organization’s policy is to require official documentation, such as a doctor’s note for sick time.
- Click Save.

- Scroll to the top of the request and click Submit to send an email automatically your manager for his or her approval.
- If there is a mistake, you can choose to Cancel or Delete the request by clicking on the appropriate button above to status bar. This is possible until the request has been approved.
- Before leaving this page, you may notice something that needs to be added or corrected. Click the Re-Open button.
- If you have left the page and then want to Re-Open or Cancel or Delete the request switch to the Calendar view.
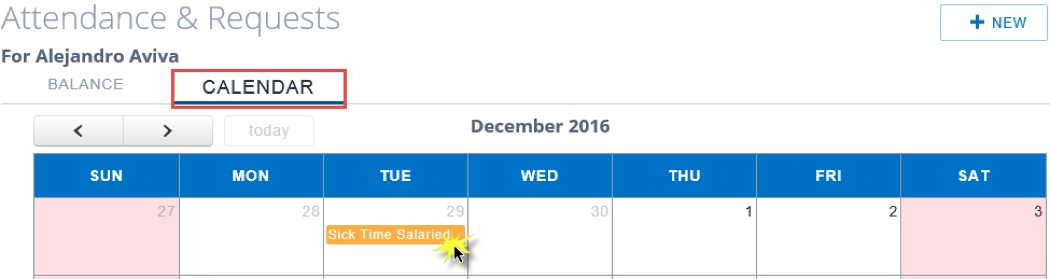
- Click on the item.
- The item displays and you are able to Re-open, Cancel, or Delete the request.
