Users can utilize the Pay Statements web app to review a list of their pay statements generated by payroll. It is also possible for users to look through a history of their pay statements by year and print ones they require in hard copy format. Also, users can receive their pay statements at a specified email address.
Viewing and Printing Pay Statements
To view your pay statements:
1. From the My Self Service menu bar item, click the Pay Statements link.
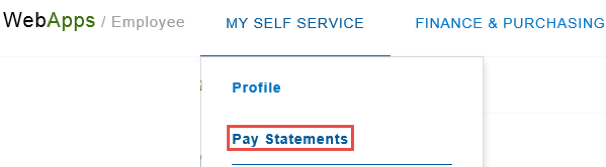
The Pay Statements page opens, displaying a list of pay statements for the most recent calendar year for which pay statements are available.
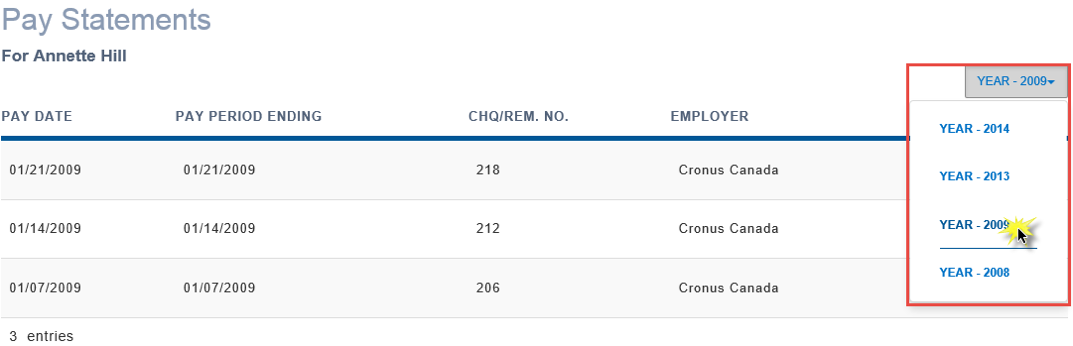
2. View the pay statements from a different year by selecting one of the available years from the Year field.
3. To view a particular pay statement, hover over the line of the pay statement you wish to view and more tools will appear.

4. Click the View link.
5. In Microsoft Internet Explorer or Edge, a web page message will prompt you to save and/or open the file in question. Make the selection you prefer and open the pay statement if you have saved it. In Google Chrome, a new tab will open. If you have pop-ups disabled in Chrome, the tab will not open, and you will need to enable pop-ups for the Employee Web Apps web site.
The file displays in a printable version.
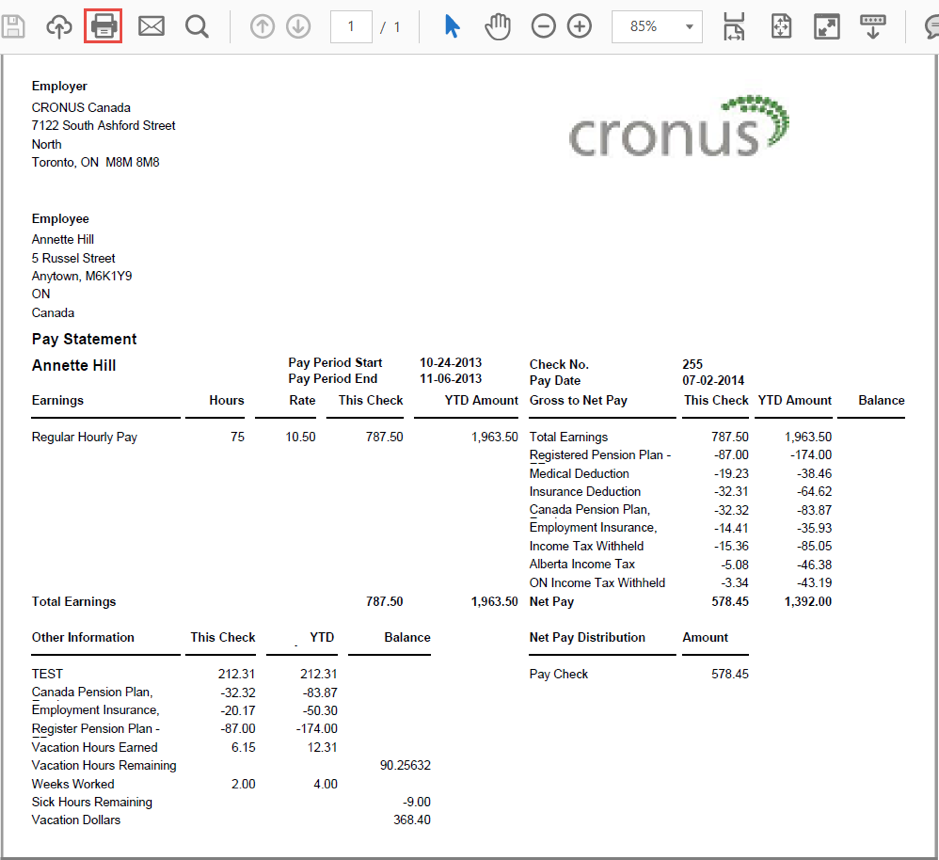
6. If you wish to print it, click the Print button.
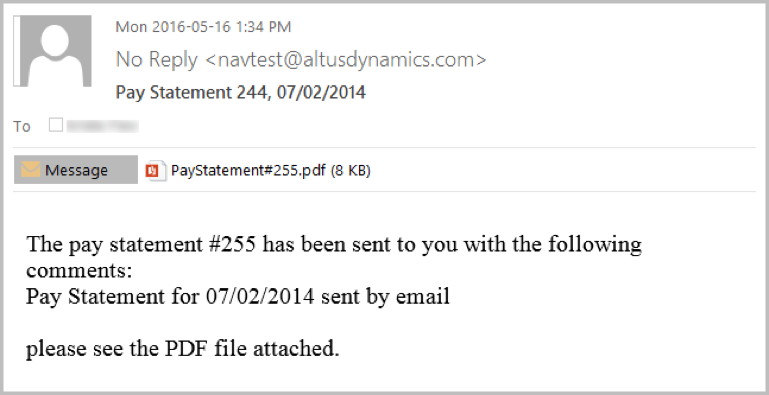
Sending Pay Statements by Email
Users may wish to receive their pay statements at a specific email address.
To receive your pay statement as an attachment in an email:
1. Hover over the line of the pay statement you wish to view and more tools will appear.

2. Click the Send by email link.
An Emailing – Paystatement… box pops over the screen.

3. Add the e-mail addresses in the To field.
4. If you wish, you can add a subject to the Subject field and a description to the Comments field.
5. Click Send.
A Sent Successfully confirmation message appears at the top of the Pay Statements page.
The pay statement is sent as an attachment to the address you entered in the steps above.