

Setting up the Schedule Administrator Role Center
Setting up the Training and Schedule Administrator Role Center provides the optimal menu structure for a user responsible for scheduling activities.
Schedule Setup Configuration
Schedule Setup defines the major business rules and communication settings for the scheduling feature.
Setting Up Areas
Use areas if your organization has groups of employees that should be segregated from other groups, perhaps for reasons such as geography or function. A single employee can only belong to one area, although they can be assigned to units outside of their home area on an exceptional basis. When the feature to show non-trained employees is used, it will only show employees in the area containing the chosen unit. For example, if you have north and south areas, when selecting employee to fill a shift in a unit from the north area, when you select the show non-trained employees the system will show non-trained employees from the north region, but will not include employees from the south region.
A minimum of one area is required.
To manage existing or to set up new areas:
- In the Search field, type and then select Schedule Areas.
The Schedule Areas page displays.
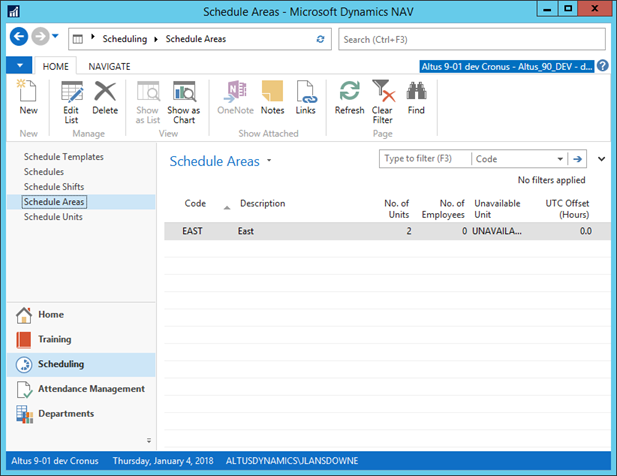
- Select the area for which you want to make changes or click New to create a new one.
- Enter a unique code for the area in the Code field.
- Enter a description for the area in the Description field.
- The No. of Units field will calculate automatically as units are assigned to the area.
- The No. of Employees field automatically calculates as employees are assigned to units linked to the area.
- Use the drop down to select the unit where you want all unavailable time such as vacation or sick to be scheduled from the Unavailable Unit field. This is typically used as a single “vacation” or “unavailable” unit. Unavailable units are not displayed in Employee Center.
Setting Up Units
Units group specific schedules that are managed as a unit. Multiple units can be associated with a single physical location, for example if they are managed by different supervisors or are staffed by different employee groups. A unit can belong to only one location and one area.
A minimum of one unit is required. One Unavailable unit per area is normally also needed.
To manage existing or to set up new units:
In the Search field, enter Schedule Units. The Schedule Units List displays. Select an existing unit to make changes or use the New button to create a new unit. The Schedule Unit Card opens.
General Settings
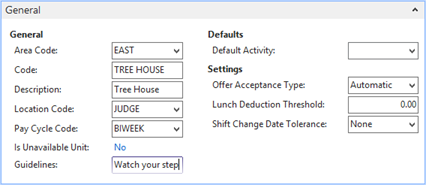
These settings appear on the General FastTab of the Schedule Units list.
- In the Area Code field, enter the area to which this unit belongs.
- Enter a unique code for the unit in the Code field. You will us this unit code to link templates to the unit.
- Enter a description for the unit in the Description field.
- Enter the physical location associated with this unit in the Location Code field. This is used if address information is needed.
- Select the pay cycle code to be used for this unit from the Pay Cycle Code field.
- Optionally, enter text into the Guidelines field. This text will be displayed on the Shift Detail page of every shift in the unit. For example, you might use this to provide special instructions to employees about security, parking, or other unit-specific notices.
- If most of the shift work is related primarily to a single activity, select the default from the Default Activity field. New shifts will be created with this activity set.
- In the Offer Acceptance Type drop-down list, specify what happens when an employee accepts an offer to work a shift:
- The default selection, Automatic, fills the shift in response to an acceptance. When this option is selected, the first person to respond is awarded the shift and all others who have been offered the shift receive the Unavailable shift notice without the intervention of a supervisor.
- The As Bid selection converts acceptance of an offer into a bid. A Unit Supervisor can review the bids and select one employee to fill the shift. Choose this option if your unit supervisors will offer many shifts at once, and need to balance the schedule so that the first employee to respond does not take too many of the offered shifts.
- In the Lunch Deduction Threshold field, specify the minimum shift length from which unpaid lunch periods are automatically deducted, without the need to configure an activity to cover this time. The lunch period that is used defaults per unit but can be set individually by employee. For example, if you want any shift 5.5 hours long or longer to get a 30 minute lunch break, enter 5.5.
-
In the Shift Change Date Tolerance drop-down, specify the range in which a shift can be adjusted. This change can be made directly by Unit Supervisors when editing a shift, or can be requested by non-supervisors when submitting a change request. This setting applies to both employee types equally — you cannot have one setting for Unit Supervisors and another for employees. Available options are:
- None: prevents changing the date on a shift. This is the default selection.
- Current Week: allows a change to be made or requested for the date of the shift within the current week, starting Sunday and ending Saturday.
- Current Pay Cycle: allows a change to be made or requested for the date of the shift within the current pay cycle, which is determined by the pay cycle start and end dates.
Web Apps Settings FastTab
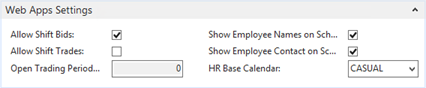
Use the Web Apps Settings FastTab to set Employee Center scheduling options. These settings also appear on the Schedule Unit Defaults FastTab of the Schedule Setup card.
- Select the Allow Shift Bids check box to permit unit employees to bid on available shifts in this unit. When this check box is cleared, the bid action will not be available within the unit.
- Select the Allow Shift Trades check box to permit unit employees to request trades for shifts within this unit.
- When this check box is cleared, trade actions will not be available within the unit.
- When Allow Shift Trades is selected, the Open Trading Period (Days) sets the outer bound on how far in the future a shift can be eligible to be included in a trade transaction. A good practice is to set this to one or two pay cycles.
Note: The earliest date for a shift to participate in a trade transaction is one day past the current day (today). This is not configurable.
- Employees have view-only access to the unit schedule page for their units, if this page has been made available to them. Select the Show Employee Names on Schedule check box to permit employees who view the unit schedule to see the names of other employees alongside their assigned shifts. This setting also shows employee names on the Shift Detail page for any filled shift. If this check box is cleared for a unit, only the position is displayed on the Unit Schedule, and the employee name will be blank on the Shift Detail page (although when employees view their own shift details, they will always see their own name).
Note: Unit supervisors can always see Employee Names, in order to manage the unit. - Select the Show Employee Contact on Schedule check box to permit employees to view contact information for other employees, such as email address and phone numbers, on the shift detail page for a shift filled by another employee.
- Set HR Base Calendar to enable the calendar views of Unit Schedule and My Schedule to highlight non-working days.
Configuring the Unit Employee Record
Use the Schedule Employee Defaults FastTab to specify settings that are used when employees are added to the unit.
Note: Enter the date when training or orientation has taken place at this unit in the Trained Date field. This optional field is for information only.
Employee Controls
- Select the Can Create Shifts check box to enable employees to create new shifts for themselves within the unit. Such shifts are automatically assigned to the employee and have a duration of 0. The employee then submits a change request for the desired hours and activities.
- Select the Can Split Shifts check box to enable employees to split shifts.
- Select the Allow Change Requests check box to enable the employee to request changes to an assigned shift.
- Select the Allow Activity Changes check box to enable employees to edit activity details within a shift.
Note: Activity changes do not go through a change request process. When entered, they are applied immediately. - Select the Can Edit Pay Controls (Employee) check box to allow the employee to edit payroll controls on the activities.
Note: Changing the payroll control on an activity affects employee payroll. You may not wish to give employees this ability. - In the Default Lunch Break (Hours) field, enter the default lunch duration.
- Select the Prevent Trade Requests check box to block employees from participating in Shift Trading. This could be used to prevent casual employees from trading shifts with full-time employees, for example.
Note: The Shift Trading add-on must be activated, otherwise this setting has no effect.
Supervisor Controls
- Select the Supervisor check box to mark this employee as a Unit supervisor. This means that shift management actions including Fill, Offer, Delete, and Create New shifts will become available to this employee. A unit can have more than one supervisor, but each unit should have at least one.
- Select the Can Edit Pay Controls (Supervisor) check box to allow a unit supervisor to edit payroll controls for shifts in this unit.
NOTE: Changing the payroll control on an activity affects employee payroll. You may not wish to give unit supervisors this ability. - Select the Receive Bid Notices check box if this user should receive the emails generated when someone bids on a shift for this unit. This flag is intended for employees configured as unit supervisors. If you have multiple supervisors, you may wish to have a subset of them manage employee bids.
- Select the Receive Trade Notices check box if this user should receive the emails generated by shift trade transactions. This flag is intended for employees configured as unit supervisors. If you have multiple supervisors, you may wish to have a subset of them manage trade requests.
- Select the Can Approve Schedules check box if this user should be able to approve shifts worked for this unit. In some cases, you may have multiple users with the ability to approve but only one primary person. It is a best practice for this person to be a unit supervisor, but this is not required.
NOTE: Approving Shifts Worked sends the shift activity data to payroll. - Select the Receive Approval Notice check box if this user should receive reminder emails messages about performing shift approval for payroll.
Unit Information FactBox
The Unit information FactBox contains statistical information calculated for the unit:
- Target - The total hours specified in the Unit Positions as the target hours for a pay period.
- Scheduled - The total hours scheduled for this unit.
- Variance - The variance between the target and the scheduled hours. This typically represents the amount the unit is over/under scheduled from a typical period.
- Vacant - The total number of shifts that are scheduled but not yet filled for this unit.
- Pending - The total number of shifts in a pending status for this unit, such as shifts with active change requests.
- Active Templates - The total number of templates with an active status for this unit.
Associating Employees with Units
Employees should be associated with the units in which they usually work. This relationship indicates that the employees have received any necessary training that is specific to this unit. Creating this relationship and configuring specific permissions for this unit are managed with the Schedule Unit Employees setup. Employees must use Employee Center to access and manage their schedules. Thus, only employees with an EWA User card configured can be added to a unit.
Note: Offers to fill vacant shifts can only be made to employees who are associated with the unit.
To manage the existing employee roster for a unit or to add employees to the roster:
- Open the Schedule Unit Card for that unit.
- On the Ribbon, click the Navigate tab and then click Employees. The Schedule Unit Employees List displays.
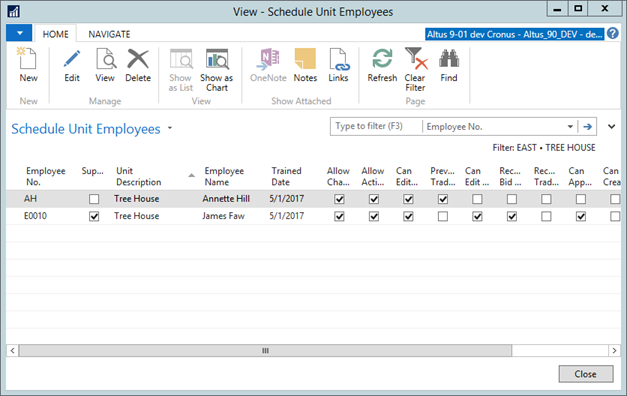
- Select the employee for which you want to make changes or use the New button to add one.
- The Unit Code field will default to the unit you opened this page from.
Note: You can remove the filter and set up an employee at multiple units all at once by changing this value. - In the Employee No field enter the employee number or search for the desired employee. The employee name will show in the Employee Name field once the employee number has been filled.
Maintaining Unit Activities
Activities can be set up by unit and can be used to drive any variation in dimensions (such as Client, Program, or Department) as well as payroll controls (such as regular hours or sleep hours). Note that if you want all time for this unit to be charged to the same dimensions, you can set up a single activity and then set it as the default on the unit card.
To review or create activities for a unit:
- From the Schedule Unit Card, click the Navigate tab and then click Activities. The Schedule Unit Activities List displays.
- Select the activity for which you want to make changes or click New to create a new one.
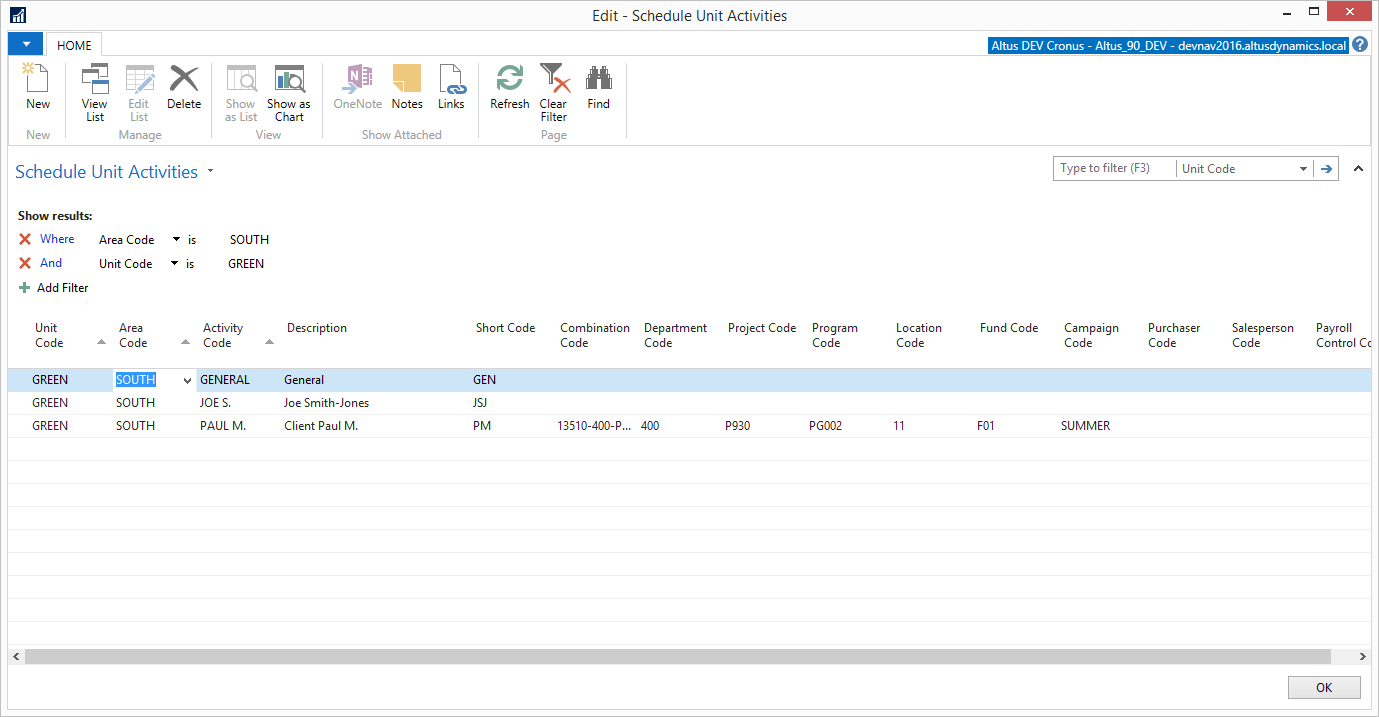
- The Unit Code column will default to the unit from which you opened this page.
- In the Activity Code column, create a code for the activity you want to define.
- Enter a description for the activity in the Description column. This will appear on the Shift Detail page in the Activities collapsible section.
- Enter a short code for the activity in the Short Code field. This is used on views where the full code cannot be displayed, for example, this code will appear on the Unit Schedule and My Schedule list pages.
- In the Combination Code field select a combination code to fill out the dimension or leave this field blank and select the dimension individually.
- Select the Dimensions you want to be tagged to the time entered for this activity.
- Enter a Payroll Control Code if you want the activity to have a default.
Maintaining Unit Positions
Use schedule unit positions to limit the positions that can be used when scheduling for this unit. For example, if this is nursing unit, then list only nursing or qualified positions. If no unit positions are specified, then all positions with a non-zero Schedule Priority Group will be allowed. You can also use this setup to define the total budget hours for a period.
To review or associate positions to a unit:
- From the Schedule Unit Card, click the Navigate tab and then click Positions. The Schedule Unit Positions List displays.
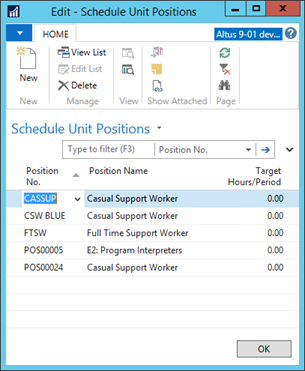
- Select the position for which you want to make changes or click New to create a new one.
- In the Position No. field, search for and select the position to be associated with the unit. The Position Name field automatically populates once you have selected a position.
- In the Target Hours/Period field enter the total hours you want to schedule this position for, in a typical pay cycle for this period. The total of this value for all position becomes the target hours for the unit.
Maintaining Scheduling Settings on Positions
The Schedule Priority Group field on the HR Positions Card determines priority in employee scheduling. This may factor into choosing an employee for replacing another in a filled shift. The priority of the specific position is determined based on a setting in the HR Position Card.
To set up position priority:
- In the search field, enter HR Positions. The HR Positions list displays.
- Double click on the position you want to edit. The HR Position Card displays and is editable.
- Expand the Employee Scheduling FastTab.

- In the Schedule Priority Group field, place an integer to determine the sequence of the employee who holds this position in the Fill by Priority list. A value of 0 indicates that the employee should not be used for scheduling.
NOTE: This field is categorized as "Additional" by default and therefore you will need to select the Show more fields button in order to see it. - Expand the Payroll FastTab.
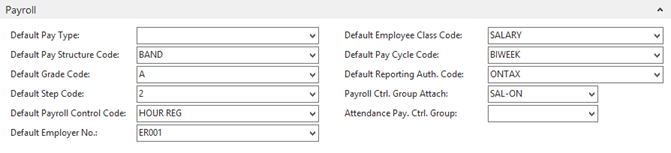
- In the Default Payroll Control Code field, select the payroll control that is to be used by default when entering a schedule line for employees that hold this position.
Configuring Seniority Options
The solution now supports the ability to track seniority hours for an employee and use this as an option for sorting the Employee/Position Select list. Using this functionality requires some set up steps to be completed.
Setting Seniority Options
Seniority settings are set in the General FastTab of the Payroll Setup page:
- In the Search field, type Payroll Setup and select the page from the drop-down list.
The Payroll Setup page displays.
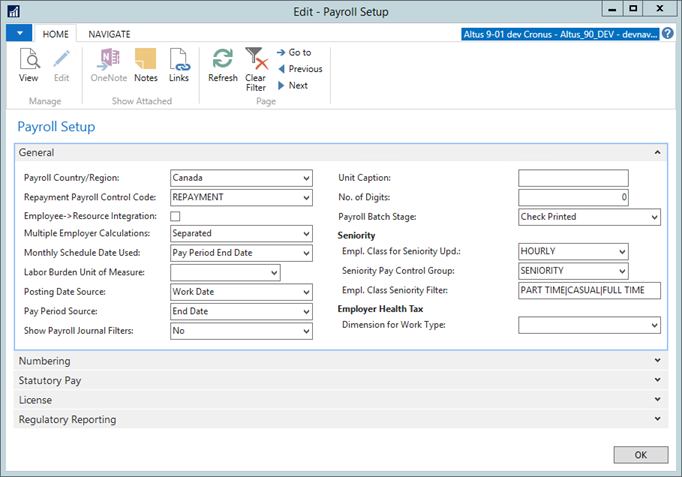
- In the Empl. Class for Seniority Upd. drop down, specify which employee class you want included for seniority hours calculation
- In the Seniority Pay Control Group drop down, select a payroll control group that you want used to increment the seniority hours.
- In the Emp. Class Seniority Filter field, enter the filter for the employee classes that you want included for the seniority hours calculations.
Viewing Employee Card Seniority Hours
Seniority Pay Control Group – Set up a Payroll Control Group and add all of the Hours Payroll Controls to it that you want used to increment the seniority hours. Select this Payroll Control Group in this field.