

The Human Resource department is the entry point for all new employees and the necessary HR functions surrounding existing employees as well. This also includes the information needed to meet Payroll requirements. The Position Management granule enables you to manage current positions within the organization and monitor the process to fill vacant positions. Several Positions can exist for the Jobs required in the organization.
Once all the jobs are created and the corresponding positions established, new and existing employees can be assigned to a position(s).
Working with HR Jobs
The first step in the Position Management process is to define the HR Jobs. The HR Jobs are the high level, generic jobs used within your organization (for example, Teacher, Administration, Custodial, and so on).
Defining HR Jobs also enables you to track evaluation criteria and job evaluations.
Note: Because of the relationship between HR Jobs and HR Position, an HR Job needs to be created before HR Positions can be added to the system.
Using the Functions within HR Job List
- In the Search field, type HR Jobs and select the page from the drop-down list.
The HR Jobs list displays.
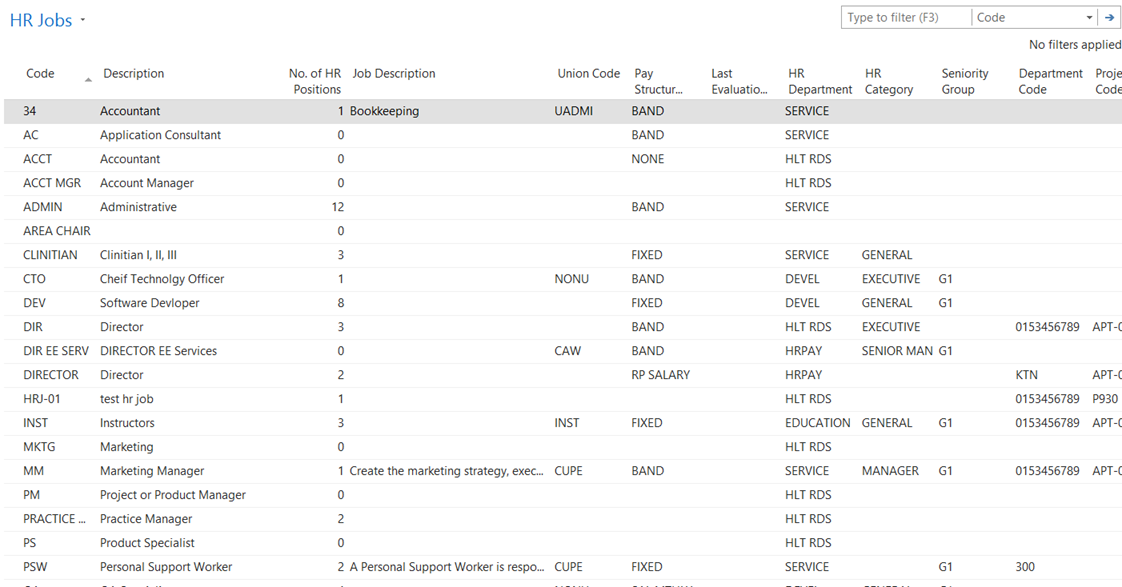
- The HR Job List enables you to view the full HR Job list, see more detail for a position attached to the job, as well as attach evaluations and view evaluation criteria and comments for a particular job.
- The following table provides a detailed explanation of the functions available in the HR Job List:
| Field | Description |
| New | Selecting this option opens a blank HR Job Card for creating a new job record. |
| HR Job Evaluation | Selecting this option opens the HR Job Evaluation page where you can enter the evaluation details for the selected job. |
| HR Job Evaluation Criteria | Selecting this option opens the HR Job Evaluation Criteria page where you can review the evaluation criteria assigned to a job. |
| Actions menu | Contains options for interacting with the jobs in the HR Jobs list (for example, viewing the job card, editing the job, creating a new job, deleting a job, etc.) |
| Related Information menu | Contains the HR Job Card options – view HR Job Card, HR Job Evaluation, HR Job Evaluation Criteria (mirrors the options on the Home Ribbon). |
Reviewing a Job Record in Detail
Each job listed in the HR Job List contains a corresponding HR Job Card in which all the details for the specific job are stored. You can open the HR Job Card for a corresponding job to review the details for a particular job.
To open the HR Job Card:
- In the HR Jobs List, click to select the job you want to review.
- From the Ribbon, click the Navigate tab and then click HR Job Card.
The HR Job Card displays.
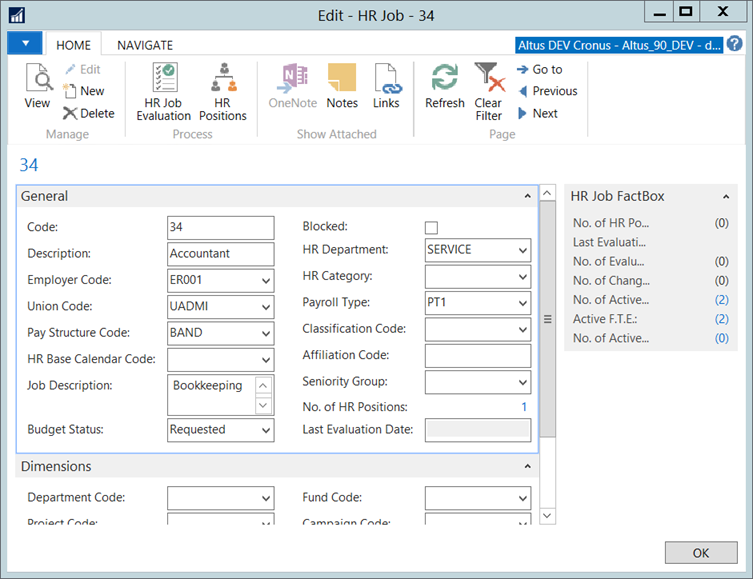
Note: The HR Job Information FactBox displays statistics for the job. Click a number to view additional details for the job. - The following table provides a detailed explanation of the functions available in the HR Job Card:
| Field | Description |
| HR Job Evaluation | Selecting this option opens the HR Job Evaluation page where you can enter the evaluation details for the selected job. |
| HR Positions | Selecting this option opens the HR Positions page displaying the associated positions for this job. |
| Actions menu | Contains options for interacting with the job (for example, editing the job, creating a new job, deleting a job, and so on). |
| Related Information menu | Contains the HR Job Card options – view HR Job Evaluation, view HR Positions (assigned to the job), and add comments (mirrors some of the options on the Home Ribbon). |
Creating a New Job Record
New job records are created using the Job Card where you can enter as many details as you require for providing the details for a job within your organization.
To create a new job record:
- From the HR Job List, on the Ribbon, click New.
A blank HR Job Card opens. - Enter the details for the job in the fields provided.
- When you finish providing the required information for the job, click OK.
- The following table provides a detailed explanation of the fields within the HR Job Card:
| Field | Description |
| General FastTab | |
| Code | Displays the code assigned to the job. Follow your internal standards for codes/naming conventions when creating new job records. |
| Description | Displays the full name for the job. Enter the job name in the space provided. |
| Employer Code | Displays the employer code associated with the job. From the drop-down, select the appropriate option. |
| Union Code | Displays the union code attached to this job. From the drop-down, select the applicable union. |
| Pay Structure Code | Displays the pay structure code linked to the job. From the drop-down, select the pay structure you want to assign to this job. |
| HR Base Calendar Code | Links to the base calendar associated with the HR Job. A calendar determines working and non-working days and can be used in payroll calculations. |
| Job Description | Displays the job description. In the space provided, enter the details for the job. |
| Budget Status | Displays the budget status for the job. From the drop-down, select from the following (applicable) options:
|
| Blocked | If this check box is marked, it indicates this job is no longer Active. |
| HR Department | Displays the HR department to which this job is assigned. From the drop-down, select the appropriate department. |
| HR Category | Displays the HR Category associated with this job. From the drop-down, select the appropriate option. |
| Seniority Group | Displays the seniority group to which this job belongs. From the drop-down, select the applicable option. |
| No. of HR Position | Displays the number of HR positions currently associated with this job. This field is not editable. |
| Last Evaluation Date | Displays the date upon which this job was last evaluated. This field is not editable. The data is pulled from the details provided in the HR Job Evaluation page. Note: Not all organizations employ this functionality. |
| Dimensions FastTab | |
| This tab contains the default dimension values associated with a HR Job. When HR Position is linked to HR Job these values are automatically populated on the position. Note: The Dimension fields available depend upon your organization’s specific implementation. For information on Dimensions, refer to your G/L (General Ledger) documents for details. |
|
| Attendance Management FastTab | |
| If you have an integrated absence tracking application such as AESOP, separate documentation exists for setting up, recording, and tracking employee absences. For details, see the ‘Attendance Management Integration User Guide’. |
|
Recording Job Evaluations
Job Evaluations and their scores can be recorded in the Job Evaluation section. This enables your organization to maintain a history of when job evaluations were performed, track the scores, and analyze the changes to jobs over time.
To record a job evaluation:
- From the HR Job List, select the job that you want to record an evaluation for.
- From the Ribbon, click the Navigate tab and then click HR Job Evaluation.
The HR Job Evaluation page displays.
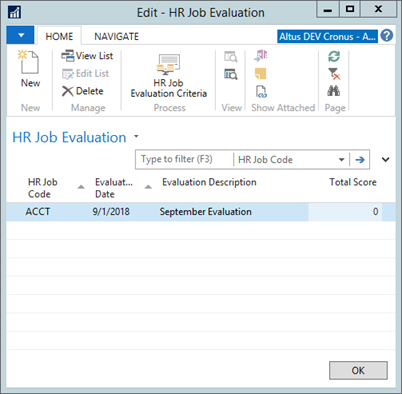
- On the Ribbon, click New. A new record is inserted.
- In the Evaluation Date field, enter a date for the evaluation.
- In the Evaluation Description field, enter a description of the evaluation.
- On the Ribbon, click HR Job Evaluation Criteria.
The HR Job Evaluation Criteria page opens.
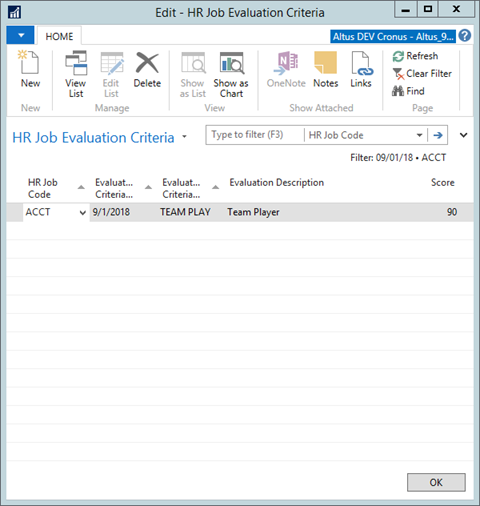
Note: The HR Job Code and the Evaluation Date defaults to the job selected and date entered in the previous page. - In the Evaluation Code field, from the drop-down select an evaluation criteria code.
- The Evaluation Description field defaults to a description of the evaluation code you selected.
- In the Score field, enter the score.
- Click OK.
The total score displays in the HR Job Evaluation List. If the total score is not displayed, press F5 to refresh the page.
Creating a New HR Position
Once an HR Job has been established, one or multiple iterations of that position can be created. The common link between Positions and the HR Job would normally be the Job Description.
You can set up the various Positions within your company. You can then assign skills and qualifications that relate to that position. An analysis can then be performed of all employee and applicant qualifications related to that position to fill positions and assign appropriate pay and compensation to the employees in the positions.
For each HR Position created, you can assign a number of default values which are attached to the employee when an individual is assigned to the position. Additionally, each position has the ability to hold multiple budget entries therefore establishing a staffing plan for each position available within the organization.
The HR Position card is where you store the information about the specific positions (attached to more generic jobs) within your organization.
Using the HR Position card functions you can manage the following:
- Define the details for each position in your organization.
- Add and track any activities (Budget, Assignments) performed or required for the position.
- Assign the HR Tasks that need to be performed for each position.
- Add the required Qualifications and Training for the position.
- Record Misc. Articles required for the position (what an individual in this position would receive).
- Integrate each position with the appropriate Pay Structures to automate payroll.
To create a new position record:
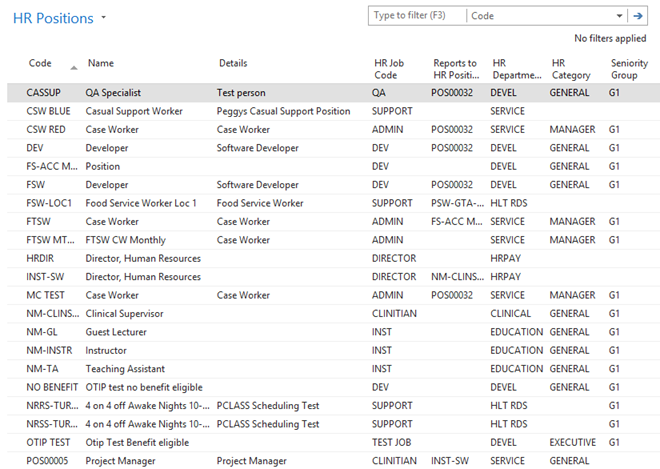
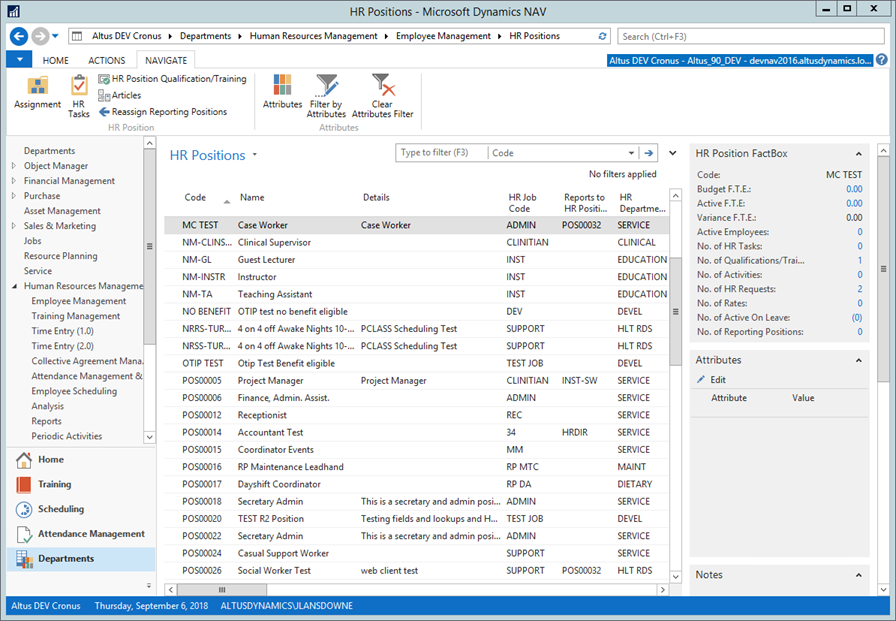
- In the Search field, type HR Positions and select the page from the drop-down list.
The HR Positions page displays.
- Select any of the options.
- From the Ribbon, click New.
A blank New - HR Position Card opens. - Enter the details for the position in the fields provided.
- When you finish providing the required information for the position, click OK.
- The following table provides a detailed explanation of the fields within the HR Position Card:
| Field | Description |
| General FastTab | |
| Code | Displays the code assigned to the job. Follow your internal standards for codes and naming conventions when creating new job records. |
| Name | Displays the position name. In the space provided, enter the name associated with the position. |
| Details | Displays a description of the position. In the space provided, enter the details for the position. |
| HR Job Code | Displays the job code to which this position is linked. From the drop-down, select the job code. |
| Reports to HR Position Code | Displays the code for the position to which this position reports. From the drop-down, select the reporting position code. |
| HR Department | Displays the HR department to which this job is assigned. From the drop-down, select the appropriate department. |
| HR Category | Displays the HR category associated with this job. From the drop-down, select the appropriate option. |
| Default Union Code | Displays the union code for the union to which this position belongs. From the drop-down select the union code for the union that represents the position, if applicable. |
| Default Benefit Code | Displays the benefit plan linked to the position. From the drop-down, select the appropriate option. |
| Seniority Group | Displays the seniority group to which this job belongs. From the drop-down, select the applicable option. |
| Default Assignment Type | Displays the assignment type associated with the position. From the drop-down, select the applicable option. |
| Budget Status | Displays the budget status for the position. From the drop-down, select the applicable option (Requested, Planning, or Approved). |
| Schedule Selection Priority | Used in Location Scheduling. The priority on the position is used for sorting and prioritizing records in this module. |
| First Appraisal Code | Displays the time frame by which the first appraisal is due. From the drop-down, select the option applicable to this position. |
| First Appraisal Description | Displays a description for the first appraisal. This field is auto-populated based on the appraisal code you selected. (The appraisal description contains a hyperlink that you can click to view details for the appraisal.) |
| Probation Type | Determines the method by which ‘probation’ is calculated. If Worked Hours the probation is calculated based on the ‘Probation Hours’ value (e.g. 200 hours). If Elapsed Time, the probation is calculated based on the date formula specified in the Probation Date Calc. field. |
| Probation Date Calc. (elapsed) | Enter the date formula for the probation calculation (e.g. 90D or 6M). Used if the Probation Type is set to Elapsed Time. |
| Probation Hours (Worked Hours) | Displays the number of work hours that need to be fulfilled to complete the probation time period. If the probation type selected is based on ‘worked hours’, enter the number of hours required to complete the probation period. |
| HR Base Calendar Code | Display the base calendar applicable to this position. From the drop-down, select the appropriate option. |
| Default Hours/Week | Displays the hours per week required for this position. Enter the number in the space provided. |
| Default Hours/Day | Displays the hours per day required for this position. Enter the number in the space provided. |
| Blocked | When this box is selected, this indicates the position is blocked and should no longer be used. |
| HR Rep. No. | Displays the HR representative number assigned to this position. From the drop-down, select the appropriate HR representative. |
| HR Rep. Name | Displays the HR representative name. This field is auto-populated based on the HR Representative number you selected. (The name contains a hyperlink that you can click to view details for the HR representative.) |
| EWA User Profile | Displays the EWA user access assigned to the position. From the drop-down, select the EWA access profile applicable to the position |
| Payroll FastTab | |
| Default Pay Structure Code | Displays the pay structure assigned to the position. From the drop-down, select the applicable option. |
| Default Step Code | Displays the pay step linked to the position. From the drop-down, select the appropriate option. |
| Default Grade Code | Displays the pay grade linked to the position. From the drop-down, select the appropriate option. |
| Default Payroll Control Code | Displays the payroll control linked to the position. From the drop-down, select the appropriate option. |
| Default Employer No. | Displays the employer number. This field is auto-populated with the appropriate organization. |
| Default Employee Class Code | Displays the employee class to which the position is linked. From the drop-down, select the applicable option. |
| Default Pay Cycle Code | Displays the pay cycle assigned to the position. From the drop-down, select the pay cycle you want to apply to this position. |
| Default Reporting Auth. Code | Displays the reporting authority applicable to the position. From the drop-down, select the option that applies. |
| Payroll Ctrl. Group Attach. | Displays the payroll control group you want to attach to the position. From the drop-down, select the appropriate option. |
| Payroll Ctrl. Group Deactivate | Displays the payroll control group…? From the drop-down, select the appropriate option. |
| Attendance Pay. Ctrl. Group | Displays the attendance payroll control group to which the position belongs. From the drop-down, select the appropriate option. |
| Progression FastTab | |
| Progression Date Calculation | Enter a date calculation formula to use in the progression calculation (for example, 1M). |
| Progression Unit | Displays the ‘unit’ by which the progression is calculated or quantified. From the drop-down, select the appropriate option. |
| Progression Qty. | Displays the quantity based on the ‘unit’ selected. In the space provided, enter the quantity. |
| Progression Payroll Ctrl. Grp. | Displays the progression payroll control group that gets applied when the conditions for the progression are met and the Mass Progression Update HR Requests periodic activity is run. |
| Progression Absence Grp. | Displays the progression absence payroll control group that gets applied when the conditions for the progression are met and the Mass Progression Update HR Requests periodic activity is run. |
| Dimensions FastTab | |
| The Dimension codes link the position to the appropriate department, area, site, etc. Using these codes you are able you to clearly associate the position with very specific dimensions for your company’s budget allocation purposes. Note: The Dimension fields available depend upon your organization’s specific implementation. For information on Dimensions, refer to your G/L (General Ledger) documents for details. |
|
Assigning HR Tasks to a Position
You can ensure the proper process (in HR, by the manager, and by the employee) is completed when an employee is assigned to a position by assigning the required tasks to each position.
To assign HR tasks to a position:
- From the HR Positions page, on the Ribbon click HR Tasks.
The Edit - HR Position Tasks page displays.
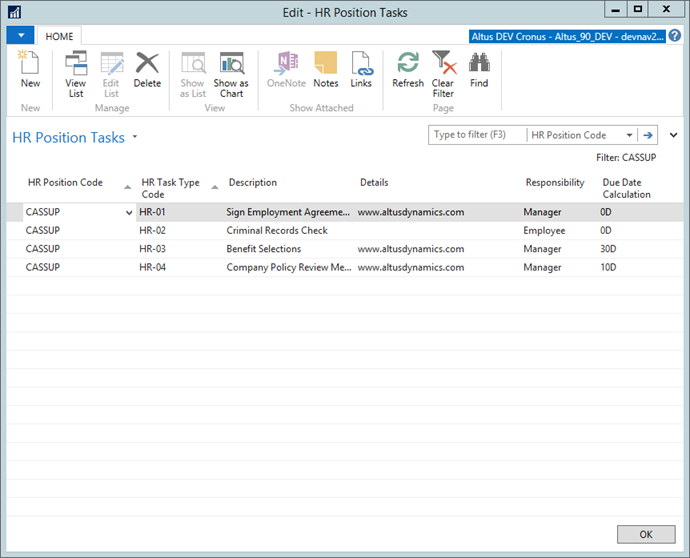
- From the HR Task Type Code drop-down, select the task that applies to the position.
The remaining fields are populated based on the task type code selected. - On the Home Ribbon, click New. A blank record is inserted.
- Repeat steps 2 and 3 for to add all the HR Tasks required for the position.
- Click OK when you finish.
Assigning Qualifications and Training to a Position
You can ensure applicants are appropriately matched to a position by assigning the necessary qualifications for a position. Additionally, you can assign the training employees should complete once they fill a position.
To assign qualifications and training to a position:
- On the HR Position page, click the Navigate tab and then click HR Position Qualification/Training.
The HR Position Qual. Train. List displays.
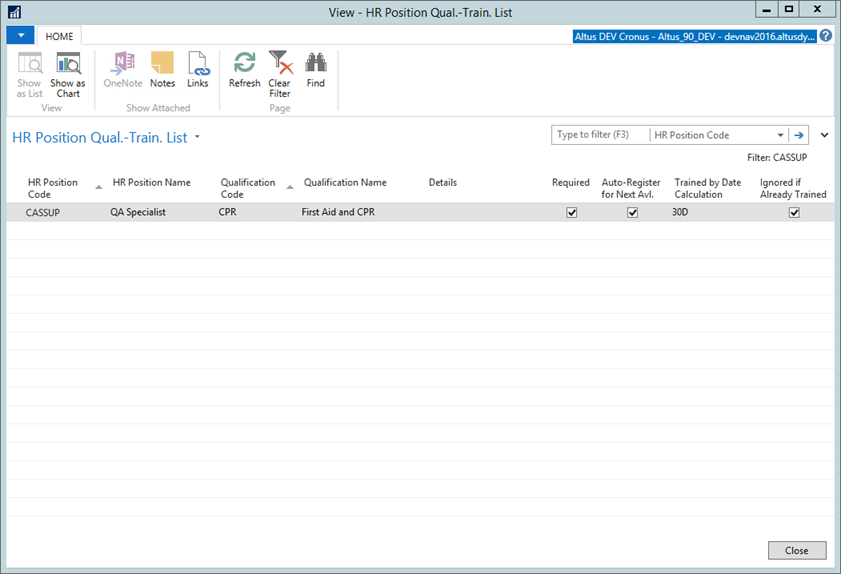
- On the Ribbon, click New.
- From the Qualification Code drop-down, select the qualification/training applicable to the position.
The Qualification Name field is populated based on the qualification code selected. - In the Details field, enter any additional information, if required.
- If the qualification or training is required, add a checkmark to the Required check box.
- Click to select the Auto-Register for Next Avl. check box to automatically register employees assigned to this position for this training.
- In the Trained by Date Calculation field, enter the time period by which employees in this position must receive training.
- Click the select the Ignored if Already Trained check box to enable employees to skip the training if they already received training (in previous position, and so on).
Assigning Miscellaneous Articles to a Position
When an employee fills a position, you can ensure that all the necessary tools and access have already.
To assign articles to a position:
- On the HR Positions page, click the Navigate tab and then click Articles.
The Edit - HR Position Misc. Articles page displays.
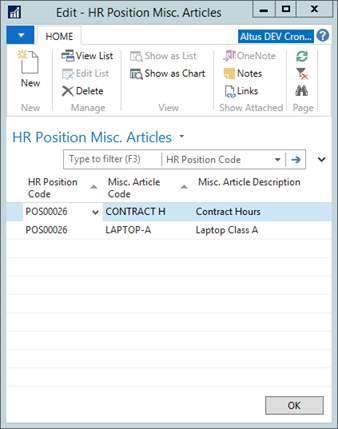
- On the Ribbon, click New. A blank record is inserted.
- From the HR Position Code drop-down list, select the relevant HR Position Code.
- From the Misc. Article Code drop-down, select the item to provide for employees in this position.
The Misc. Article Description field is populated based on the article code you selected. - Repeat steps 2 - 4 for to add all the articles required for the position.
- Click OK when you finish.
Working with HR Existing Positions
You can make changes to or complete actions against the already established HR Positions. A number of functions exist within the HR Position List and the individual HR Position Card for performing related tasks.
Using the Functions within HR Position List
- In the Search field, type HR Positions and select the page from the drop-down list.
The HR Positions List displays.
- Select any of the options displayed.
The HR Positions List enables you to view the full list of positions within your organization as well as see high level details for a position (including at-a-glance statistics from the FactBox). You can review the required HR Tasks for the position, see ledger entries, and review the qualification and training to a particular position.
The following table provides a detailed explanation of the functions available in the HR Positions List:
| Field | Description |
| New | Selecting this option opens a blank HR Position Card for creating a new position. |
| HR Tasks | Selecting this option opens the HR Tasks page where you can review the HR tasks that are required to be completed for the position. |
| HR Position Qualification/Training | Selecting this option opens the HR Position Qualification/Training List where you can review the qualifications/training requirements for the position. |
| Articles | Selecting this option opens the Miscellaneous Articles list where you can review the articles that are normally provided to employees assigned to the position. |
| HR Position FactBox | Displays the statistics for the position currently selected. This information enables you to get a snap shot of the budget and assignment details for a position. You can link to additional details for the statistics represented as well. |
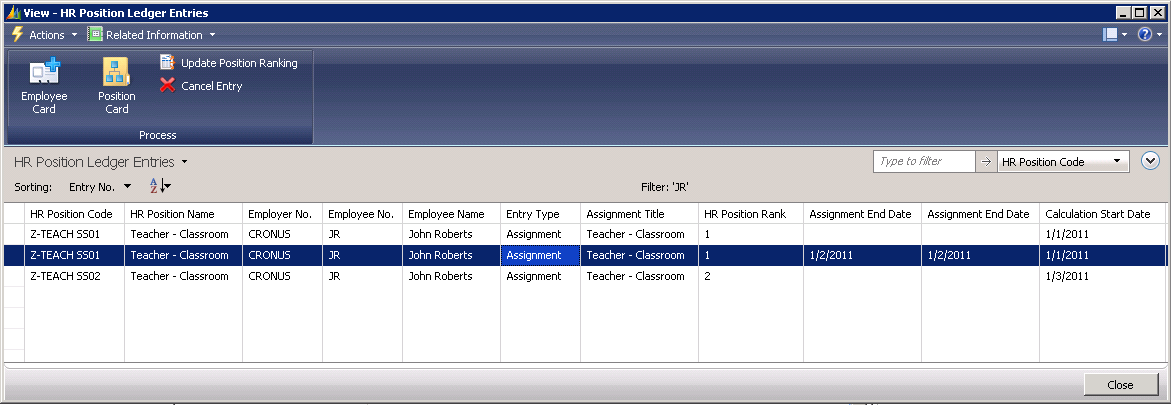
Viewing the History for a Position
The HR Position Ledger Entries page enables you to see the history of a position. This includes the employees who are currently or were at one point assigned to the position. Each entry represents a different instance for this position and is linked to a specific individual.
To view the Ledger Entries for a position:
- In the Search field, type HR Position Ledger Entries and select the page from the drop-down list.
The Assignments page displays.
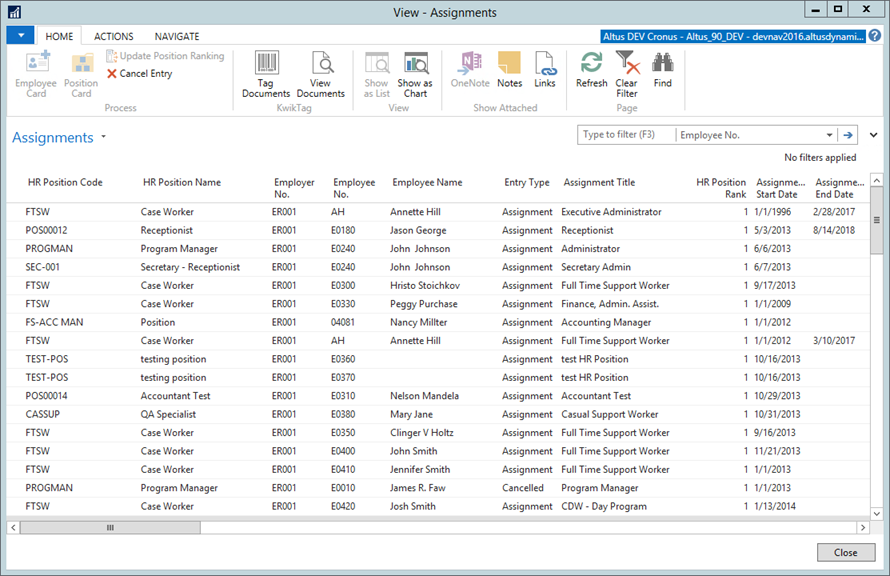
- Use the scroll bar to view the assignment, compensation, dates, and so on information for the each individual assigned to the position.
- When you finish, click Close.
Updating the Position Ranking
All the positions in your organization are stored within the HR Position Ledger Entries List. From this list, you can select a position and update/modify the ranking assigned to a given position.
To update the position ranking:
- In the Search field, type HR Position Ledger Entries and select the page from the drop-down list.
The Assignments page displays.
- Select the ledger entry for the ranking you want to update.
- On the Ribbon, click Update Position Ranking.
The HR Position Rank page displays.
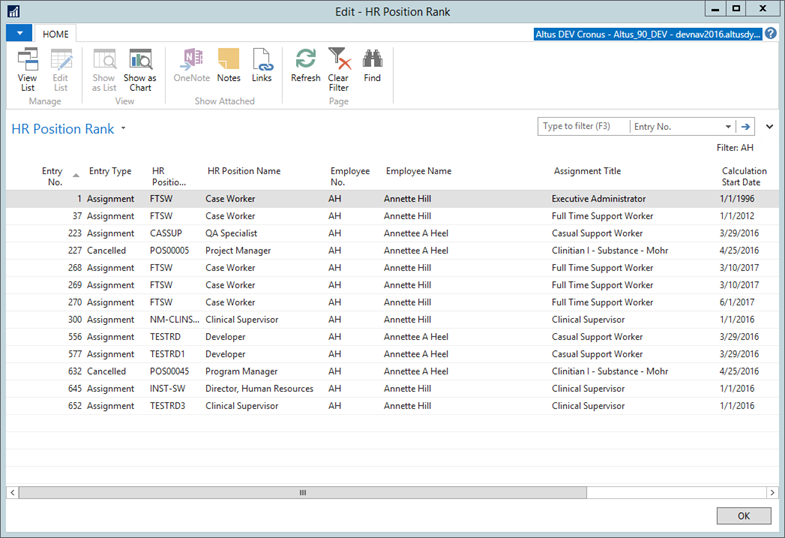
- Locate the HR Position Rank field, and change the number in the field to update the ranking.
- Click OK.
Using the Functions in the HR Position Card
The HR Positions Card enables you to view the details for a specific position as well as perform actions against the position to change details, add new requirements (HR Tasks, Qualifications/Training, and Miscellaneous Articles).
The following table provides a detailed explanation of the functions available in the HR Positions Card:
| Field | Description |
| HR Position Ledger Entries | Selecting this option opens the HR Position Ledger Entries page where you can view the employees assigned to this position (current, past, and future) and update the ranking for the selected position. |
| Comments | Selecting this option displays the Comment Sheet page where any comments added by HR personnel (pertaining to the position) are displayed. You can also add your own comments. |
| Tasks | Selecting this option opens the HR Tasks page where you can review the HR tasks that are required to be completed for the position. You can also create/add new HR Tasks. |
| Qualification/Training | Selecting this option opens the HR Position Qualification/Training List where you can review the qualifications/training requirements for the position. |
| Misc. Articles | Selecting this option opens the Miscellaneous Articles list where you can review the articles that are normally provided to employees assigned to the position. You can also attach new articles to the position. |
| Statistics | Displays the statistics for the position enabling you to get a snap shot of the budget and assignment details for the position. You can link to additional details for the statistics represented as well. In the F.T.E. section the Budget vs. Assigned FTE’s are tracked and summarized. This provides the current budget status for the position enabling you to determine how the position is staffed (over/under-staffed, or on/over budget). Note: The HR Position FactBox mirrors the data in the Statistics page. |
| Copy from Position | Selecting this option activates a copy function where you can select an existing position and copy the details to a new position. |
| Time Entry Activities | Displays a list of time entry activities associated with the position. You can link positions to activities in this list. |
| Rates | Selecting this option displays the HR Position Rates page where you can set up the payroll codes that apply to this position. |
| Actions menu | Contains options for interacting with the position (for example, creating a new Position Card, editing the current one, deleting the Position Card, and so on) |
| Related Information menu | Contains options for performing actions against the position (mirrors the options on the Home Ribbon, with the exception of Appraisal Entries). Appraisal Entries enables you to view the employee appraisals to date (displays all appraisals for every employee ever assigned to the position). |
| HR Position FactBox | Displays the statistics for the position enabling you to get a snap shot of the budget and assignment details for the position. You can link to additional details for the statistics represented as well. In the F.T.E. section the Budget vs. Assigned FTEs are tracked and summarized. This provides the current budget status for the position enabling you to determine how the position is staffed (over/under-staffed, or on/over budget). Note: Clicking Statistics on the Home Ribbon opens a Statistics page containing the same information that is displayed in the FactBox. |
Reviewing the Employee Assignment Details for a Specific Person
From the Position Card, you can open the iterations of the position assignment to view the specific details for each employee that is assigned to the position.
To review an employee’s specific assignment details:
- In the Search field, type HR Position Ledger Entries and select the page from the drop-down list.
The Assignments page displays.
- Scroll through the fields to see the details for each position ledger entry.
- You can view the details for an employee assigned to the position:
- Click to select the line representing the employee in the position.
- On the Home Ribbon, click Employee Card.
- Click OK to close the Employee Card.
- When you finish, click Close to return to the Position Card.
About the HR Request Life Cycle
The HR Request life cycle is the following:
- An HR Request is created (in NAV or on Employee Center) and submitted.
- The manager approves the request.
- HR Action – HR receives the request via the HR Request Inbox, processes the request and reviews any HR related information. When the HR representative is satisfied that the HR portion of the request is fulfill, it is forwarded to the next status.
- Payroll Action – Payroll receives the request via the HR Request Inbox and reviews information. Once the payroll representative is satisfied with the set up, the request is completed.
Note: The following section illustrates the steps that a typical HR Request follows. A Payroll Entry type request follows a slightly different flow.
Understanding the HR Request Process
The HR Request functionality enables managers, HR personnel, and Payroll personnel to generate several types of requests that will result in different types of HR or Payroll transactions for an employee. When creating an HR request, the user must select the HR Reason Code for the request.
Access to enter an HR Request is available in NAV or on Employee Center.
The following table outlines the process types that are assigned to reason codes and the corresponding processes that they support when initiated.
| Code | Description |
| Hire | Creates a new employee record and assigns the employee to a position, assigned benefits, set up payroll, misc. articles, required training, and more. Use this to create reason codes for different types of hiring processes. |
| Termination | Terminates an employee, inserts and end date on their positions and identified articles to be returned. Use this process type when creating reason codes for different types of terminations or layoffs. |
| Assignment Change | Closes the current assignment and opens new Position Assignment. Use when setting up reason codes for “transferring” an employee position to position. |
| Assignment Details Change | Changes details of an existing assignment and maintains a history to track the change. Use this when setting up reason codes for changing items such as pay rate, FTE, etc. on the current active position. |
| Payroll Entry | Generates an entry in the Payroll Journal. Use this process type when creating Reason Codes for one-time payroll entries such as bonuses, termination payments, or any other one-time payment to an employee. |
| Notification | Creates a Notification entry to be viewed by Payroll or HR. Use this process type when creating reason codes that do not fit into any of the other process types. |
| Terminate & Re-hire | Terminates a position as at specific date and re-hires the employee on a future date. |
Notes:
- Within each reason code are several process type steps that need to be completed.
- Initiate all the above HR request processes using the tools on Employee Center or in Dynamics NAV.
Creating an HR Request within NAV
To create an HR request:
- In the Search field, type HR Requests and select the page from the drop-down list.
The HR Requests List displays, showing all the requests that have been created.
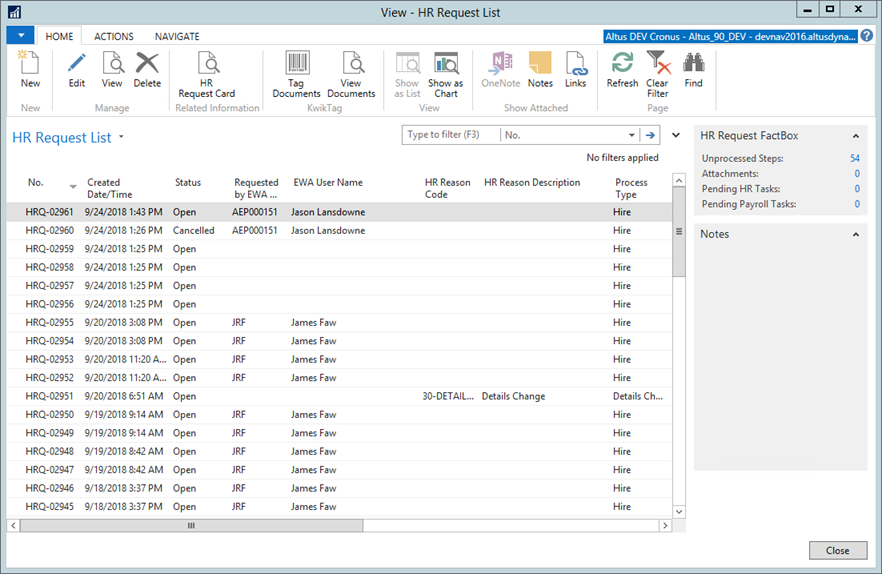
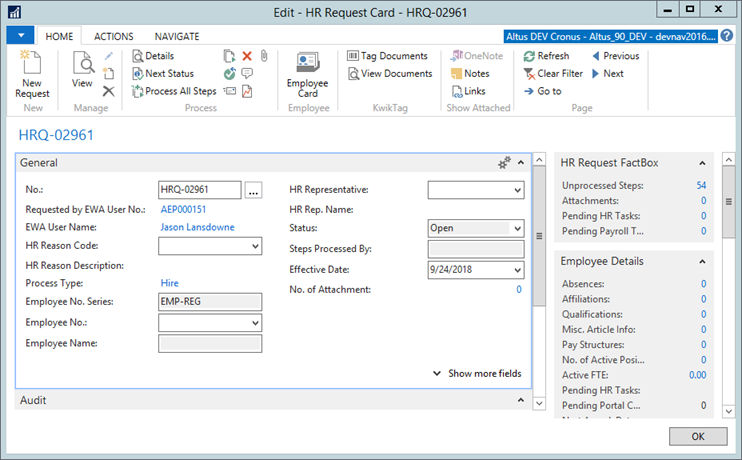
- On the Home Ribbon, click New. A blank HR Request Card opens.
- Use the following table to complete the required information to create an HR Request.
| Field | Description |
| General FastTab | |
| No. | The request number is automatically populated when create a new request. (The number is based on the numbering convention established by your organization.) |
| Requested by EWA User No. | The initials or employee number of the individual who created the request is automatically entered in this field if the request was created through Employee Center. Note: If the HR Request is being created in NAV, this field remains blank. |
| EWA User Name | The full name of the individual creating the request is automatically entered in this field. Note: If the HR Request is being created in NAV, this field remains blank. |
| HR Reason Code | From the drop-down select the applicable reason code attached to the request. (Hire, Re-Hire, Termination, and so on). This drives the contents of the Details FastTab. |
| HR Reason Description | This field is auto-populated based on the reason code you select. |
| Process Type | This field is auto-populated based on the reason code you select. This links the reason code to the appropriate process functions (steps) for this particular request to be fulfilled. |
| Employee No. | If entering an HR request that is to affect an existing employee, this field displays the employee number corresponding to the employee to whom the request applies. From the drop-down, select the employee. Or, to perform a search, from the drop-down, click Advanced and use the Filter fields to enter the employee name/number, etc. Note: If this entry is for a ‘Hire’ process of a new employee, leave this field blank since the employee’s details are entered on the Details FastTab. |
| Employee Name | Displays the full name of the employee. This field is automatically populated once you select the employee number. |
| HR Representative | Displays the HR Representative responsible for this employee. From the drop-down, select the appropriate HR representative. |
| HR Rep. Name | Displays the full name of the HR Representative. This field is auto-populated when you select the HR representative in the above field. |
| Description | Enter a detailed description or any specific instructions details for the request in this field. |
| Status | Displays the current status for the request. When creating a new request, the status is automatically set as ‘Open’. |
| Created Date/Time | Displays the date and time the request was created. This field is automatically populated with the current date. However, this date and time can be over-ridden, if required. |
| Created By User ID | Displays the EWA user ID of the individual creating the request. This field is auto-populated based on the user’s ID number, if used in your organization. |
| No. of Unprocessed Steps | Displays the current step in the process. When creating the request, this automatically defaults to 0. |
| Effective Date | From the drop-down, select the date upon which the request takes effect. |
| No. of Attachments | This field displays the number of attachments associated to the request. This field auto-populates based on the attachments uploaded to the request. |
| Status FastTab | |
| Requested by EWA User No. | The initials or employee number of the individual who is creating the request is automatically entered in this field. Note: If the HR Request is being created in NAV, this field remains blank. |
| EWA User Name | The full name of the individual creating the request is automatically entered in this field. Note: If the HR Request is being created in NAV, this field remains blank. |
| Approved by Manager | When creating a new request for hire in NAV, this check box remains blank. |
| Approved by Manager No. | Displays the employee number of the manager to whom the new hire will report. This field is auto-populated once the request is processed. When creating a new request for hire in NAV, this check box remains blank. |
| Approved by Manager Name | Displays the full name of the manager to whom the new hire will report. This field is auto-populated based on the manager number. When creating a new request for hire in NAV, this check box remains blank. |
| Approved by Manager Date/Time | Displays the date upon which the manager approved (or submitted the request over the portal). This field is auto-populated. When creating a new request for hire in NAV, this check box remains blank. |
| HR Review/Approved | hen creating a new request for hire in NAV, this check box remains blank. If the request requires HR Approval as a next status, the field is checked when this approval takes place. |
| HR Review/Approved User ID | Displays the user ID for the HR representative who approved the request. When creating a new request for hire in NAV, this field is blank. |
| HR Review/Approved Name | Displays the name of the HR representative who approved the request. When creating a new request for hire in NAV, this check box remains blank. |
| HR Review/Approved Date/Time | Displays the date upon which the HR Representative approved the request This field is auto-populated. When creating a new request for hire in NAV, this check box remains blank. |
| PR Review/Approved | When creating a new request for hire in NAV, this check box remains blank. If the request requires Payroll Approval as a next status, the field is checked when this approval takes place. |
| PR Review/Approved User ID | Displays the user ID for the HR representative who approved the request. When creating a new request for hire in NAV, this field is blank. |
| PR Review/Approved Name | Displays the name of the payroll representative who approved the request. When creating a new request for hire in NAV, this check box remains blank. |
| PR Review/Approved Date/Time | Displays the date upon which the payroll approved the request. This field is auto-populated. When creating a new request for hire in NAV, this check box remains blank. |
| Status | Displays the current status for the request. When creating a new request, the status is automatically set as ‘Open’. |
| Created Date/Time | Displays the date and time the request was created. This field is automatically populated with the current date. However, this date and time can be over-ridden, if required. |
| Created By User ID | Displays the AEP user ID of the individual creating the request. This field is auto-populated based on the user’s ID number, if used in your organization. |
- On the Home Ribbon, click Details.
Once you provide the required information for the actual request, you need to either provide (if this is a new hire request, seethe next section for more information) or review the contents in the Details FastTab. - When you finish reviewing or adding the Details FastTab information, click OK.
- To complete the request, on the Home Ribbon, click Next Status to move the request to the next stage in the process.
Adding the Details for a Hire Request
The ‘Hire’ details include all settings for creating employee records and providing the details of the hire into a position. Depending on how the position is defined, much of the information required to process the request may already be added by default. (See ‘Setting Up Position Management’ for more details.) If you are initiating the ‘hire’ request from within NAV, once the HR Request Card information is provided, you need to populate the Details fields for the new hire.
To add the details for a Hire request:
- On the HR Request Card, from the Home Ribbon, click Details.
The Details page for the request opens.
- From the Action menu, select New.
- Use the following table for assistance in completing the Employee FastTab fields:
| Field | Description |
| Job Requisition No. | Enter the job requisition number. |
| Close Job Requisition | Add a checkmark to this check box if you want to close the job requisition when the HR Request is completed. |
| Applicant | Specify the job applicant. |
| Employee Type | From the drop-down, select the type of employee to be hired. See the ‘Managing Employee Types’ section for more information. |
| Name fields (first-Legal, Middle, Last-Legal) | Enter the legal first name, middle name, and legal last name of the employee to be hired. Note: If you are hiring an existing employee into a new position, all of the fields up to and including the Social Insurance No. are not required. |
| Address Fields | Enter the home address. Enter a secondary address line, if applicable. |
| City, Province/State, Postal/Zip Code fields | Enter or select from the available drop-downs to provide the employee’s complete address details. |
| Phone No. | Enter the employee’s home phone number. |
| Mobile Phone No. | Enter the employee’s mobile phone number. |
| Enter the employee’s email address. | |
| Country/Region Code | From the drop-down, select the appropriate country/region code. |
| Gender | From the drop-down, select the appropriate option. |
| Birth Date | Enter the employee’s birth date in MM/DD/YYYY format. |
| Social Insurance No. | Enter the social insurance number for the new employee. |
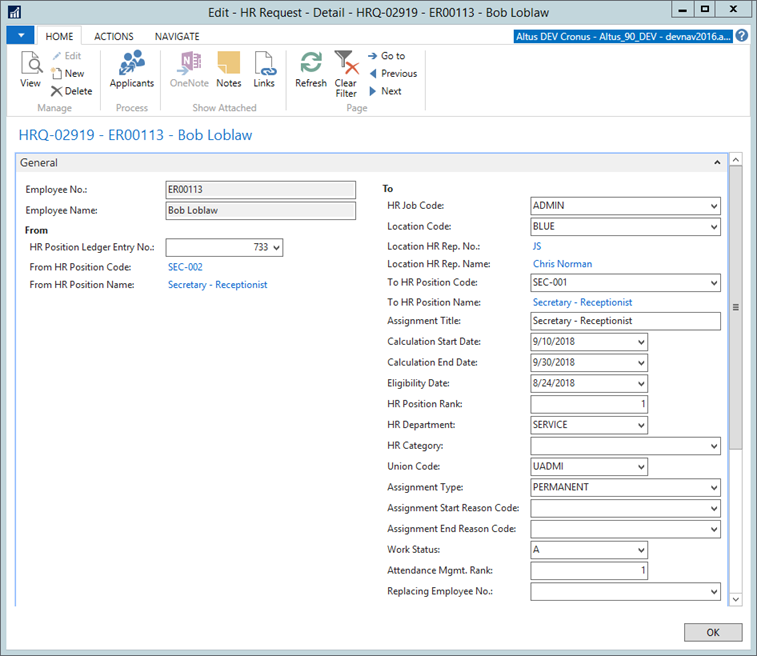
- Expand the Assignment FastTab.
- Enter the applicable information for the employee’s position/assignment. Use the following table for assistance in completing the Assignment fields.
| Field | Description |
| Assignment Start Date | From the drop-down, select the date the employee is to begin the assignment. This field is only editable for Hire and Assignment Change HR Requests. |
| Assignment End Date | From the drop-down, select the date the assignment is to be completed. Note: If this is for permanent employment, leave this field blank. |
| Calculation Start Date | From the drop-down, select the date upon which the position/detail change is to take effect. |
| Calculation End Date | From the drop-down, select the date upon which the position/detail change is set to end. |
| Note about calculation start and end dates: The Calculation Start and End Dates are used for all calculations and will generally default from the Assignment Start and End Dates. The Calculation Dates can be overwritten if the calculation dates need to vary from the Assignment dates. On all Position Details HR Requests, the Assignment Start Date is not editable and is copied from the previous entry’s Assignment Start Date. This enables HR/Management staff to view the total length of service an employee has in one position by looking at the most recent entry, as the original Assignment Start Date is always preserved and only Calculation Start Dates change with each entry. |
|
| HR Job Code | From the drop-down, select the HR Job being assigned to the employee. Note: This field filters the values in the HR Position Lookup to show positions linked to this job. |
| Location Code | From the drop-down, select the location to which this employee will stationed or assigned. |
| HR Position Code | Click the drop-down arrow to open the HR Position List, select the position, and click OK. |
| HR Position Name | Displays the position name. This field is automatically populated based on the position code selected. |
| HR Position Rank | Enter the ranking of this assignment for the employee. If this is the only active position for the employee the rank should be 1. If this is a secondary position, enter 2 or greater to identify what ranking this position has with regards to other positions. |
| Assignment Title | This defaults to the position name, but changes the text to reflect the actual position title for this assignment. |
| HR Department | From the drop-down, select the department to which this particular position is assigned. |
| HR Category | From the drop-down, select the HR category to which this position belongs, if required. |
| Assignment Type | From the drop-down, select the appropriate option based on the position (Full Time, Part Time, and so on). |
| Assignment Start Reason Code | From the drop-down, select an appropriate option that indicates the reason code for adding this position to the employee. |
| Assignment End Reason Code | From the drop-down, select an appropriate option that indicates the reason code terminating this position |
| Attendance Management Rank | Enter the position rank applicable to your attendance management ranking. Used in integrations related to attendance management. |
| Replacing Employee No. | From the drop-down, select an employee no to indicate. |
| Replacing Employee Name | Displays the name of the employee being replaced. This field is auto- populated based on the employee number selected in the previous field. |
| Recruitment No. | Enter the recruitment number if applicable in the space provided. |
| Seniority Date | From the drop-down, select the date upon which seniority status will be calculated for that position. |
| Seniority Group | From the drop-down, select the seniority group. Seniority group is a classification of employees that is attached to the position or positions they hold. For example, an employee might have both a clerical and a technical position and each of these types of positions carry their own "Seniority Group" rather than the seniority being based on the employee's start date. |
- Expand the Dimension FastTab.
The dimension values and Location Code are default to the values set up on the HR Position card. Override these values if necessary. For information on Dimensions, refer to your G/L (General Ledger) documents for details. - Expand the Payroll FastTab.
- Use the following table to complete the field in the Payroll FastTab:
| Field | Description |
| Pay Structure | Select the Pay Structure Code to be used to pay this employee. Note: This value defaults to the HR Position set up. Edit only if this employee’s assignment is different from the default for the Position. For more information, see the ‘Defining Pay Structures for Your Organization’ set up section. |
| Pay Grade | Select the Pay Grade Code to use to pay this employee. Note: This value defaults to the HR Position set up. Edit only if this employee’s assignment is different from the default for the Position. |
| Pay Step | Select the Pay Step Code to use to pay this employee. Note: This value defaults to the HR Position set up. Edit only if this employee’s assignment is different from the default for the Position. |
| Amount | This field is populated automatically if there is a grid set up for the Pay Structure, Grade, and Step selected. The behavior of the field is based on the type of pay structure.
|
| Grid Status | This field displays the status of the amount with respect to the Grid. From the drop-down, select the applicable option. The following are the statuses applicable to HR Requests:
|
| F.T.E. | Use this field to indicate the Full Time Equivalency of the assignment. Notes:
|
| Hours per Week | Use this field to identify the hours that the employee will work in a week. This field will default to the Hours Per Week set up on the position. If this field is changed it will adjust the F.T.E. value. |
| Hours per Day | Use this field to identify the hours that the employee will work in a day. This field is used for reference purposes only and is not used in calculations. Note: This value is defaulted from the HR Position. |
| Employer No | Select the Employer No. that will be used for Paying this employee. Note: This value is defaulted from the HR Position. The Employer No. is only updated if the employee is being hired for the first time. Any changes to the Employer No. after the initial hire need to be made within the Employee Card. |
| Pay Cycle Code | From the drop-down, select the pay cycle applicable to this employee. |
| Manager Comments | This section contains general comments the employee’s manager entered over the portal. If you’re creating the HR Hire request, this field is blank. |
| Probation Type | Determines the primary evaluation method for probation. The options are Elapsed Time or Worked Hours. Note: This value is defaulted from the HR Position. |
| Probation End Date | This field is automatically calculated based on the Probation Date Calculation on the HR Position card and the Effective Date of the HR Request. |
| Probation Hours (Worked Horus) | This field indicates the hours of work required to complete the probation. Note: This value is defaulted from the HR Position. |
| Progression Date | This field is automatically calculated based on the Progression Date Calculation on the Position Card and the Effective Date of the HR Request. |
| Progression Unit | Displays the unit by which the progression is calculated/quantified. From the drop-down, select the appropriate option. The value in this field is defaulted from the HR Position. |
| Progression Quantity | Enter the quantity based on the progression unit you selected. The value in this field is defaulted from the HR Position. |
| Benefit Code | Indicates the Benefit Plan assigned to the employee. Use the arrow to select a plan or change the defaulted value. Note: This value is defaulted from the HR Position. |
| F.T.E. Amount fields | The amounts in these fields are automatically calculated based on the Pay Structure, Grade, Step, Amount, and F.T.E. selections in the previous fields. |
| Yearly Amount | This field enables you to preview the annual amount that will be paid to the employee. |
| Monthly Amount | This field enables you to preview the monthly amount that will be paid to the employee. |
| Pay Period Amount | This field enables you to preview the Pay Period amount that will be paid to the employee. |
- Click OK to close the Details page and return to the HR Request Card.
- When you are ready to submit and process the request, on the Home Ribbon, click Next Status.
For details on HR Request Statuses, see ‘Updating the HR Request Status’.
Using the Termination HR Request
The Termination HR Request terminates an employee, inserts an end date on the position(s), and identifies articles to be returned. There are two possible options for Termination HR Requests:
- Terminating an employee from a single position
- Terminating an employee from multiple positions
Terminating an Employee from a Single Position
To terminate an employee from a single position:
- Create an HR Request (see, ‘Creating an HR Request within NAV’) selecting Termination as the Reason Code.
- On the Home Ribbon, select Details.
The Details page displays.
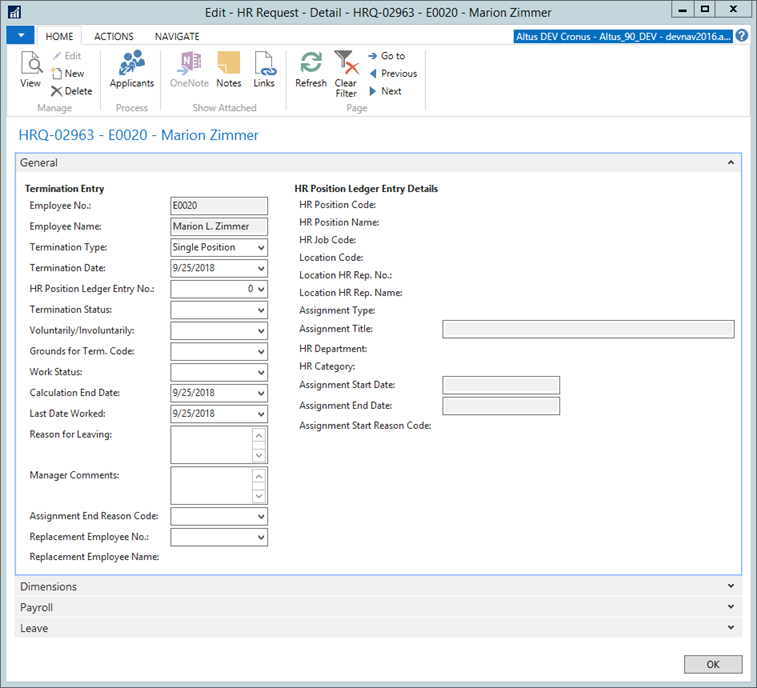
- From the Termination Type drop-down, select Single Position.
The Termination Date field defaults to the current date. This field is editable. - From the HR Position Ledger Entry No. drop-down, select the position to be terminated.
- From the Termination Status drop-down, select the option appropriate to this employee’s termination.
- From the Voluntarily/Involuntarily drop-down, select the applicable option.
- From the Grounds for Term. Code drop-down, select the appropriate code.
- In the Reason for Leaving text box, provide detail, if required.
- In the Manager Comments text box, enter the comments provided by the manager.
- From the Replacement Employee No. drop-down, select the employee replacing the terminated employee, if applicable.
- Click OK.
- Review and complete the Record of Employment. For details, see ‘Generating Records of Employment’.
Terminating an Employee from Multiple Positions Using One HR Request
The Termination Process Function enables you to use one HR Request to terminate all active positions for an employee.
To terminate an employee from multiple positions:
- Create an HR Request (see, ‘Creating an HR Request within NAV’) selecting Termination as the Reason Code.
- On the Home Ribbon, select Details.
The Details page displays. - From the Termination Type drop-down, select All Positions.
The Termination Date field defaults to the current date. This field is editable. - Leave the HR Position Ledger Entry No. field blank.
- See the above procedure for assistance completing the remaining field.
- Click OK.
- Review and complete the Record of Employment. For details, see ‘Generating Records of Employment’.
Note: There will be no entries for each unique Employer Code represented by the positions being terminated.
Updating the HR Request Status
Once all of the details for the HR Request are entered, use the Status process to move the request forward according to the steps outlined for the reason code attached to the request.
To change the status of the request:
- Open the HR Request that you want to change the status of.
- On the Home Ribbon, click Next Status.
The Status field updates to reflect the next status in the process. When creating a new HR Request from within NAV, the next status is Pending HR Action. For details on processing the steps requiring HR action, see ‘Processing an HR Request’.
Note: Applicable statuses for the HR Request are determined by the reason code attached to the request. The possible statuses are as follows:
| Status | Field |
| Open | This is the default status for any HR Request that is newly created. |
| Pending Manager Approval | If the HR Request has been entered by a Delegate, and the Reason Code has this status enabled, then an HR Request is placed in this status once the Delegate submits the Request on Employee Center. Note: The status of the Pending Manager Approval field is only applicable for HR Request created on Employee Center. The Status is changed on an HR Request with a Reason Code that includes this status, the system presumes that if HR is recording the transaction in NAV, the requisite approvals have already been obtained and the status proceeds to the next one. |
| Pending HR Action | This status indicates that the document requires action/review by HR. |
| Pending Payroll Action | This status indicates that the document requires action/review by Payroll. |
| Approved | This status only applied to the “Payroll Entry” and indicates that all prior statuses have been completed and the transaction is approved but it has not been processed by payroll yet. Once the request is processed by payroll, the status is updated to Completed. |
| Completed | This status indicates that the HR Request is fully processed. |
| Cancelled | This status indicates that the HR Request is canceled. |
Note: If the request is closed, you can re-open the request to re-initiate the steps, if required. Select Re-open from the Home Ribbon.
Using the HR Request Inbox
The HR Request Inbox is the interface that HR and payroll personnel use to review and process requests that require HR and Payroll action. When an HR request is submitted, the request is posted to the HR Request Inbox where you can retrieve the request, perform the required activities to fulfill the request, move the status of the request forward, or complete and close the request.
HR and Payroll staff must monitor the HR Request Inbox periodically to find Requests that require action (in the status of “Pending HR Action” or “Pending Payroll Action”, depending on your role; HR or Payroll staff).
The HR Request Inbox view can be configured to show only HR or only Payroll Actions and further filtered by HR Representatives to easily see your own tasks.
To view the HR Request Inbox:
- From the Human Resources Management menu, select Employee Management > HR Request Inbox.
The HR Request Inbox displays.

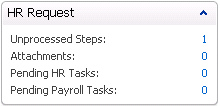
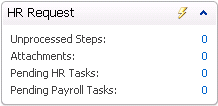
Understanding the HR Request Section (Info Panel)
The information panel provides the user with a quick summary of information about the HR Request currently selected, without the need to open the actual request card.
| Field | Description |
| No. of Unprocessed Steps | Displays the no. of steps still unprocessed for the request. |
| No. of Attachments | Display the no. of documents attached to the request. |
| Pending HR Tasks | Displays the number of pending HR tasks generated by this request that are the responsibility of HR. |
| Pending Payroll Tasks | Displays the number of pending HR tasks generated by this request that are the responsibility of Payroll. |
Working with the Inbox Filters
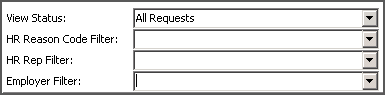
The inbox by default displays all HR requests submitted. You can use the filters at the top of the inbox to retrieve the requests that are pertinent to you. You can select one of the filters, or use a combination of all three to view the requests that you want. These are the filters available for searching/sorting HR requests:
- Status Filter – enables you to manage records by the request status.
- Reason Code Filter – enables you to manage records by reason code.
- HR Rep Filter – enables you to manage records by HR Representative responsible for completing the HR required steps.
- Employer Filter – enables you to search for and display requests based on the Employer.
To filter the inbox:
- From the drop-down lists available for the filters, select the option you want.
The request inbox is filtered to display the items contained within your selection.
Note: The typical filter settings for an HR Representative will likely be:
- Status: Pending HR Action
- HR Reason Code: Blank
- HR Rep Filter: The user’s code
- Employer Filter: Blank
Note: The typical filter settings for a Payroll user will likely be:
- Status: Pending Payroll Action
- HR Reason Code: Blank
- HR Rep Filter: Blank
- Employer Filter: Blank
Understanding Process Types
HR Requests can also be created by a specific process type (which is attached to higher level reason codes) to allow managers or HR personnel to enter an HR Request that triggers a particular HR or Payroll action from HR and/or Payroll.
The HR Functions (defined under ‘Position Management Setup’) determine what happens when an HR Request is processed. Once HR Functions are defined, they are connected to Reason Codes as HR Process Functions.
When you complete any or all of the steps within an HR request, the process functions within the reason code are initiated.
Processing Requests Submitted to the HR Request Inbox
Once you configure your filters and identify requests that require your action, you can begin the process of completing the HR portion of those requests.
Reviewing the Details for a Request
Before you begin any of the processing steps you should open and review the full details of a request to ensure all the required information has been provided and that no errors exist.
To access the request details:
- From the Request Inbox or HR Request List, select (highlight) the request you want to review.
- From the Navigate Ribbon, click Card.
The HR Request Card opens.
- Review the high-level information for the request, including the request status.
- Supply additional information in the editable fields, if known.
- On the Home Ribbon, click Details.
The Details for the request displays.
Note: Depending on the Reason Code for the HR Request, different FastTabs are available. For example, if the request was for a Details change, the Leave FastTab would be visible. - Review the request details to ensure the necessary information has been supplied.
Notes:
- The Assignment Start Date is only editable for ‘Hire’ and ‘Assignment Change’ HR Requests. For all other request types, the field is not editable and additional Calculation Start and End Date fields are available instead. For example, the calculation start and end dates can be used to define a ‘substitution’ position for an employee to ensure the appropriate position details and payroll information is applied and for the correct timeframe.
- Assignment dates indicate the start and end dates of the assignment, while the calculation dates refer to the period in which this position needs to be used in payroll calculation.
General Rule:
- Details Change is used for updating an existing position. The assignment start date is not editable
- Assignment Change is used when the employee moves to another position. All dates are editable.
For example, say you employ someone on 01/01/2013 with Salary A and calculation date 01/01/2013. A few months later, this person is approved to receive a raise. To update the salary, you would submit an HR Request for a Details Change. The assignment dates stay the same, but the calculation date for the new Salary B is different, for example, 01/04/2013.
- Click the other FastTabs to display and review the remaining details for the request.
Note: If the request is missing required information, you can send it back to the individual who submitted the request to ask for more detail or modifications. For information on sending a request back to the request creator, see ‘Re-Opening or Re-Opening and Emailing an HR Request’.
Processing All HR Steps for a Request
Once you review the information on the HR Request, you can use the process options to initiate an automatic execution of all the functions assigned to HR that are defined for the reason code.
To process all steps at once:
- From the Request Inbox or HR Request List, select (highlight) the request you want to review.
- From the Home Ribbon, click Card.
The HR Request Card opens. - On the Home Ribbon, click Process All Steps.
Notes:
- The Process All Steps option completes all the functions required within that particular step of the process (by HR or Payroll individually, and so on).
- The Next Status option moves the request to next stage in the request approval and completion process.
All process functions tied to the reason code for the request are processed. If any problems or errors exist, the No. of Unprocessed Steps updates to show the processes that did not complete.
To resolve processing errors:
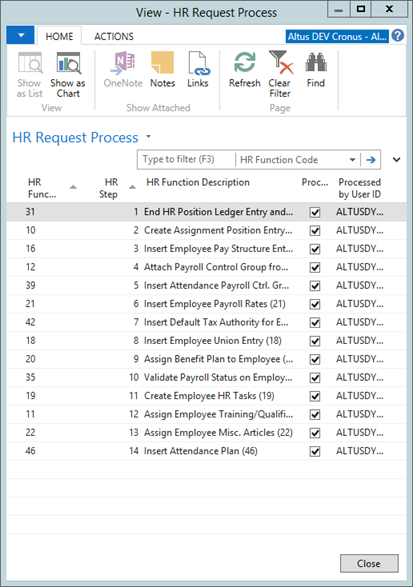
- Click the Unprocessed Steps link to view the specific errors and resolve them.
- The View - HR Request Process page opens listing the step(s) not processed.
- From the Related Items menu, select:
- Process Line (if only one unprocessed step remains or)
- Process All Steps (to process all items listed)
- Click Close.
The HR Request Info Panel is updated to reflect that no unprocessed steps remain.
Processing Individual Steps
When you complete your assigned step(s) in fulfilling the HR request, you can process the step(s) you completed to move the request fulfillment along.
To process individual process functions:
- From the Request Inbox or HR Request List, select (highlight) the request you want to review.
- From the Home Ribbon, click Card.
The HR Request Card opens. - On the Home Ribbon, click Process Individual Steps.
The HR Request Process page opens listing all the unprocessed steps.
- Select the function you want to process.
- From the Related Information menu, select Process Line.
A confirmation page opens to indicate the step was processed successfully and a check mark appears in the Processed column for the function you selected. - Repeat steps 3 - 5 for any remaining functions you want to process.
Reviewing Processed Records
Once the steps are processing, you can review the records created. This can be done quickly and easily by displaying the Employee Card (On the Home Ribbon, select Employee Card). From the Employee Card, you can view all the applicable FastTabs to ensure the appropriate information was inserted or updated.
An HR Representative, for example, may review the following information when setting up a new hire:
- Review the Employee card and the Position Entry created.
- Review the EWA User card created.
- Review the pay structure assigned to the employee.
- Review the union record created.
- Review and update training information.
- Complete any HR tasks with a responsibility of Human Resources.
A Payroll Representative, for example, may review the following information when setting up a new hire:
- Open the Employee card and resolve any errors or warnings generated by the Payroll Status process.
- Review payroll controls.
- Review rates.
- Review tax authority info.
- Review other authority info.
- Set up the pay distribution.
- Complete any HR tasks with a responsibility of Payroll.
NOTE ABOUT PAYROLL CONTROLS:
Payroll staff can attach payroll controls to an employee and have them calculate only for a specific position if the employee has more than one position active concurrently. You can define payroll calculations to apply to very specific scenarios, such as certain types of leave or substitutions when an employee takes over a position while the individual who normally occupies the position is on leave. An HR Request (Details Change) is required to handle positions within the leave and substitution scenarios.
- Payroll Control Effective Dates: Payroll controls can be set up to default the calculation start and end date from the position to which they are related. For example, payroll control effective dates can be used for placing an employee in a substitution role for a position.
- Position Specific Payroll Controls: Payroll Controls can be made to be position specific. If they are set up as ‘Position Specific’, payroll calculations using the appropriate method steps will apply only to the appropriate position-related data. This option is selected within the Payroll Controls page from within the Payroll menu. Again, this can be used for a position substitution scenario.
Changing the Status of a Request to Move to the Next Step
Once you process or complete the steps that are assigned to you and are satisfied with the system-generated records, you can move the request to the next status (step). Depending on the step, the system automatically sets the status to the next workflow process or changes the status to Complete. However, if you perform a step in the request process, you can also update the status to reflect the task you performed.
For details, see ‘Updating the HR Request Status’.
Completing Employee Leave HR Requests
Employee leaves are handled through HR Requests submitted as Details Changes (reason code) by the employee’s manager over the portal. Once a ‘leave’ HR Request is submitted, you need to process the request to put the employee on leave. If an employee is to be put on a leave the HR Request Details section has an additional Leave FastTab with fields that need to be completed.
Before you can process an HR Request for a leave, you need to ensure that the appropriate Cause of Inactivity codes are set up. For information on setting up the required Cause of Inactivity codes for ‘leaves’, see, ‘Defining Cause of Inactivity Options’.
Note: When substituting an employee into another position (for example, in a Leave situation), you need to create an HR Request for a Details Change with the Leave details to place the employee's existing/base position on leave. Then, you need to create an HR Request for a 'Hire' to assign this employee to the new position.
To put an employee on leave:
- From the Request Inbox or HR Request List, select (highlight) the request you want to review.
- From the Navigate Ribbon, click Card.
The HR Request Card opens. - On the Home Ribbon, click Details.
The Details for the request open. - Expand the Leave FastTab.
The Leave FastTab displays.

- From the Cause of Inactivity Code drop-down, select the appropriate Leave option (based on the HR Request).
Note: This is typically used on the Record of Employment (ROE) if it’s related to a layoff, sick, or parental type leave. Other organizational-specific leave codes can be specified and selected as well. - In the Leave Comments field, enter any comments that pertain to the leave.
- In the Expected Return Date field, enter an expected return date, if one is known.
- From the Payroll Control Code drop-down, select the payroll control that applies to the leave.
- From the Replacement Employee No. drop-down, select Advanced. This step is not necessary if no replacement is required.
The View – Employee List page opens. - Select the employee who is replacing the employee going on leave (use the filter field to locate the employee).
- Click Close.
- 2. From the Leave Type drop-down, select the applicable option. The availability of this option depends on your particular installation.
- Click OK to close the Details page.
- In the HR Request Card, on the Home Ribbon, click Next Status.
- The Status field is updated to the next applicable status in the process.
- Click OK.
Confirming the 'Leave' Status for an Employee
Once the HR Request for a leave is completed (all steps are processed), the employee record is marked as ‘On Leave’.
To confirm the ‘leave’ status was applied:
- On the Home Ribbon, select Employee Card.
- In the Employee Card, on the Home Ribbon, click HR Position Ledger Entries.
- Click the Expand icon to display the Leave FastTab.
- Click OK to close the Employee Card.
Re-Opening and Emailing an HR Request
If for some reason the data on the HR Request is incomplete and the request needs to be routed back to the requester for more details or clarification (regardless of the request’s current status), you can either re-open it, or re-open and email the requester in a single step.
To re-open a request:
1. From the Request Inbox or HR Request List, select (highlight) the request you want to review.
2. From the Related Information menu, select HR Request > Card.
The HR Request Card opens.
3. On the Home Ribbon, click Re-Open or Re-Open and Email.
You are prompted to confirm that you want to re-open the request and once you confirm the Status field changes to reflect that the request is open.
Note: If the request has already been processed, re-opening does not undo any of the changes applied by the processing. If these changes need to be reversed, the reversal must be done manually. Once the status is Open, the requester is able to edit the request again and re-submit, if necessary.
4. Click Yes.
Cancelling an HR Request Before it is Processed
If the HR Request is no longer valid and it will no longer be processed, you can cancel the request before it is processed, meaning it must be in the ‘Open’ status.
Note: This function is only available if the HR Request has not yet been processed. If the request has already been processed, you need to manually cancel or delete the entries that were processed. For details, see the next section, ‘Cancelling an HR Request After Processing’.
To cancel a request:
1. From the Request Inbox or HR Request List, select (highlight) the request you want to review.
2. From the Related Information menu, select HR Request > Card.
The HR Request Card opens.
3. On the Home Ribbon, click Cancel.
You are prompted to confirm that you want to cancel this request and once you confirm the Status field changes to reflect the next step in the processing of the request.
4. Click Yes.
The Status field is updated to Cancelled.
Cancelling a Position Ledger Entry
For HR Requests that have been processed and position ledger entry has been created, you need to cancel the entry to ensure it is not included in the Payroll Journal process.
To cancel a position ledger entry:
1. Open the Employee Card for the employee with the entry you need to cancel.
2. From the Related Information menu, select Human Resources > Position Ledger Entries.
The HR Position Ledger Entries page opens.
3. Select the entry you want to cancel.
4. On the Actions Pane, click Cancel Entry.
A warning message opens.
5. Click Yes to cancel the entry line.
The Entry Type is changed to Cancelled and the Payroll Journal Pre-Load will not include this line for processing.

In addition to cancelling the entry, you can reverse some of the other steps from the process (if applicable).
Use the following table as a guideline for manually reversing the steps you need to remove:
| Description | Guidelines for Reversing |
| Creates the employee HR Tasks | Open the Employee Card. Display the Employee HR Tasks page (on the Home Ribbon, click HR Tasks). Select the appropriate entries and from the Actions menu, select Delete. |
| Assigns a benefit plan to the employee | Open the Employee Card and click the Expand icon to display the Benefits FastTab. Remove the Benefit Plan Code or replace it with the previous entry. If you would like to return the entries to their previous state, change the Work Date (From the Tools menu - on the toolbar - select Work Date) to the previous Assignment Start Date and then assign the previous benefit plan code. You can do that by using the Assign Benefit Plan function or by adding the lines manually. |
| Assigns miscellaneous articles to employees | Open the Employee Card. Display the Misc. Article Information s page (on the Home Ribbon, click Misc. Article Information). Select the appropriate entries and from the Actions menu, select Delete. |
| Assigns employee training and qualification registrations | To remove qualification entries created: Open the Employee Card. Display the Employee Qualifications page (under Employee Details, click the Qualifications link.) Select the appropriate entries and from the Actions menu, select Delete. (‘Show’ the HR Request No. column to confirm the entries created by the request. Right-click over the header row and select Choose Columns). To remove training registrations: Open the Employee Card and click the Expand icon to display the Training FastTab. Use the Training Management History, to determine what entries were created. On Employee Training Reg Subform, select the entries created by the HR Request and delete the registration created. |
| Inserts employee rates | Open the Employee Card. Display the Employee Rates page (under Payroll Details, click the Rates link.) Select the appropriate entries and from the Actions menu, select Delete. |
| Inserts employee ‘other authorities’ information | Open the Employee Card. Display the Employee Other Auth. Info page (under Payroll Details, click the Other Auth. Info link.) Select the appropriate entries and from the Actions menu, select Delete. |
| Inserts a payroll entry | If the Payroll Journal Pre-Load has not been run for this HR Request, simply cancelling the request prevents it from being pulled in for processing. If it is already in the Payroll Journal, delete the line from the Payroll Journal. Contact the Payroll department for more details. |
| Inserts the employee union information | Open the Employee Card. Display the Employee Unions page (on the Home Ribbon, click Unions). Select the appropriate entries and from the Actions menu, select Delete. |
| Assigns a termination date to employee | If this process has already been run, you need to create a HIRE HR request to re-hire the employee. See, ‘Creating an HR Request within NAV’ for details. |
| Closes an HR position entry when terminated | If this process has already been run, you need to create a HIRE HR request to re-hire the employee. See, ‘Creating an HR Request within NAV’ for details. |
| Sets a Misc. Article collection date request for the Employee | Open the Employee Card. Display the Misc. Article Information page (on the Home Ribbon, click Misc. Article Information). Locate the Collection Request Date column and delete the appropriate entries. |
| Copies the position ledger entry to the employee. | Depending on the type of line copied you need to create a new HR Request to return to the original assignment. |
| Changes the access end date on AEP User card when an employee is terminated. | Open the Employee Card. Display the AEP User Card page (on the Home Ribbon, click AEP User Card). In the General FastTab, locate the Access End Date field and delete the entry or return it to the previous date. |
| Creates an AEP User with the Employee number | Delete the AEP User by opening the Employee Card and on the Home Ribbon, select AEP User Card. From the Actions menu, select Delete OR ‘Block’ the record. Open the Employee Card. Display the AEP User Card page (on the Home Ribbon, click AEP User Card). In the General FastTab, select the Blocked check box to add a check mark. |
Creating Budget Entries for the Position
Budget entries can be set up to represent the complement of staff planned for the position. Then, these budget entries can be updated to reflect changes in the organization’s resource requirements when a change occurs.
For example, if next year, two individuals are required for a particular position instead of the single person holding the position in the current year, the HR Budget Journal can be used to record the increase.
To create a Budget Entry:
1. In the Search field, enter HR Budget Journal.
2. Select the option.
The HR Budget Journal page opens displaying the most recent request created.
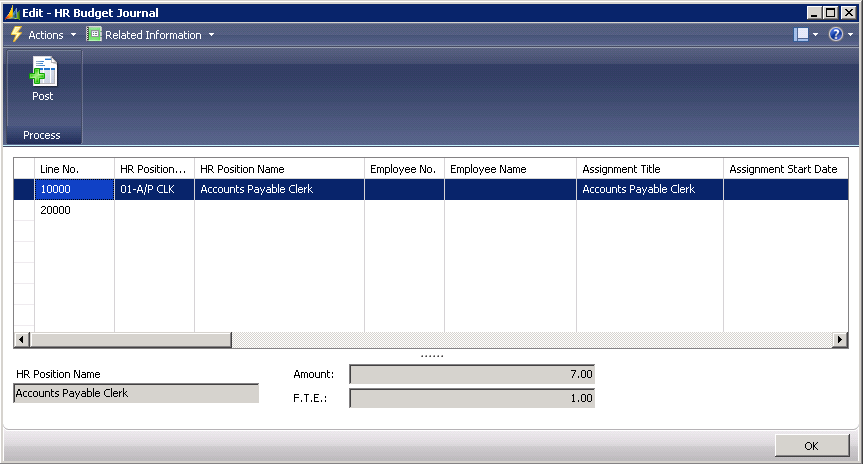
3. From the HR Position Code drop-down, select the applicable option.
The HR Position Name field is populated automatically.
4. From the Employee No. drop-down, select the employee number for the individual, if applicable. (Generally budgeting happens at the position level and not necessarily by employee, but the value can be added.)
5. In the Assignment Start Date field, enter the date that the new assignment is to take effect.
6. If the assignment is temporary, enter the end date of the assignment in the Assignment End Date field. Otherwise leave blank.
7. Enter additional fields that you want to budget by including dimensions, FTE and Amount.
Note: The FTE field is the field that is used to display the budget FTE on the HR Position Fact Box.
The entry is added to the HR Budget Journal page.
8. Once all budget lines are entered, on the Home Ribbon, click Post.
The changes are posted to the HR Position Ledger Entry as a Budget Type entry.
Note: To make adjustments to the entries created, create additional lines to adjust the values (add or subtract FTEs on a specific date).