

A number of set up steps are required initially to customize the Human Resources Management granule to meet your organization’s specific requirements. This section provides detailed set up and configuration information to assist you in defining and creating the Human Resources Management platform you envision.
Your initial set up contains many defaults and samples for you to use within your organization. Many of the options in the tables are already populated for you by the Sparkrock Client Services team based on your company requirements and preferences.
The set up options provide you with powerful tools for customizing the Human Resources Management granule. With the options available you can add, edit, and delete codes and categories within the following areas to set up the HR Management tool specifically for your organization:
- Causes
- Unions
- Employment Contracts
- Relatives
- Miscellaneous articles
- Confidential information
- Qualifications
- Qualification assessments
- Degrees/levels
- Course types
- Position classes
- Employee statistic groups
- HR Representatives
- Communication tracking
- Pay structures
For the most part, this is a one-time process to complete. Once you complete the set up steps for all the required tables and tasks you need for the Human Resources Management of your HR team and employees, you’ll just need to add or define options/items on an as-needed basis.
Configuring the Human Resources Setup Table
The Human Resources Setup table contains a number of fields and tabs for defining how the HR team and employees and managers (through Employee Center) will interact and use the Human Resources Management tools to record and track HR-related issues and employee-related items.
To configure the Human Resources Setup table:
- In
the Search field, type Human Resources Setup and
select the page from the drop-down list.
The Human Resources Setup page displays.
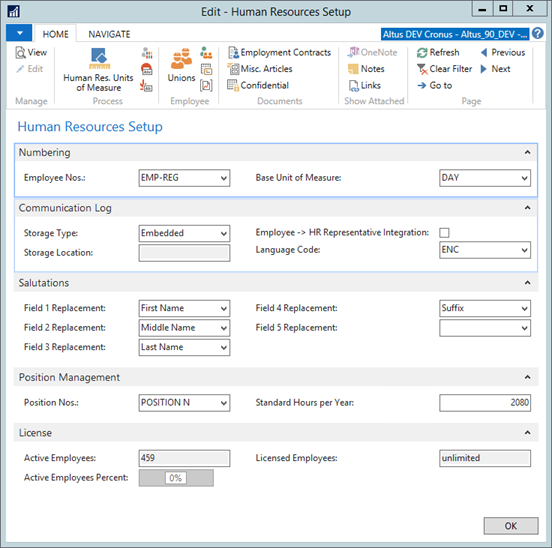
- Use the following tables to explain each of the fields on the Human Resources Setup page:
| Field | Details |
| General FastTab | |
| Employee Nos. | Enter the code for the number series that will be used to assign numbers to employees, applicants, job requisitions, and incident numbers (for health and safety issues). |
| Base Unit of Measure |
Specify the unit of measure used to measure employee absences. Can be:
|
| Communication Log FastTab | |
| Storage Type | Select Embedded if you want the communication tracking documents to be saved within the database. Select Disk File if you want the documents stored in a separate location outside of the database. |
| Storage Location | If Disk File was selected in the Storage Type field, enter the location you want the communication tracking documents to be stored. |
| Employee -> HR Representative Integration | This flag directs the NAV to update the HR Representative record when changes are made to an employee who is also an HR Representative. |
| Language Code | Select the default language to use for communications. |
| Salutations FastTab | |
| Field # Replacement | Use these fields to set up formula values for salutation options/preferences used for the Communication Tracking feature. |
| Position Management FastTab | |
| Position Nos. | Specify the employee's postilion number. |
| Standard Hours Per Year | Specify the position's standard number of working hours per year. |
| License FastTab | |
| Active Employees | Displays the number of active licensed employees. |
| Licensed Employees | Displays how many employees can be licensed, under the terms of your license agreement. |
| Active Employees Percent | Displays the current percentage number of used licenses. |
NOTE: Licensing considerations – once your license file is applied, you can access the areas to which you are licensed to access. If you click a value and get a message regarding permissions, and you want to use these areas, contact your Sparkrock representative to purchase the appropriate granule.
Setting up Units of Measure
Performing the HR Setup Steps
The HR Setup options enable you to configure settings specific to Sparkrock features, such as Employee Center options and time entry specifics.
To provide HR information:
- In the Search field, enter HR Setup and select the
page from the drop-down list.
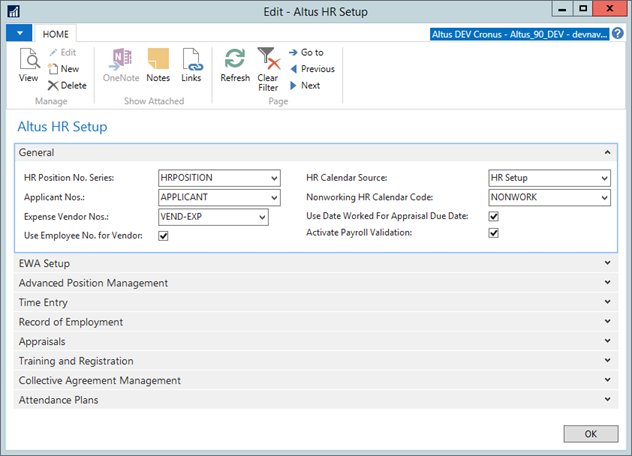
The HR Setup page displays.
- Enter information in the fields as required. Use the tables below for assistance.
General FastTab

| Field | Description |
| HR Position No. Series | Specifies the number series used for HR Positions. |
| HR Calendar Source | Specifies the source HR calendar. |
| Applicant Nos. | Specifies the number series to use. |
| Nonworking HR Calendar Code | From the drop-down, select the calendar code for the calendar used for non-working days. |
| Expense Vendor No. | Specifies the number series to use for Employee Vendors when vendors are created from employees. |
| Use Date Worked for Appraisal Due Date | Indicates that you want to use the date of the entry as the appraisal due date. |
| Use Employee No. for Vendor | Add a checkmark to this check box to use the employee number as the vendor number when creating a vendor from employee. |
| Activate Payroll Validation | Add a checkmark to this check box to activate payroll validation. |
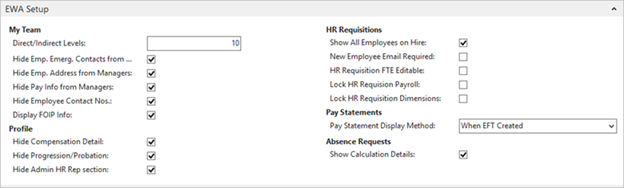
EWA Setup FastTab
| Field | Description |
| My Team Section | |
| Direct/Indirect Levels | Indicates the number of direct/indirect ‘reports to’ levels that you want to display over the portal. Enter the number in the space provided. |
| Hide Emp. Emerg. Contacts from Manager | Select this check box if you want to hide your employee’s emergency contact information from view on their manager’s portal. |
| Hide Emp. Address from Managers | Select this check box if you want to hide your employee’s home address information from view on their manager’s portal. |
| Hide Pay Info from Managers | Select this check box to hide salary/pay information from managers. |
| Hide Employee Contact Nos. | Select this check box if you want to hide your employee’s personal contact information from view on their manager’s portal. |
| Display FOIP Info | This
field is
used for
Alberta clients in accordance to Alberta’s Freedom of Information and Protection of
Privacy Act (FOIP). FOIP information includes assignment end date, probation end date, probation hours, next progression date, pay structure code, pay step, pay grade. Select this checkbox if the employee’s FOIP information should be displayed to the managers in the portal. For Alberta clients, these information should be hidden from the managers (i.e. the checkbox should not be checked). |
| Profile Section | |
| Hide Compensation Detail | Add a checkmark to this check box to not display the Pay Structure section on the Employee Center Profile page. |
| Hide Progression/Probation | Add a checkmark to this check box to not display Progression and Probation dates and hours on the Employee Center Profile page. |
| Hide Admin HR Rep Section | Add a checkmark to this check box to not display HR Representative details on the Employee Center Profile page. |
| HR Requisitions Section | |
| Show All Employees On Hire | Select this check box to indicate that each new employee requires a new email address upon hire. |
| New Employee Email Required | Add a checkmark to this check box if a new employee email is required. |
| HR Request FTE Editable | Add a checkmark to this check box to be able to edit the FTE on the HR Requisition on Employee Center. |
| Lock HR Request Payroll | Select this check box if you want to prevent the Payroll Details tab (in the HR Request) from being edited. |
| Lock HR Request Dimensions | Select this check box if you want to lock the Dimensions tab in HR Request from editing. |
| Pay Statement Section | |
| Pay Statement Display Method | Select the type of pay statement display method that you want to use. |
| Absence Requests Section | |
| Show Calculation Details | Add a checkmark to this check box to include calculation details in absence requests. |
Time Entry FastTab

| Field | Description |
| TE View First Day of Week | Select the day of the week you want to display as the first day of the week over the Time Entry portal. |
| TE Copy Hours | Select this check box if you want to enable users to copy previous timesheet hours to new timesheets (using the Time Entry portal). |
Record of Employment FastTab

| Field | Description |
| Ins. Earnings Pay Ctrl. Code | This is a lookup field linked to the Pay Control Code used for computing insurable earnings. The Payroll Control to be assigned here tracks both insurable earnings and insurable hours. |
Appraisals FastTab

| Field | Description |
| Next Appraisal Date Basis | Specify the method for determining the next appraisal date. |
Training and Registration FastTab

| Field | Description |
| Training Nos. | Specify the number series that you want to use for Training numbers. |
| Registration Closure Date Calc | Specify the formula used to determine the registration closure date. For example, "5D" would be five days from now. |
| Training Location Code | Specify the Training Location Code. |
| Training Payroll Control Code | Specify the Training Payroll Control Code. |
| Disable Training/Schedule Integrations | Add a checkmark to this check box to disable training and schedule integrations. |
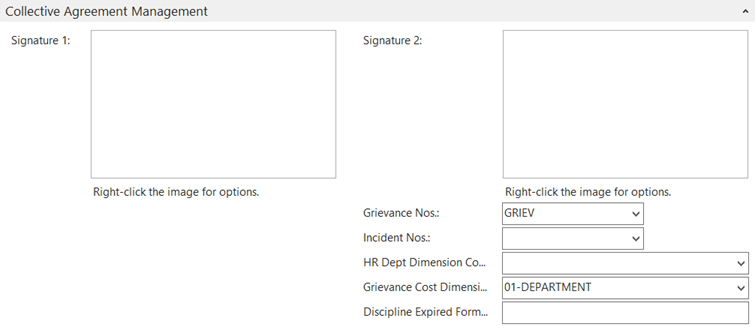
Collective Agreement Management
| Field | Description |
| Signature 1 | The signature of the first signing authority. |
| Signature 2 | The signature of the second signing authority. |
| Grievance Nos. | Specify the number series to use for grievances. |
| Incident Nos. | Specify the number series to use for incidents. |
| HR Department Dimension Combination | Specify the dimension combination for the HR department. |
| Grievance Cost Dimension Code | Specify the Grievance Cost Dimension Code. |
| Discipline Expired Formula | Specify the formula that is used to determine when discipline has expired. |
Attendance Plans
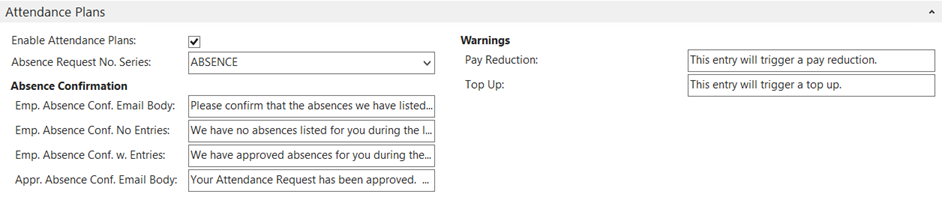
| Field | Description |
| Emp. Absence Conf. Email Body | This is the body of the absence confirmation email sent to the employee. |
| Emp. Absence Conf. No Entries | This is the message that is displayed to the Employee Center users when the employee does not have any absence entries for the period. |
| Emp. Absence Conf. w Entries | This is the message that is displayed to the Employee Center users when the employee has absence entries for the period. |
| Emp. Absence Conf. Email Body | This is the body of the absence confirmation email sent to the employee absence confirmation approver. |
| Pay Reduction | This is the message that displays when a pay reduction is triggered. |
| Top Up | This is the message that displays when a pay top up is triggered. |
Setting Attendance Management Options
The Attendance Management Setup enables you to integrate your attendance application (in which users call in absences/indicate absences, etc.) with the Human Resources Management granule. This provides automatic population of employee attendance details within NAV.
The Attendance Management and Integration functions and features are contained within a separate granule. For details setting up, configuring, and using the Attendance Management and Integration tools, refer to the Attendance Management Integration Setup and User Guide.
Creating Qualifications
You can define the required qualifications for employees to apply to positions and new hires. Depending on your configuration, you may have pre-defined qualifications created for you. Use the following procedure to add new qualifications as required.
To create qualifications codes:
- In the Search field, enter Qualifications, and select the page from the
drop-down list.
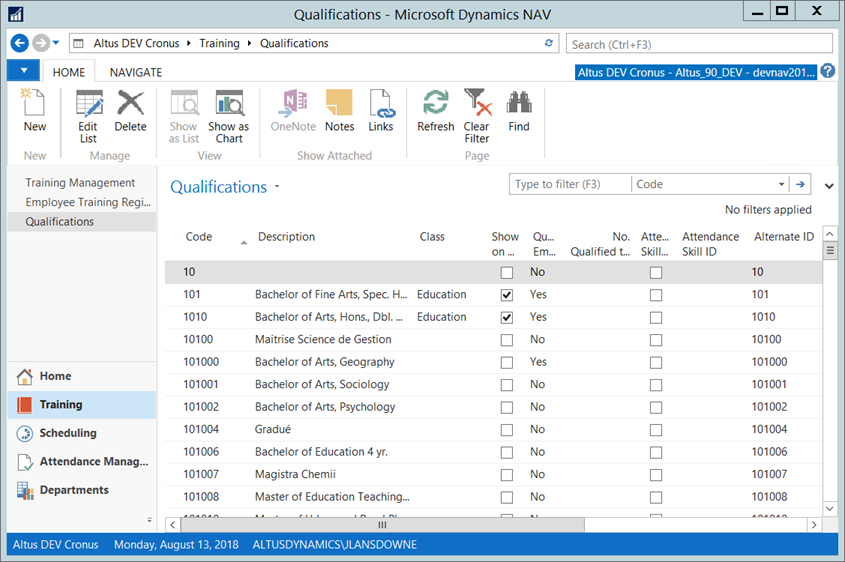
The Qualifications page displays.
- From the Home Ribbon, click New.
The Edit - Qualifications page opens displaying the pre-defined, default qualifications. - Use the following table to enter information and select from the available options to complete the qualification specifics:
| Field | Details |
| Code | Displays pre-defined code for the qualification. |
| Description | Displays a brief description for the code. Enter a description to clearly define/explain the code you created. |
| Class | Indicates the ‘type’ of qualification. From the drop-down, select the option most applicable to the qualification. |
| Intranet Access | Indicates if the qualification is available over the employee portal. |
| No. Qualified to Instruct | Indicates the number of people in the organization, including applicants that are qualified to instruct this particular course/training. This is auto-populated based on the information pulled from employee and applicant records. |
| Qualified Employees | Indicates whether this code is associated with employees. |
| Qualified Applicants | Indicates whether this code is associated with applicants. |
| Attendance Skill Export | Part of the Attendance Management and Integration
setup. Select this check box if you want to indicate that this qualification needs to be included in the export. |
| Attendance Skill ID | Part of the Attendance Management and Integration
setup. Enter the attendance skill ID assigned to the qualification. |
Creating a Cause of Absence List
Defining Causes of Inactivity Options
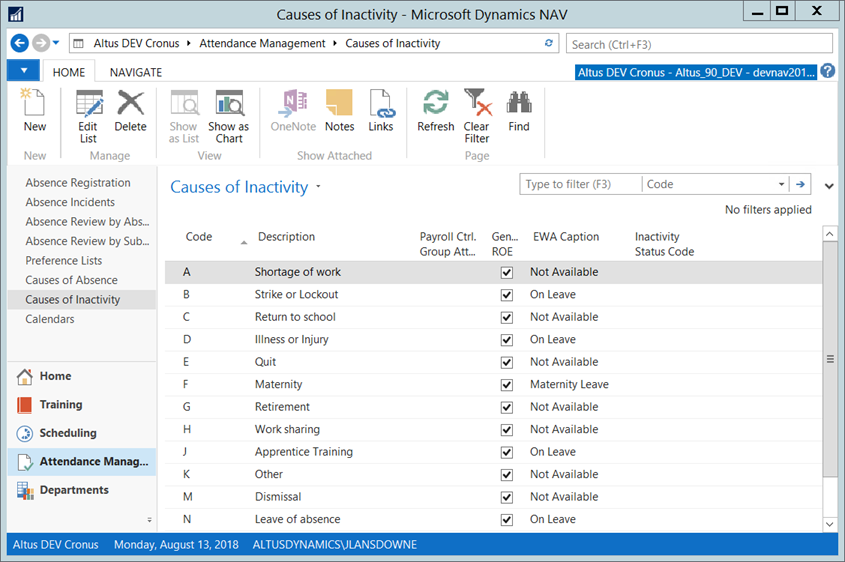
The Causes of Inactivity table enables you to set up cause of inactivity codes for your employees. These codes can then be used for tracking various reasons that cause employee inactiveness, typically items that will appear on the Record of Employment (ROE). Examples include:
- Retirement
- Long-term illness
- Leave (Maternity, Parental, Compassionate Care, etc.)
To define causes of inactivity:
- In the Search field, enter Causes of Inactivity and select the page from
the drop-down list.
The Causes of Inactivity page displays.
- From the Home Ribbon, click New.
- In the Code field, enter a code for the inactivity. (For example, in the above image, letters of the alphabet are use. However, you should define the codes based on your particular organization’s requirements/standard conventions).
- In the Description column, provide a description for the new inactivity code.
- In the EWA Caption column, enter the caption to appear over the Employee and Manager portals.
NOTE: When creating the EWA Caption for the various ‘Leave’ types, bear in mind, this information is displayed over the portal. If there are leave inactivity reasons that are subject to privacy, the ‘Leave’ EWA Caption can be set to be something generic, for example, ‘On Leave’ (you may end up with most of the ‘Leave’ descriptions used for ROE to display as ‘On Leave’). However, if there are ‘Leave’ types that are related to substitutions or reasons that are not private, the captions can reflect the inactivity reason more specifically.
- Click OK to close the page once all the required inactivity codes are added.
Defining the Grounds for Termination Options
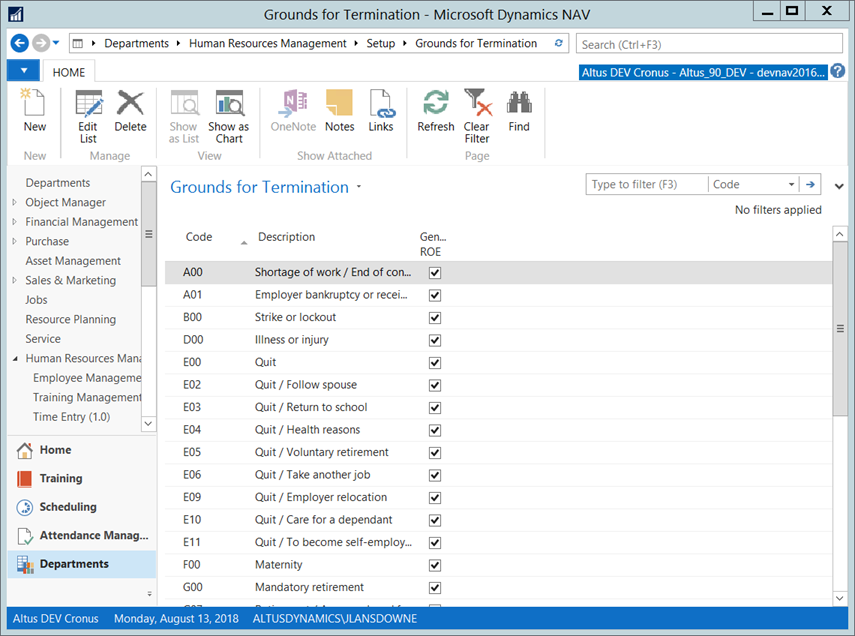
Use the Grounds for Termination table to set up grounds for termination codes for terminated employees for tracking and extract valuable information on employee loss statistics. These codes are then applied for the various reasons (Deceased, Dismissal, Retirement, Resignation, and so on) when there is an employee termination.
Once you set up the grounds for termination codes, you can assign them to the individual employees on their Employee cards when an employee is terminated and specify the date on which the termination occurred.
To add grounds for termination items:
- In the Search field, enter Grounds for Termination and select the page
from the drop-down list.
The Grounds for Termination page displays.
- On the Action Pane, click New. A new record is inserted.
- Enter a code for the termination.
- In the Description column, provide a description for the new termination code.
- In the Generate ROE column, click to select the check box if you want a Record of Employment automatically generated when this termination code is applied to an employee record.
- Click OK to close the page once all required termination codes are added.
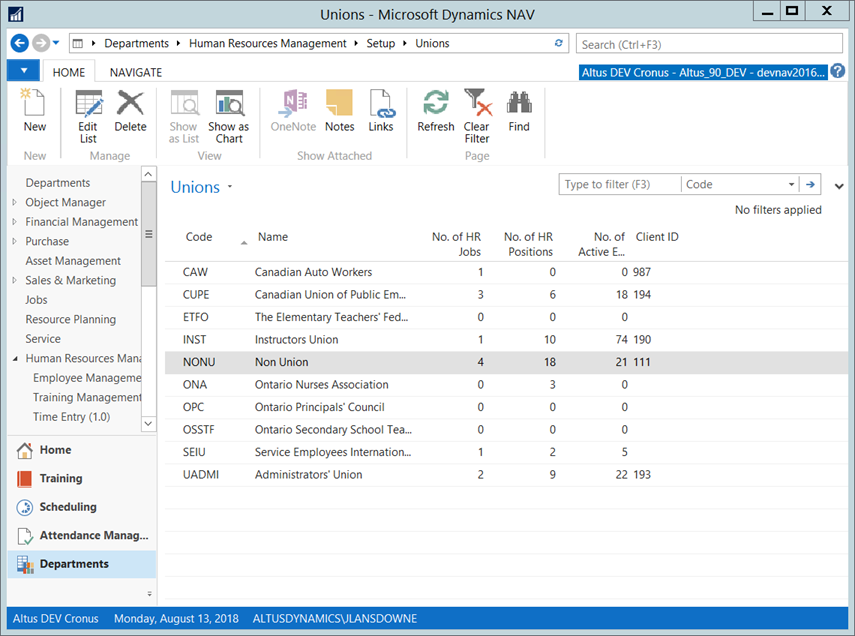
Adding Applicable Unions
If your employees are unionized, you need to record the different unions representing employees throughout your organization. After you add the applicable unions operating within the organization, you can assign the appropriate union to the unionized employees. This is useful when dealing with Collective Agreement and Health and Safety issues/incidents.
To add the unions applicable to your organization:
- In the Search field, enter Unions and select the page from the drop-down
list.
The Unions page displays.
- From the Home Ribbon, click New.
NOTE: The following steps include the ‘standard’ columns containing the basic union information. However, you can display additional columns to provide more detailed information, if required. To display more columns for including more detail for the unions, right-click over a column header and select Choose Columns. - In the Code column in enter a code for the union. Most unions have pre-defined codes that are standard and should be used to maintain consistency.
- In the Name column, provide the full name for the new union.
- In the Phone No. column (if a general contact phone number exists), enter the number.
- In the Home Page column, enter the website address for the union. This enables you to access the site directly from Human Resources Management should you need to look up specific information or policies.
- Click OK to close the page once all the applicable unions are added.
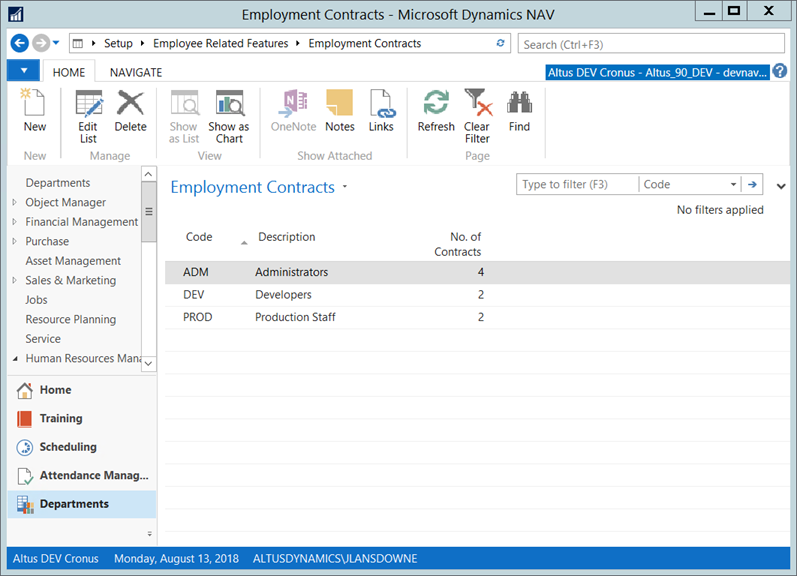
Defining Employment Contracts
In the Employment Contracts table, you can set up different contract types (for example, Admin, Clerical, etc.) for categorizing the positions used in your organization.
Once you set up the employment contract codes, you need to assign them to the individual employees on their employee cards. When you assign the employment contract codes to employees, you then see the total number of employees in the company that are employed under a certain contract in the No. of Contracts field in the Employment Contract table. This is useful for tracking the number of employees that are currently employed under each contract type.
To add the employee contracts used in your organization:
- In the Search field, enter Employment Contracts.
The Employment Contracts page displays.
- From the Home Ribbon, click New.
- On the Action Pane, click New. A new record is inserted.
- In the Code field, enter a code for the employment contract. (Some pre-defined codes may exist, if so, you can mirror the code convention used.)
- In the Description column, provide the full name for the employment contract.
As you assign employees (on their individual Employee Cards) to the applicable contract types, the No. of Contracts column updates to reflect the number of employees assigned to a contract type. - Click OK to close the page once all the required employment contract codes are added.
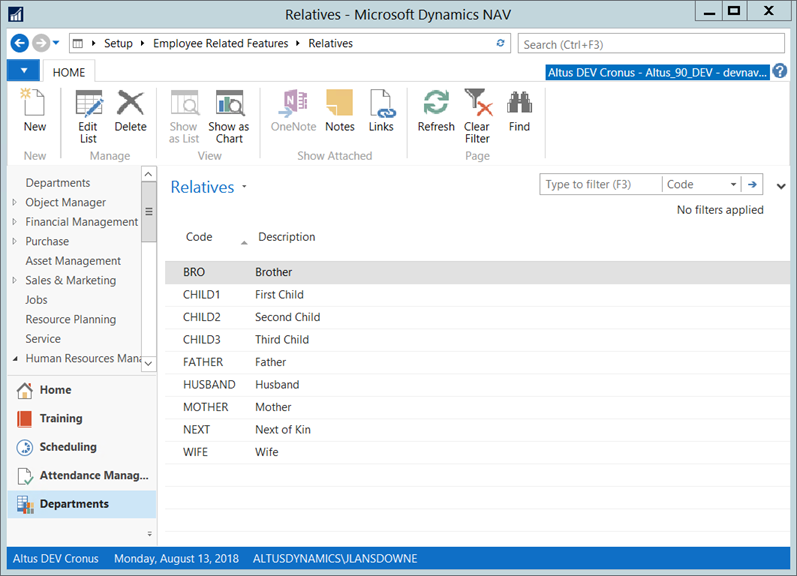
Creating Relative Fields to Link to Contacts and Benefits
The Employee Relatives table enables you to record and maintain a file of employee' relatives making information about an employee's relatives easily accessible for contact and benefit purposes. (You can also use this table to set up codes for close contacts to the employee if the employee does not have family.)
Once you define the ‘relative’ codes, you can link a list of relatives to each employee in the Employee Relative table. Employee relatives are set up for each employee on the employee's Employee card.
To add the appropriate relative fields required in your organization:
- In the Search field, enter Relatives.
The Relatives page displays.
- From the Home Ribbon, click New.
- In the Code column, enter a code for the relative. Some pre-defined codes may exist, if so, you can mirror the code convention used. For example, Child1, Child2, etc.
- In the Description column, provide the descriptive detail for the code you added.
- Click OK to close the page once all the required relative codes are added.
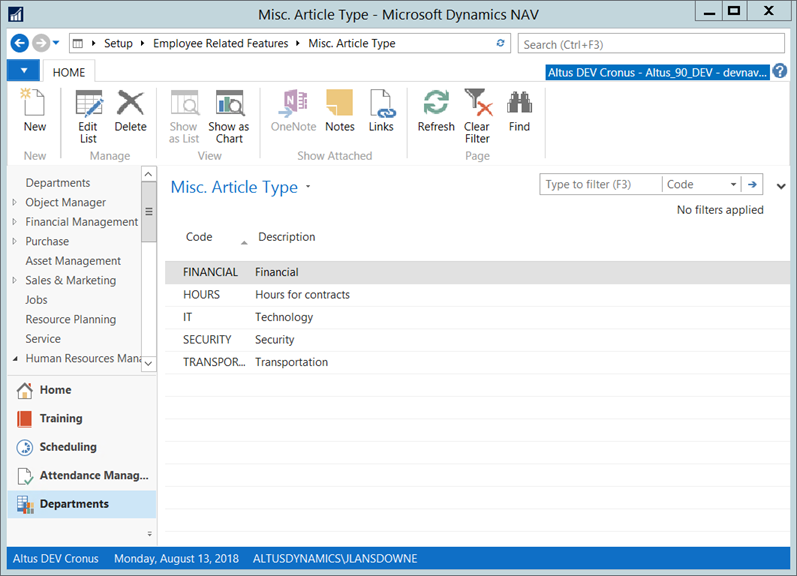
Defining Miscellaneous Article Types
The Misc. Article Types table enables you record and track miscellaneous articles that are provided to employees under specific categories. Once you set up the article types, you can assign each of the articles provided to employees to a category or type to make tracking and maintaining items easier.
To add the categories for types of articles provided to employees:
- In the Search field, enter Misc. Article Types.
The Misc. Article Types page displays.
- From the Home Ribbon, click New.
- In the Code column, enter a code for the article type. (For example, you can create the types based on departments, etc.)
- In the Description column, provide the descriptive detail for the article type code you added.
- Click OK to close the page once all the required article type codes are added.
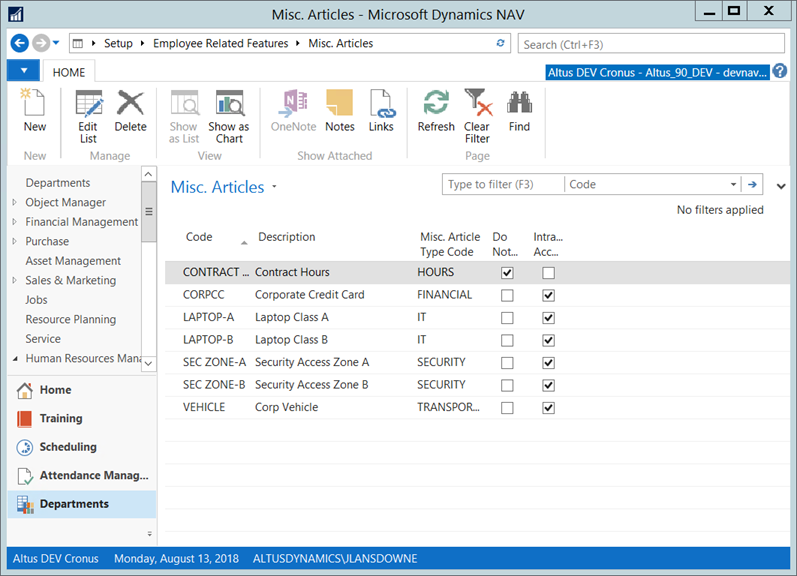
Assigning Miscellaneous Article Items
The Misc. Articles table enables you define the specific articles (keys, computers, company cars, memberships in company clubs, etc.) you provide to employees based on their position within the organization. Once you set up the articles, you can also link them to the appropriate article type. Enter up to 10 characters, numbers and letters; CREDITCARD or LAPTOP01. The code must be unique, but there is no limit to how many you can set up.
Miscellaneous articles are assigned directly to an employee. The item list is created for the employee automatically when the employee record is created and assigned to a position. The articles required for the position are defined and listed in the HR Position card.
Employees falling under the position are flagged to receive the article. The articles that the employee requires then display on the Employee card. This also serves as a means of tracking what items need to be collected when an employee is terminated. Upon termination, the ‘workflow’ indicates the items that are to be collected from the employee and assigns this task to the appropriate HR or manager resource.
To add the miscellaneous articles provided to employees:
- In the Search field, enter Misc. Article.
The Misc. Article page displays.
- From the Home Ribbon, click New.
- In the Code column, enter a code for the item.
- In the Description column, provide the descriptive detail for the article code you added.
- From the Misc. Article Type Code drop-down, select the appropriate type to which the article belongs.
- If this particular item will not be collected upon termination, click to add a check mark in the Do Not Collect On Termination column.
- In the Intranet Access field, place a check mark if you want the employee to view details of this article assignment on the Employee Portals under ‘My Assigned Items’. If you do not want employees to see these items, leave the field blank.
- Click OK to close the page once all the required articles are added.
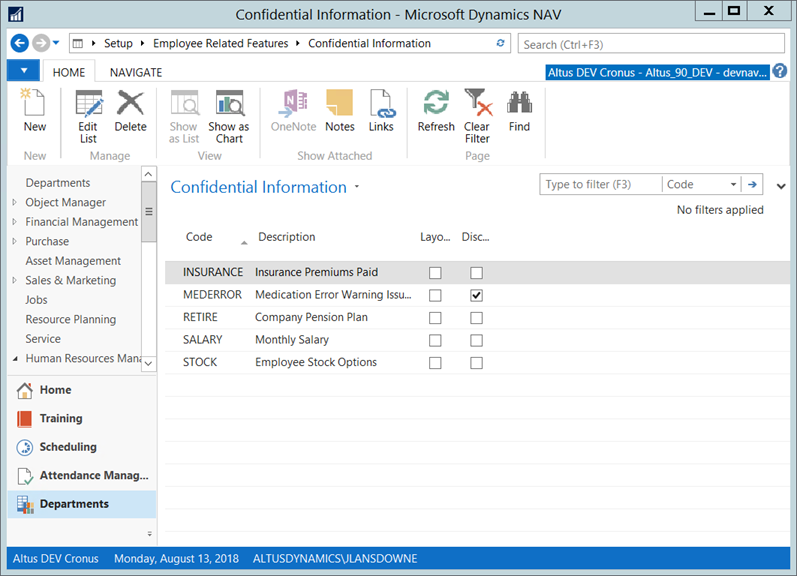
Setting up Confidential Information Codes
The Confidential Information table is where you create codes to set certain types of employee-related information (for example, disciplinary, layoff details, bonus, stock options, or other compensation details) as confidential to ensure that the information does not display on the employee record. You can then link those codes to each employee to ensure the details of a particular item are stored in the Confidential Information table and can be accessed only by users with specific permissions. Confidential codes ensure that sensitive employee information is kept private and your organization, responsible for securing this data, is protected.
To add the confidential information codes to protect sensitive employee data:
- In the Search field, enter Confidential Information.
The Confidential Information page displays.
- From the Home Ribbon, click New.
- On the Action Pane, click New. A new record is inserted.
- In the Code column, enter a code for the confidential material. (For example, monthly salary, etc.)
- In the Description column, provide the descriptive detail for the code you added.
- If the confidential code is associated with a layoff, in the Layoff column click to insert a check mark.
- If the confidential code is associated with some sort of disciplinary action, in the Discipline column click to insert a check mark.
- Click OK to close the page once all the required confidential information codes are added.
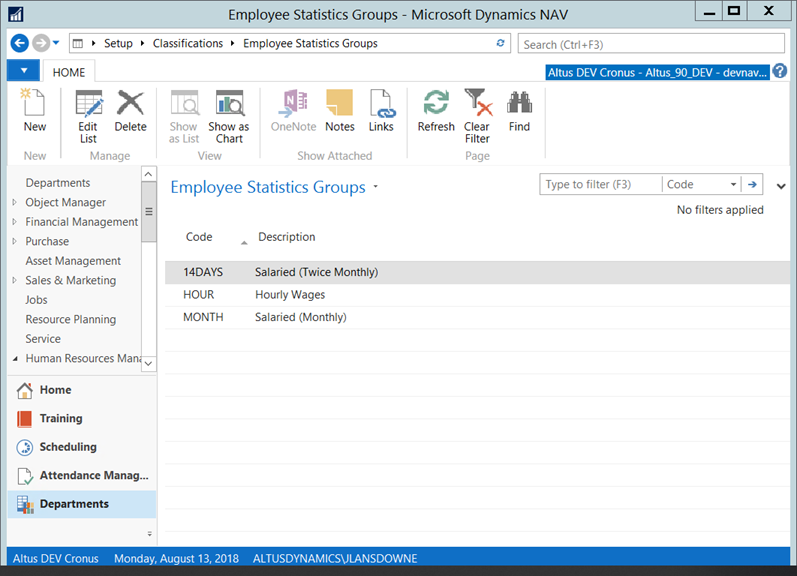
Assigning Employee Statistics Group
Use the Employee Statistics Group table to assign employees to groups for reporting or statistical purposes.
To assign employee statistics groups (payment schedules):
- In the Search field, enter Employee Statistics Groups.
The Employee Statistics Groups page displays.
- From the Home Ribbon, click New.
- On the Action Pane, click New. A new record is inserted.
- In the Code column, enter a code for the payment schedule type. For example, week, hourly, monthly, etc.
- In the Description column, provide the descriptive detail for the code you added.
- Click OK to close the page once all the applicable payment schedules used in your organization are added.
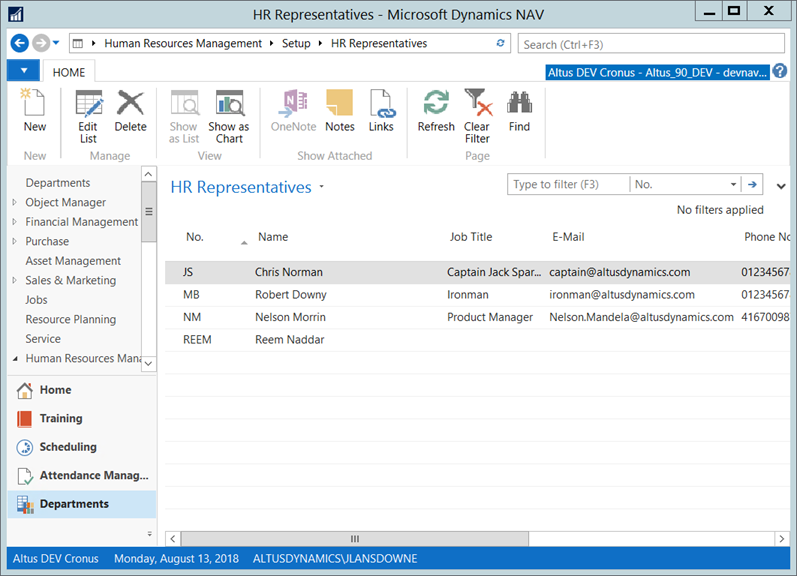
Adding Human Resources Representatives
You can add all the Human Resources representatives within your department and then assign the appropriate representative to each employee on their Employee Card.
Setting up the HR Representatives in your organization enables you to track who is responsible for each employee to ensure all human resources-related issues, incidents, and day-to-day management of employees from an HR perspective are managed and appropriate follow-up occurs.
To add Human Resources Representatives for assigning to employees:
- In the Search field, enter HR Representatives.
The HR Representatives page displays.
- From the Home Ribbon, click New.
- On the Action Pane, click New. A new record is inserted.
- In the Code column, enter the individual’s employee number or initials (as in the example above).
- In the Name column, provide the individual’s full name.
- In the Job Title column, enter the individual’s position/job title.
- In the E-Mail, Phone No., etc. columns, provide the required contact details for the HR representative.
- Close the page once all the applicable payment schedules used in your organization are added.
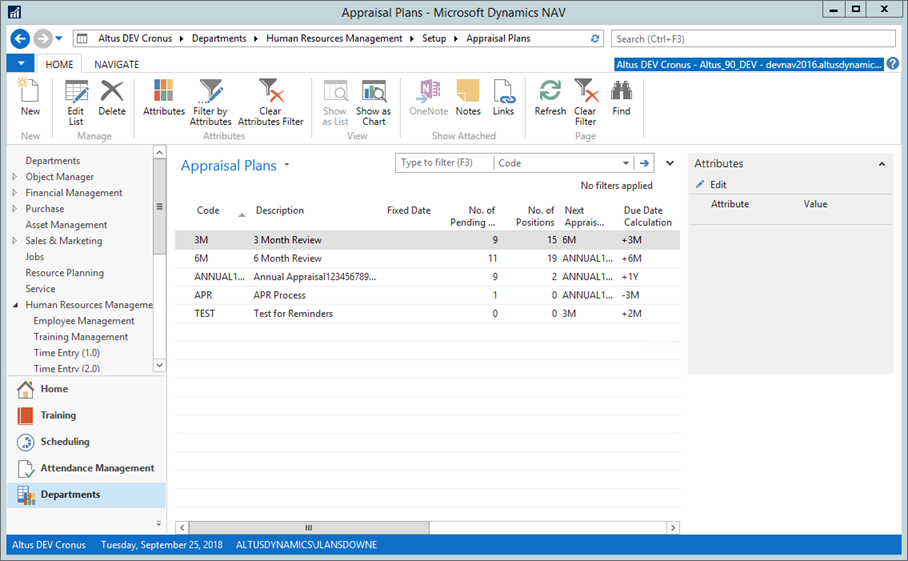
Defining Appraisal Plans (Employee Reviews)
Depending on your organization, you may have several different appraisal plan (employee review) intervals that are applied on an annual basis. The Appraisal table enables you to define all the employment review stages used within your organization and the sequence of these stages. The appraisal due dates can be calculated either by a due date (elapsed time) or by hours worked depending on the type of position.
Once the appraisal codes are created, you can apply them either directly to employees on their Employee card, or attach them to the position to initiate the hiring process to generate the appraisal records automatically.
Once they are attached to an employee they are used to record employment reviews that are completed as well as track upcoming reviews to ensure employees receive their appraisals on time.
NOTE: For more information on this topic, consult the following the ‘Appraisal Management User Guide’
To define the parameters for the appraisal plans used in your organization:
- In the Search field, type Appraisal
Plans and select the page from the drop-down list.
The Appraisal Plans page displays.
- On the Home Ribbon, click New. A new record is inserted.
- In the Code column, enter a code for the appraisal interval. (For example, 100 hours, 3 months, 6 months, annual, and so on.)
- In the Description column, provide the descriptive detail for the code you added.
- In the No. of Positions column, click the Down Arrow icon to select the positions that require this particular appraisal interval or fill in the First Appraisal Code on the HR Position card when you set up the positions.
- In the Next Appraisal Code column, select the review interval to follow this item. For example, the employee may start with a 3 month review, then go to a 6 month review, and then revert to an annual review each time after that. This sequence can be managed by setting the Next Appraisal Code on each of the records.
- In the Due Date Calculation column enter the date formula for the elapsed time for the appraisal. Use M = Month, D = Day, Y= Year. See the following section for further details. Leave this column blank if the appraisal period is calculated based on hours worked.
- In the Due Hrs. Threshold column, enter the number of hours required to reach this appraisal. When this number is reached by the employees linked to this appraisal, you receive notification to indicate what employees require a review.
- In the Due from Employment Date column, enter the number of days from an employee’s start date that the review needs to be performed.
- Click OK to close the page when you finish adding the applicable payment schedules used in your organization.
Using Data Formulas
Use the date formulas in Microsoft Dynamics NAV to direct the application on how to calculate dates. You can enter date formulas in various date calculation fields and in recurring frequency fields in recurring journals.
Here are some examples of how date formulas can be used:
- The date formula in the recurring frequency field in recurring journals determines how often the entry on the journal line is posted.
- The date formula in the Grace Period field for a specified reminder level determines the period of time that must pass from the due date (or from the date of the previous reminder) before a reminder is created.
- The date formula in the Due Date Calculation field determines how the program calculates the due date on the reminder.
The date calculation formula can contain a maximum of 20 characters, both numbers and letters. You can use the following letters, which are abbreviations, for time specifications:
- C - Current
- D - Day (s)
- W - Week (s)
- M - Month (s)
- Q - Quarter (s)
- Y - Year (s)
You can construct a date formula in three ways:
a. Current plus a time unit. For example:
- CW - Current week
- CM - Current month
b. A number and a time unit. A number cannot be larger than 9999. For example,
- 10D - 10 days from today
- 2W - 2 weeks from today
c. A time unit and a number. For example,
- D10 - The next 10th day of a month
- WD4 - The next 4th day of a week (Thursday)
You can combine these three forms if required. For example,
- CM+10D - Current month + 10 days
You can use a minus sign to indicate a date in the past. For example,
- -1Y - 1 year ago from today
Linking Employees to their Upcoming Review
Employees are automatically linked to their appraisal plans either based on the selection of a Primary Position Code on the Employee card (if not using Position Management) or through the hire process in the HR Request.
Once an appraisal is completed, the next appraisal record is automatically created through the Periodic Activity.
NOTE: The periodic activity is triggered automatically by the payroll posting process. It only needs to be run manually if you are not using Payroll Posting.
See the ‘Viewing the Appraisal Schedule for an Employee’ section for more information.
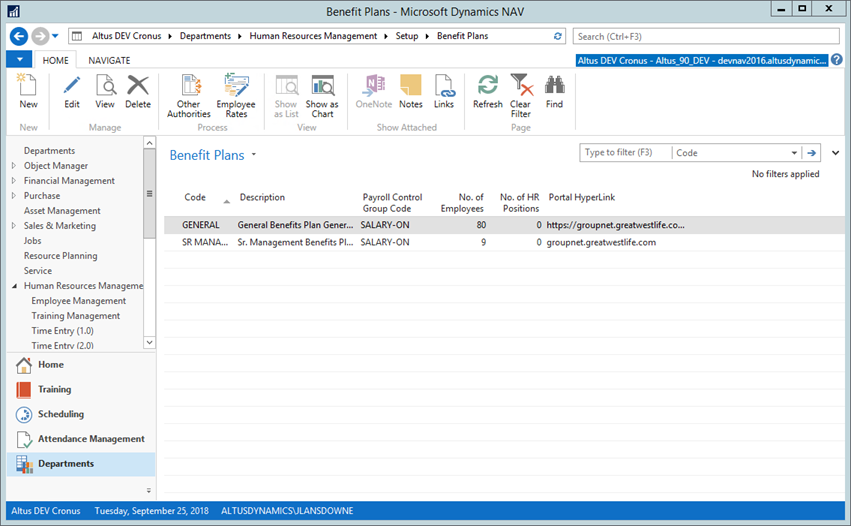
Setting Up Benefit Plan Information
Depending on the employee’s position within the organization, different benefit entitlements apply. Within your organization, you may have several different benefit plan structures. You can define the benefits plans, default rates, and payroll calculation components. These plans can then applied to employees either automatically (if using Altus Position Management) or manually when the employee is set up. Once applied, this triggers the assignment of the applicable benefit entitlements.
To add benefit plan information:
- In the Search field, type Benefit Plans and select the
page from the drop-down list.
Benefit Plan List displays.
- From the Home Ribbon, select New. A new Benefit Plan Card opens.
- In the Code field, add the Benefit Plan code. (For example, the acronym for the benefit company or the benefit coverage level, and so on.)
- In the Description column, provide the descriptive detail for the code you added.
- From the Payroll Control Group Code drop-down, select the payroll control group
to which this benefit is attached.
NOTE: For more details on the Payroll Control Groups, see the applicable Payroll documents. - In the Portal Hyperlink text box, enter the web or SharePoint link where a benefit booklet is stored.
- In the Plan Provider field, enter the name of the company.
- In the Plan Name of Employer field, enter your organization’s plan name.
- In the Plan Client No. field, enter your organizations’ plan number.
- Click OK.
Statistics for the No. of Employees, No. of Rates, and No. of Other Authorities display in this page to provide information on the number of employees that are currently enrolled in this plan, etc. The numbers are links to the details for the employees, rates, and other authorities.
Defining Other Authorities for the Benefit Plan
Depending on the benefit plan, you may need to attach/define the ‘other authorities’ applicable.
To define Other Authorities:
- In the Benefit Plan Card, on the Ribbon, click Other
Authorities.
The New - Benefit Plan Other Authorities page opens with a new record added.
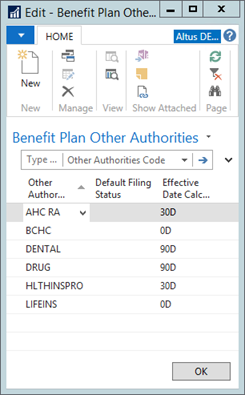
- From the Other Authorities Code field, select the code related to this benefit plan.
- From the Default Filing Status drop-down menu, select a default filing status for the Other Authority, if applicable.
NOTE: The Other Authorities data is automatically assigned to the Employee Other Authorities table once the benefit is selected. The Effective Date of the calculation is based on the HR Reason Code
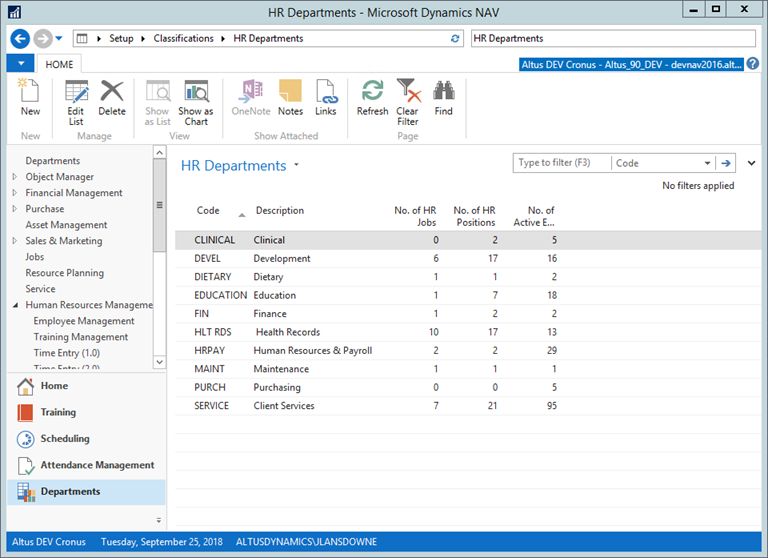
Creating HR Department Information
The HR Department table is where you define the departments within your organization. They can be linked to HR Jobs or HR positions. This allows the organization to define non-general ledger related organizational groupings in HR and monitor and report on employees by this.
To create the HR department information:
- In the Search field, type HR Departments and
select the page from the drop-down list.
The HR Departments page displays.
- On the Home Ribbon, click New. A new record is inserted.
- In the Code column, enter a code for the department (for example, HR, ADMIN, and so on).
- In the Description column, provide the full name for the department.
The No. of HR Position column displays the current number of positions that are assigned to this department. This field is auto-populated and not editable.
Defining HR Categories
You can further define the areas within your organization using HR Categories. These ‘categories’ can also be linked to HR Jobs and HR positions.
To create the HR category information:
- In the Search field, type HR Category and select
the page from the drop-down list.
The HR Category page displays.

- On the Home Ribbon, click New. A new record is inserted.
- In the Code column, enter a code for the category.
- In the Description column, provide a brief description or full name for the category.
- Click OK to close the page.
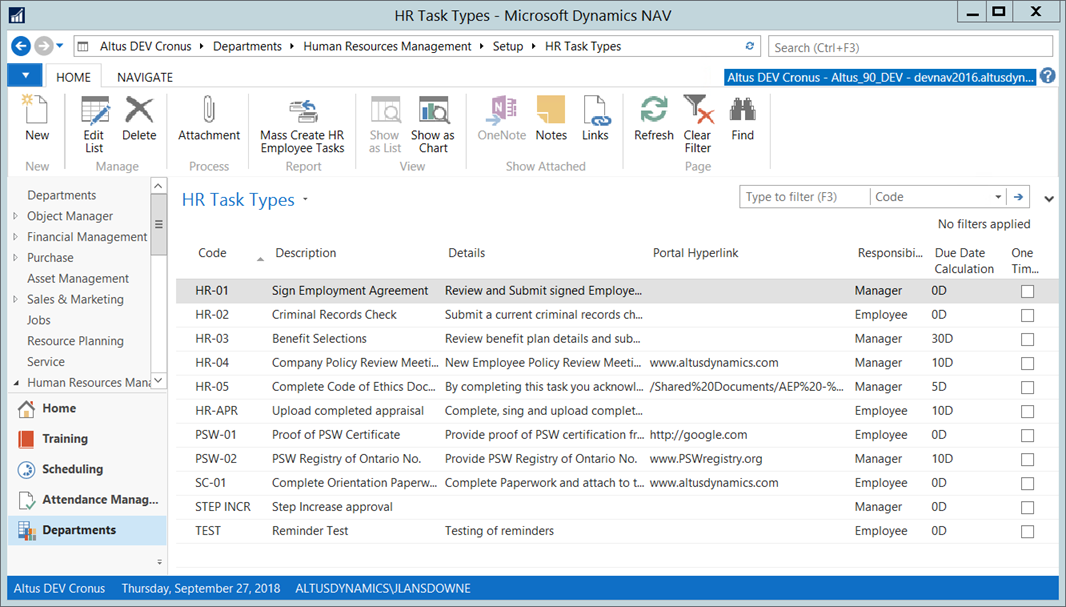
Setting Up HR Task Types
You can add the required Human Resources-related tasks that need to be completed for each new/incoming employee as well as the ongoing tasks for existing employees using the HR Task Types table. Setting up the required HR duties/task types enables you to track the important tasks that need to be completed for each employee and designate the appropriate individual’s responsible for completing the tasks, along with setting a timeline for completing these tasks.
To set up HR task types:
- In the Search field, type HR Task Types and
select the page from the drop-down list.
The HR Task Types page displays.
- On the Home Ribbon, click New. A new record is inserted.
- In the Code column, enter a code for the department (you can use a keyword or set the code based on the actual task).
- In the Description column, provide the full name or brief explanation for the task.
- In the Details column, provide a complete explanation for the task.
- In the Portal Hyperlink column, you can add the link to employee portal to a page that contains additional details, forms or other resources that may be related to the task.
- From the Responsibility drop-down, select the position/role responsible for completing the task.
- In the Due Date Calculation field, enter the date formula for elapsed time to
calculate the due date.
The due date is calculated from the start date of the position entry if using HR requests to create the task. Employees and managers can use the portal to view tasks assigned to them and mark them as completed within ‘My Tasks’ or ‘My Manager Tasks’ under Employee or Manager Tools respectively. - Click OK to close the page once all the required HR task types are added.
TIP: Tasks can be set up in groups. Considers all of the steps required in an on-boarding process then, you can set up those steps as tasks. The status of the tasks can then be monitored to track compliance and performance of individuals responsible for completing them.
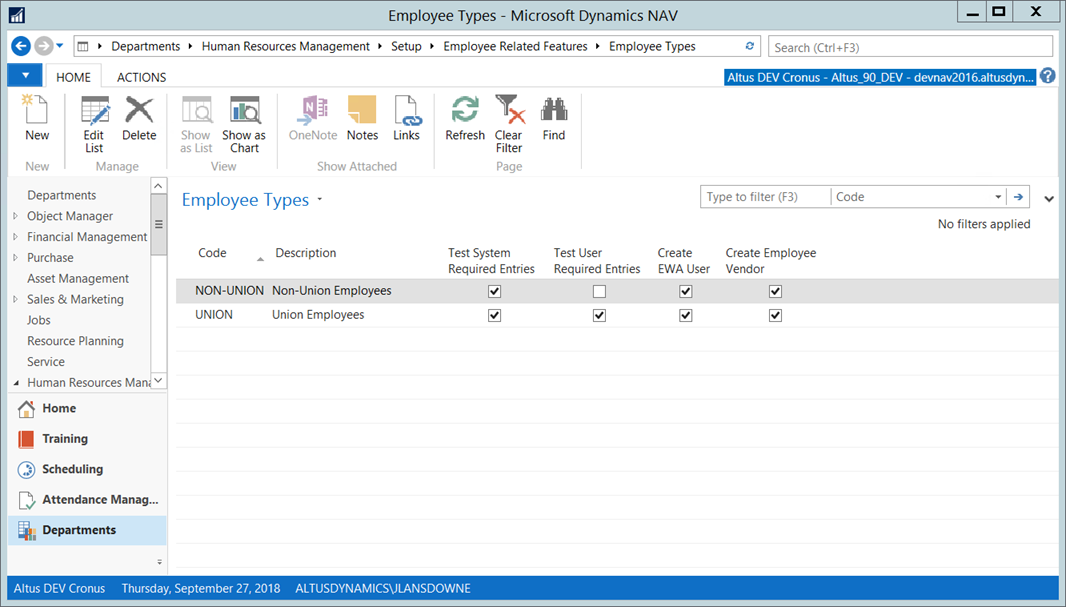
Managing Employee Types
Employee types are used to drive validation when employee records are set up. Based on the employee type, you can trigger the system to perform an automatic test to determine if certain system required fields (ones that drive payroll or specific system settings) or user required fields (fields that you can define in the ‘Required Fields’ setup under Payroll) need to be provided for a specific employee type.
To define employee types:
- In the Search field, type Employee Types and
select the page from the drop-down list.
The Employee Types page displays.
- On the Home Ribbon, click New.
A new record is inserted. - Enter the code and description for the employee type.
- Click to select the check boxes for the options you want to apply to the particular type.
- Click OK when you finish.
The following table provides a description for the fields within the Employee Types page.
| Field | Details |
| Code | Use this field to enter a unique identification code for the employee type. For example, SAL for salaried employee. |
| Description | Provide a brief description, for the code you added to the job. This is where you add the full job name. |
| Test System Required Fields | Place a checkmark in this field to flag or indicate that system required fields must be completed |
| Test User Required Fields | Place a checkmark in this field to automatically flag or indicate that the user needs to complete a user required field |
| Create EWAW User | Place a checkmark in this field to generate an EWA user
record when an employee is created using the HR Request Process. NOTE: This feature is part of Position Management and works only through the processing of an HR Request with the appropriate function, |
| Create Employee Vendor | Place a checkmark in this field to generate a Vendor record
when an employee is created using the HR Request Process. NOTE: This feature is part of Position Management and works only through the processing of an HR Request with the appropriate function. |
NOTE: Required fields are managed through the Payroll Setup, Required Fields. Consult your Payroll documentation or more information.
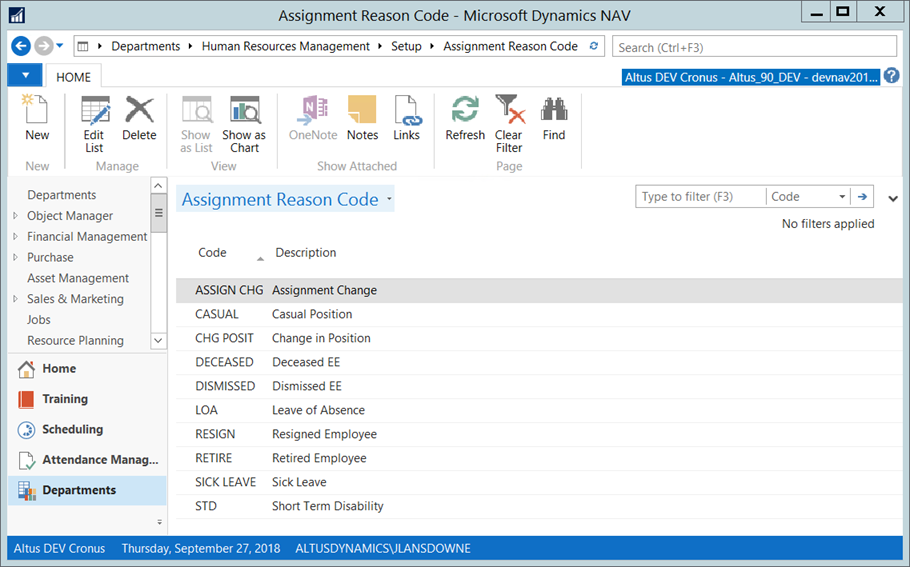
Creating Assignment Reason Codes
Assignment reason codes are used to create a list of reasons for why the employment of the employee has started or ended. They are used on the HR Request as Assignment Start Reason Code and Assignment End Reason Code.
To define assignment reason codes:
- In the Search field, type Assignment Reason
Code and select the page from the drop-down list.
The Assignment Reason Code page displays.
- On the Home Ribbon, click New. A new record is inserted.
The Edit – Assignment Reason Codes page opens. Some assignment reason codes may be pre-defined and set up for you during installation and configuration. - In the Code column, enter a code for the assignment reason code.
- In the Description column, enter a description for the assignment reason code.
- Click OK to close the page.
Creating Assignment Types
Assignment types are used to define the type of assignment and to define whether the type is permanent or temporary. When the assignment is temporary, an Assignment End Date is required within the HR Request (on the employee portal).
To define assignment types:
- In the Search field, enter Assignment Reason Type and
select the page from the drop-down list.
The Assignment Reason Type page displays.

- On the Home Ribbon, click New. A new record is inserted.
- In the Code column, enter a code for the assignment reason type.
- In the Description column, enter a description for the assignment reason type.
- Click OK to close the page.
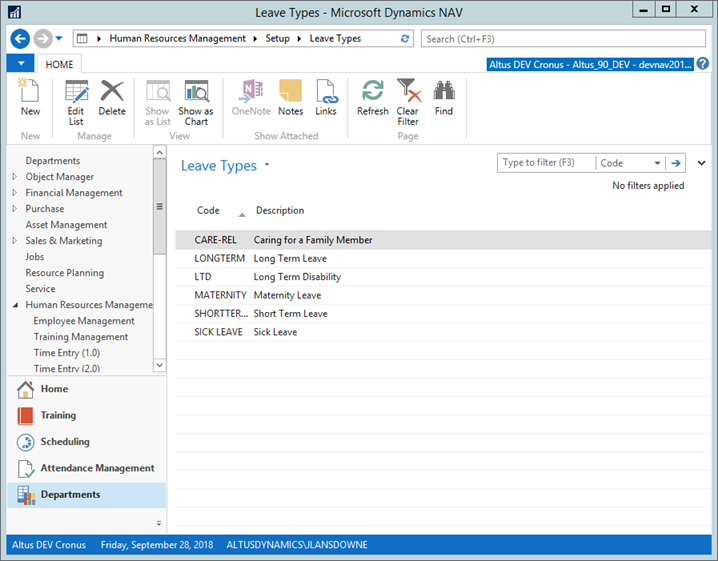
Creating Leave Types
You can define ‘leave’ types for reporting and tracking purposes. When an employee goes on leave, this enables you to track the type of leave, for example partial leave or full leave.
To define leave types:
- In the Search field, type Leave Types and
select the page from the drop-down list.
The Leave Types page displays.
- On the Home Ribbon, click New. A new record is inserted.
- In the Code column, enter a code for the leave type.
- In the Description column, enter a description for the leave type.
- Click OK to close the page.
Adding Seniority Groups
You can create seniority groups for reporting and tracking purposes. They are associated with HR Position Ledger Entries and are used to indicate either the length of their tenure or the terms and conditions of the collective agreement that their employee group has negotiated with the organization.
To define seniority groups:
- In the Search field, type Seniority Groups
and select the page from the drop-down list.
The Seniority Groups page displays.
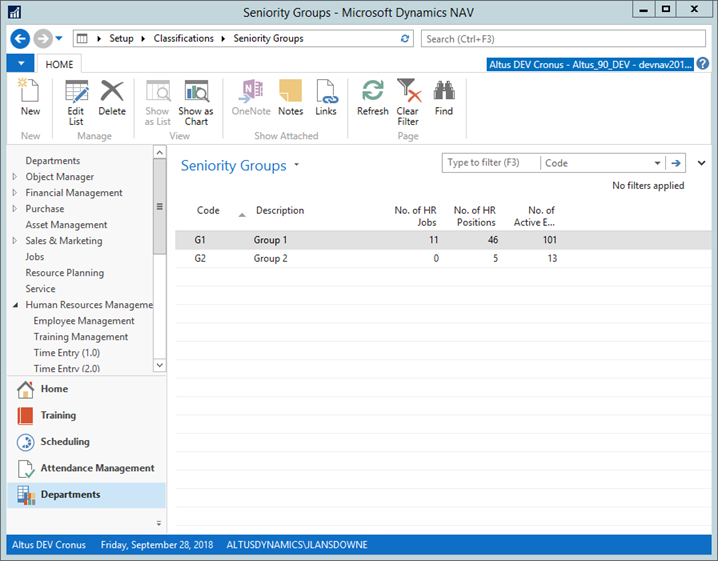
- On the Home Ribbon, click New. A new record is inserted.
- In the Code column, enter a code for the seniority.
- In the Description column, enter a description for the seniority.
- Click OK to close the page.
Setting Up Communication Tracking
Setting Up Contact Person (HR Representative) to Link to Employees
It is necessary to identify the HR person from/to whom communications are made within the organization. These representatives need to be defined so that employees/applicants have a contact to which they can communicate.
It is expected that HR representatives are also employees. It is important that the data that is common between the Employee table and the HR Representative table is synchronized. The synchronization is accomplished by adding a check mark or ‘flag’ to the Human Resources Setup form.
To set up a contact link from HR representatives to employees:
- In the Search field, type Human Resources
Setup and select the page from the drop-down list.
The Human Resources Setup page displays.
- Expand the Communication Log FastTab.
- Add a checkmark to the Employee ->HR Representation Integration
check box.
This flag directs the system to update the HR representative record when changes are made (to the common fields) to an employee record of an employee who is also an HR representative. - Click OK.
NOTE: If you already set up the HR Representatives for your organization, then you do not need to define them again here. These HR representatives can be used for linking to employees for their communications.
For details on adding HR Representatives, see ‘Adding Human Resources Representatives’.
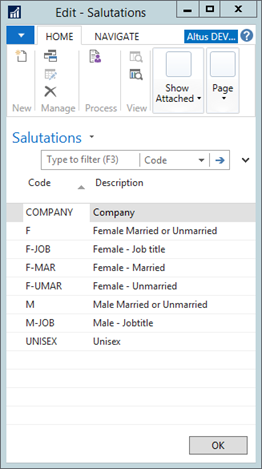
Defining Salutation Formulas
The Salutations set up functionality enables you to define multiple salutation formulas, one of which can be assigned to an employee or applicant. The salutation formulas are further delineated by language. The system can accommodate various forms of salutations that can be created (masculine (Mr.), feminine (Mrs., Miss, Ms), professional (Dr, Reverend), unisex (Dear, Hi).
For each salutation code, a formal and informal salutation formula can be defined for a language. The formula is a mixture of text and ‘replacement symbols’ (%1, %2, %3, etc.). Each replacement symbol has an option field that indicates what field each one represents. These are defined on the Human Resource Setup page.
To define salutation formulas:
- In the Search field, type Salutations and select
the page from the drop-down list.
The Salutations page displays.
- On the Home Ribbon, click New.
A new record is inserted. - In the Code column, enter a code for the salutation.
- In the Description column, enter a description for the salutation.
- Click OK to close the page.
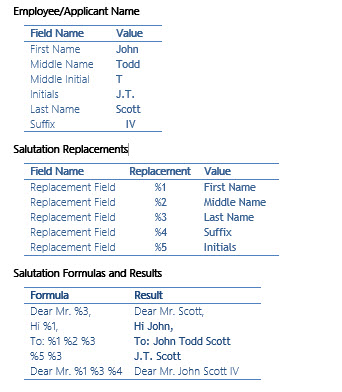
Example of Salutation Codes
The following example demonstrates the salutation functionality:
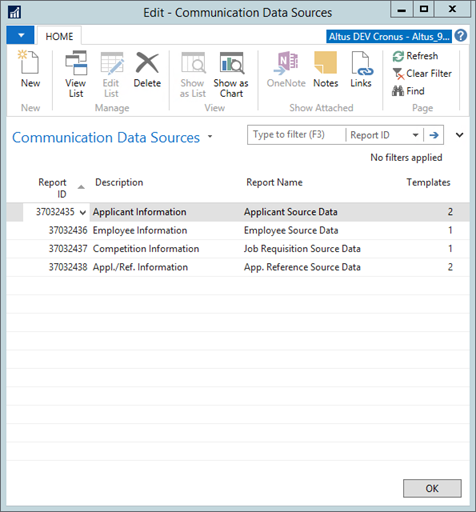
Performing the Data Source Reports Setup
Data Source Reports gather appropriate job requisition, employee, or applicant related information that is to be merged into Word documents for the purpose of communicators within these three groups. Also, each data source report can provide both a ‘Formal’ and ‘Informal’ salutation for the employee or applicant.
The Data Source Reports need to be defined on the Communication Data Sources page.
To define the data source reports:
- In the Search field, enter Communication Data
Sources and select the page from the drop-down list.
The Communication Data Sources page displays.
- On the Home Ribbon, click New.
A new record is inserted. - From the Report ID drop-down, select the applicable report ID.
NOTE: When you select the report ID and press tab, the Report Name field auto-populates. - In the Description field, enter a definition/explanation for the data source (for example, applicant information).
- In the Templates field, click the link select a template.
The View – Communication Template List opens. - Select the appropriate template to link to this data source. This is the content inserted in the report.
- Click Close. The Templates field updates to show the template is now linked.
- Click OK to close the page once all communication data sources are defined.
Creating Communication Templates
Using Communication Tracking you can to produce templates upon which communications are based. There are three categories for templates:
- Job Requisition
- Employee
- Applicant
While templates may be from any source, templates made within Microsoft Word enable you to make use of Word’s mail merge functionality. Depending upon the communication source (job requisition, employee, or applicant) of the template, various merge fields are available with Word to personalize the template for the intended recipient.
Communication templates have two purposes:
They can provide a standard format for communication with employees, applicants, and references.
They provide a consistent convention under which documents are catalogued.
NOTE: Word document templates may or may not contain merge fields. A template that does contain mail merge fields requires special handling to ensure that the appropriate data (job requisition, employee, or applicant related) is made available to complete the process of creating a communication log entry.
Multi-languages
Often organizations have employees that speak different languages making it beneficial to have the ability to maintain communication templates with documents in multiple languages. Each template may have multiple versions in different languages (one template, multiple languages). This enables you to select a document that matches the recipient’s language of choice. The data that is merged into documents must match the selected language for the template.
To create a communication template:
- In the Search field, type Communication
Templates and select the page from the drop-down list.
The Communication Templates page displays.
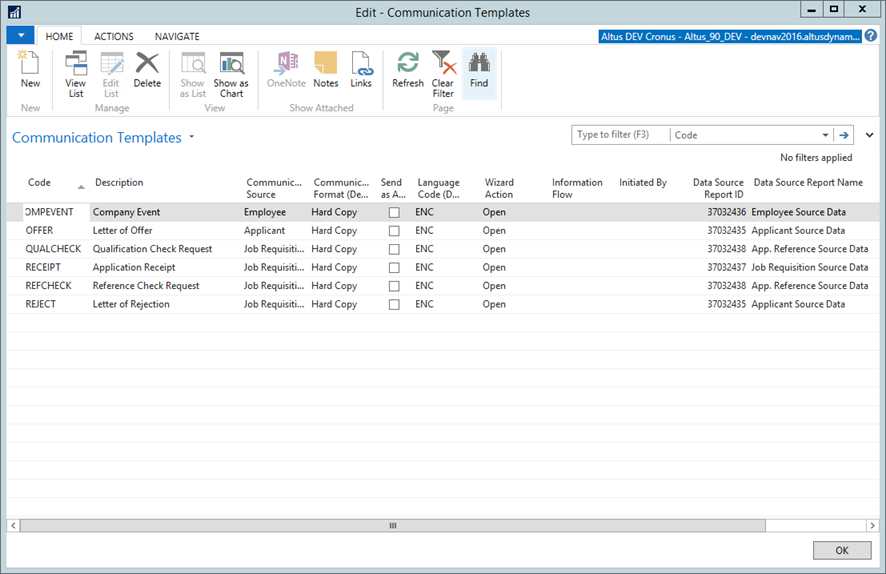
- On the Home Ribbon, click New. A new record is inserted.
- Use the following table to assist you in completing the fields:
| Field | Description |
| Code | Use this field to enter a unique identification code for the type of communication template. For example, WELCOME for on-boarding employees. |
| Description | Provide a brief description, for the code you created for the template. |
| Communication Source | From the drop-down, select the category for the communication (employee, applicant, or job requisition). |
| Communication Format (Default) | From the drop-down, select the applicable format by which to send/transmit this particular communication (Hard Copy, Email, or Fax). |
| Send as Attachment | Place a checkmark in this field to indicate you want the communication letter sent as an attachment (if sending electronically). |
| Language Code (Default) |
From the drop-down, select the default language in which this communication template is to be sent or generated. |
| Wizard Action | From the drop-down, select the action the wizard initiates when this communication template is triggered (Import or Open). |
| Information Flow | From the drop-down, select the appropriate category to which the communication template belongs/is applied (Inbound, Outbound). |
| Initiated By | From the drop-down, select the appropriate option (Us or Them). |
| Data Source Report ID | From the drop-down, select the data source report ID to merge into this communication template. |
| Data Source Report Name | This field is auto-populated based on the Data Source Report ID selected. |
| Document Created | This field is auto-populated. |
| Entries | This field is auto-populated. |