

The Payment Request list enable users to view existing requests, create new requests, copy existing requests, or create new requests from templates. Each request is given a status (the default status for a new request is Open). Users can view requests according to these status: All, Open, Pending Approval, Approved, In-Progress, Completed, Cancelled, Private Templates, and Public Templates. Users can also search for requests; either by sorting requests according to their status or by searching for specific text using the search function on each page.
Payment Requests are essentially cheque requests. They are requests that once approved are routed to the Accounts Payable department for processing.
Creating a Payment Request is very similar to creating a Purchase Requisition. However, there are a few differences. Refer to the Creating Purchase Requisitions section of this document for information on working with Payment Requests. Only the differences between Purchase Requisitions and Payment Requests are provided here
Editing General Information about a Payment Request
To create a payment request:
1. From the menu bar click on Finance and Purchasing.
The Finance & Purchasing options will drop-down, displaying all the links to which you have access.

2. Select Payment Requests.
The Payment Request list opens.
3. Click the +New icon.
The Payment Request page for the new request opens with the Details tab expanded (a payment request number is automatically assigned).
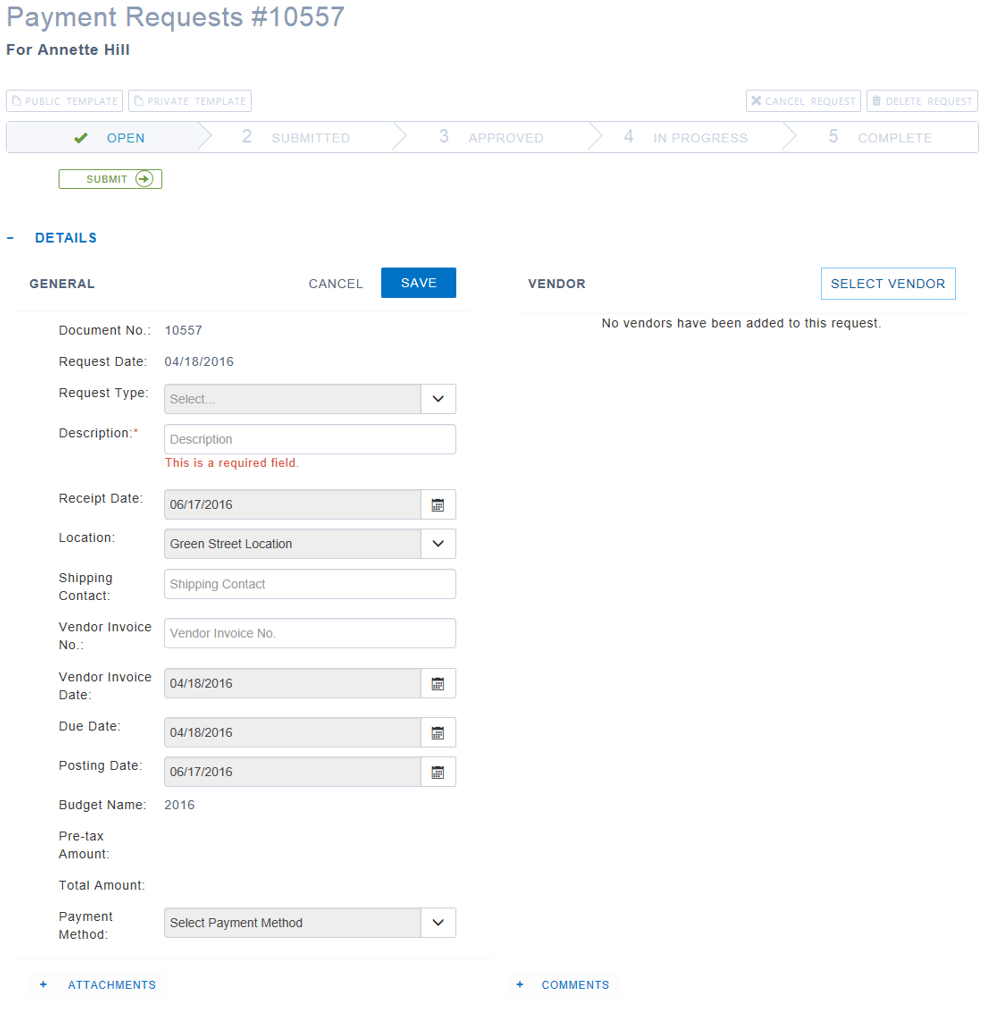
The following table provides details for the fields in the General section of a Payment Request Details tab.
|
Field Name |
Details |
|---|---|
|
Document No. |
This field is an automatically generated consecutive number. |
|
Request Date |
This field defaults to the date when the Payment Request is created. |
|
Request Type |
This filed displays the type of request. Users can select the type from the drop-down. |
|
Description* |
This field displays a brief description of the Payment Request. This is a mandatory field. The description is included in the approval email and helps the approver determine what the request is for. |
|
Receipt Date |
This field displays the receipt date. Enter or select the date on which the Payment Request must be received. |
|
Location |
This field defaults to your primary location, but it can be changed. Select the appropriate location for the Payment Request from the drop-down. |
|
Shipping Contact |
This field contains the name of the individual for whom the request is being made or who will receive the shipment. This person is used as contact if the Purchasing department or the vendor require further details, etc. |
|
Vendor Invoice No. |
This field contains the Vendor’s Invoice No. if that number is available. NOTE: Depending on a company's particular setup/configuration, this field may be madatory. |
|
Vendor Invoice Date |
This field contains the vendor invoice date. |
|
Due Date |
This field contains the due date of the vendor’s invoice. |
|
Posting Date |
This field defaults to the date selected in the Receipt Date field and is the accounting date used for budget checking. |
|
Budget Name |
This field displays the budget name that corresponds to the Posting Date selected above. |
|
Pre-tax Amount |
This field displays the cost of items or expenses included in the Payment Request before taxes are calculated. |
|
Total Amount |
This field displays the total cost of items or expenses including taxes. |
|
Payment Method |
This field displays the payment method which can be selected from the drop down. |
Selecting a Vendor
Vendors can be added to Payment Requests by following the same steps as outlined for Purchase Requisitions (see Selecting a Vendor). The difference is that Payment Requests are specific to only one vendor. Once users add a vendor to the Payment Request, the Add Vendor tab disappears.
Adding an Attachment to a Payment Request
There is very little difference between Purchase Requisitions and Payment Requests. For information and steps on attaching a file to a Payment Request, see Adding an Attachment to a Purchase Requisition.
Adding Comments to a Payment Request
There is very little difference between Purchase Requisitions and Payment Requests. For information and steps on adding internal and external comments to a Payment Request, see Adding Comments to a Purchase Requisition.
Working with Payment Request Lines
There is very little difference between Purchase Requisitions and Payment Requests see Creating a New Purchase Requisition for the main steps.
Using Gross Unit Cost
The Expense types can be set to use Gross Unit Cost for Payment requests.
In Web Apps, open a Payment request and add a line by clicking on the Expense button. Select the expense from the Expense list and add it to the request. The Gross Unit Cost or the Unit Cost will display depending on whether the Expense type is set to use Gross Unit Cost or Unit Cost.

Viewing the Budget Details
There is very little difference between Purchase Requisitions and Payment Requests. For information and steps on viewing the budget details for the request, see Understanding the Budget Status.
Selecting an Alternate Approver
There is very little difference between Purchase Requisitions and Payment Requests. The functionality around changing Approvers is the same. For steps see Selecting an Alternate Approver.
Changing the Status of a Payment Request
Follow the same process as outlined in purchase requisitions for changing statuses. See Submitting a Purchase Requisition.