

Understanding the Project Card
The Project card is the central repository for all information related to the project. In the Project card users can define details about the project, view or update its status or other classifications, keep notes or documents related to a project, maintain details about funding for the project, manage project tasks, and maintain a list of all contacts involved with the project.
The Project card includes two FastTabs: General and Comment Sheet. From the Home ribbon, you have access to the Payments & Funding page, Tasks/Deliverable page, Project Contacts FastTabs, and a Project Panel. The following is a detailed description of each tab and links in the Home ribbon.
General FastTab and Comment Sheet
The General FastTab in the project tab provides essential details about a project such as its title, primary contact name, start and end date.
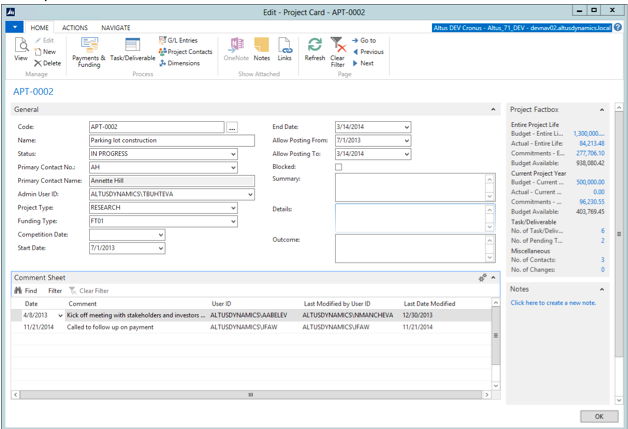
The following table provides detail for each of the General FastTab fields:
| Field Name | Details |
|
Code |
Enter the code used to identify the project here. |
|
Name |
Enter the name of the project here. |
|
Status |
Select the status of the project here. Drill down to view the list of statuses. |
|
Primary Contact No. |
Select the contact no. for the contact person for this project. Drill down to view the list of contacts. |
|
Primary Contact Name |
This field displays the name of the person that corresponds with the primary contact no. |
|
Admin User ID |
Select the user ID for the administrator responsible for this project. Drill down to view the list of administrators. |
|
Project Type |
Select the type of project here. Drill down to view the list of project types. |
|
Funding Type |
Select the type of funding for the project here. Drill down to view the list of funding types. |
|
Summary |
Enter a summary description of the project here. |
|
Details |
Enter details about the project here. |
|
Outcome |
Enter any outcomes for the project here. |
|
Competition Date |
Use this field to track the data of the Competition or application process for the Project. This is typically used for tracking of pre-awarded grants or projects. |
|
Start Date |
Select the start date for the project here. |
|
End Date |
Select the end date for the project here. |
|
Allow Posting From |
Select the date when you want to allow transactions to start for this project. This is typically the same as the Stat Date but if you want to accept some transactions before the official start date of the project. This value defaults from the Start date |
|
Allow Posting To |
Select the date after which changes can no longer be made to the project here. The date defaults from the end date. |
|
Blocking |
Check this box to mark this project as blocked and prevent and further transactions to it. |
|
Comment Sheet |
Use these fields to enter and keep track of comments related to the project |
Project Payment Funding
The financial information related to the project can be viewed in the Project Payment Funding page.
To access the Project Payment Funding page:
- In the Home ribbon, click Payments & Funding.
The Project Payment Funding page displays.
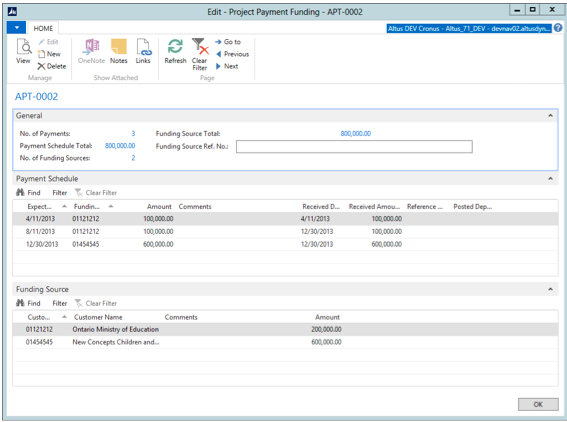
- The following table provides detail for each of the Project Payment Funding page fields.
| Column Name | Details |
|
No. of Payments |
This is a flow field that shows the number of payments made on the project. |
|
Payment Schedule Total |
This is a flow field that shows the total amount of payments on the project. |
|
Number of Funding Sources |
This flow field shows the number of funding sources. |
|
Funding Sources Total |
This flow field displays the total amount received from all funding sources. |
|
Funding Source Ref. No. |
Use this field to provide a reference number for the funding source. |
Payment Schedule FastTab
Use this section to enter information about the expected payments for the project.

The following table provides detail on each of the Payment Schedule fields:
| Column Name | Details |
|
Expected Payment Date |
Enter the expected date of payment here. |
|
Funding Source Cust. No. |
Enter the no. that corresponds to the customer here. |
|
Amount |
Enter the amount of the payment here. |
|
Comments |
Enter any comments here. |
|
Received Date |
Enter the date on which the payment was received here. |
|
Received Amount |
Enter the payment amount received here. |
|
Reference No. |
Enter the reference no. on the invoice here. |
|
Posted Deposit No. |
Enter the deposit no. here. |
NOTE: Payment Schedules are automatically updated with the deposit process. If a deposit is made that is a fulfillment of a funder’s payment commitment, a user must link the transaction scheduled payment with the deposit by updating the received information manually on this Payment Schedule sub section.
Funding Sources
Use this section to outline a single or multiple funding source(s) for the project. If the funding source is external, you can link the line to a Receivables Customer and input the amount that they have committed to fund. If the funding source is internal, you can enter information in the Comments field and input the amount of that funding.

The following table provides detail about each of the fields in the tab:
| Column Name | Details |
|
Customer No. |
Select customer number from the drop down list. |
|
Customer Name |
This flow field is automatically filled once you select the customer number in the previous column. |
|
Comments |
Enter any comments here. |
|
Amount |
Enter payment amount received here. |
Note: Although this section allows a user to select a customer, this selection is for informational purposes only. If an invoice is to be generated and sent to the Funder, the user will need to follow standard receivables invoicing procedures to generate the invoice.
Project Task Deliverables Page
The Project Task Deliverables page is used to record the tasks to be completed as part of the project. Users can select the tasks from a list of predefined tasks and deliverables. They can keep track of what tasks and deliverables have been completed by entering the Required By Date and Delivered Date.
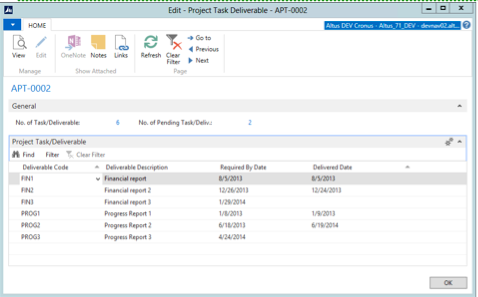
The following table provides detail for each of the Tasks & Deliverables page columns.
| Column Name | Details |
|
Deliverable Code |
Enter the code associated with a type of task or deliverable here. |
|
Deliverable Description |
Enter the description of the type or deliverable here. |
|
Required by date |
Enter the date by which the task or deliverable have to be completed |
|
Delivered date |
Enter the date on which a task or deliverable have been completed |
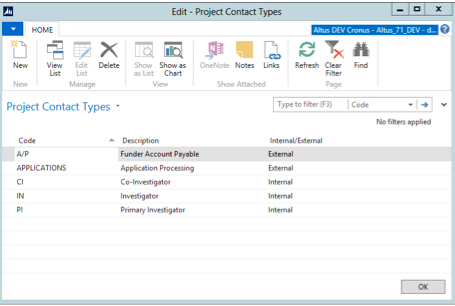
Project Contact Types
The Project Contacts Types page provides space for you to keep track of project contacts, as well as classify them into either internal or external contacts.
The following table provides detail for each of the Project Contacts table fields.
| Column Name | Details |
|
Code |
Enter the code of the contact here. |
|
Description |
Enter the description of the contact here |
|
Internal/External |
Specify whether the contact is internal or external |
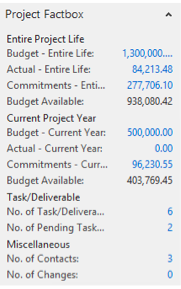
Project Panel
The Project Panel gives an overview of the financial or budgetary information about the project and additional information that is relevant to the project. The fields are not editable in the panel.
Creating a New Project
To create a new project:
- In the navigation pane, select Project Tracking. Click on Projects at the top of the navigation pane.
The Projects List displays.
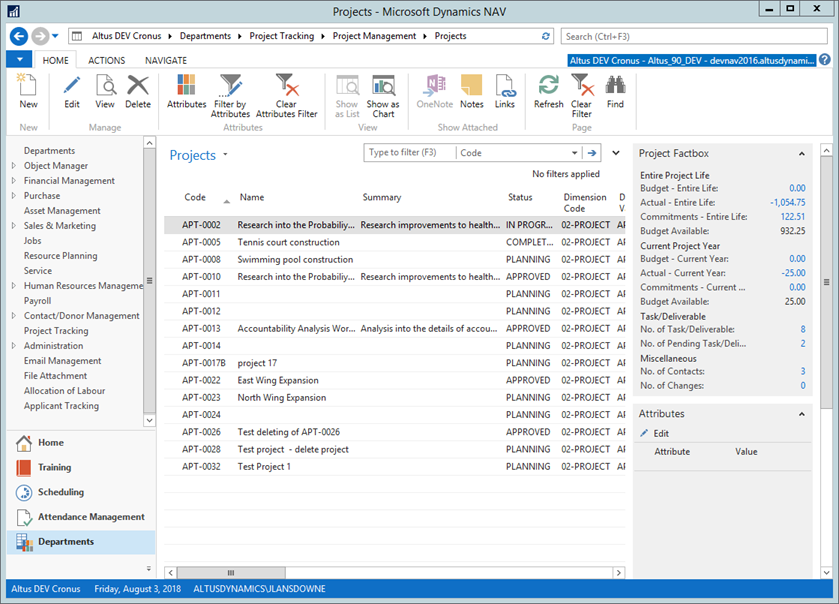
- In the Home ribbon, click the New icon to create a new project.
The system displays a blank project card. - Click the ... button in the Code field to select a code from a list of number series to assign a code, or simply click or tab out of the field to have the system use the default number series to assign a code to the project.
- Continue filling out the appropriate data on each of the tabs of the project card (see Understanding the Project Card for information about each tab).
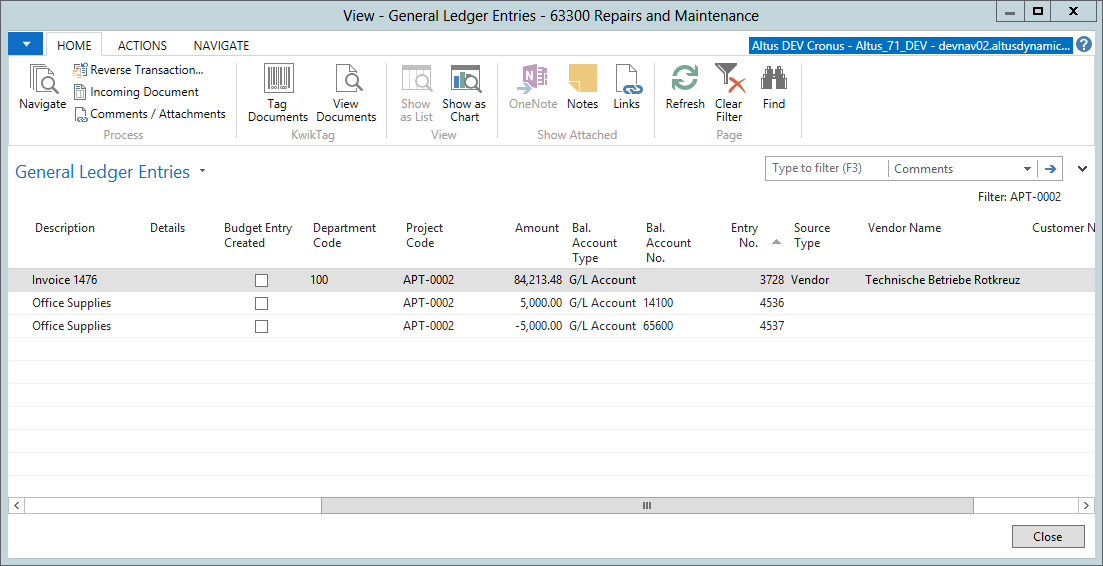
Viewing G/L Entries Related to the Project
You can view all G/L Entries related to this project directly from the Project Card.
To access the G/L Entries:
- In the Home ribbon, click G/L Entries.
The G/L Entry page displays. Data is filtered by the dimension code linked to the current project card.
Attaching Documents to a Project using Links
Electronic documents or files of any type can be attached to the Project Card and made available to any user. By having documents stored centrally with the Project card, organizations can ensure that important information is always backed up and accessible to individuals who need access to it.
To attach a document to a project, follow these steps:
- In the Project Card, in the Home ribbon, click Links.
The Links page displays. - In the top left corner, click the
 icon and select the New option to create a new link.
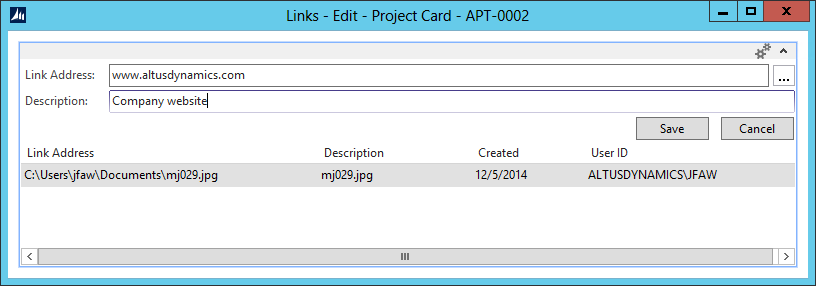
- Type in a Link address and Description and click Save.
To view an attached document, follow these steps:
- In the Project Card, in the Home ribbon, click Links.
- Place the cursor on the document you wish to see.
- Click the
 icon in the line to display the document.
Attaching Additional Dimensions to a Project
Additional dimensions can be attached to a project. When a user attaches the additional dimensions to the Project Card, the dimensions are added to the project dimensions as reporting dimensions. Reporting dimensions are attached to the transaction at posting (not at time of data entry) and are used for reporting purposes on posted entries.
To attach additional dimensions to a project:
- In the Project Card, in the Home ribbon, click Dimensions.
The Edit Dimension Set Entries page displays.
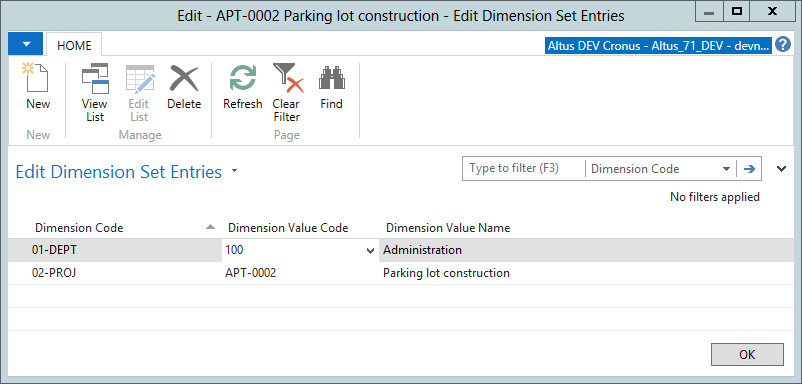
- Drill down in the appropriate Dimension Code and Dimension Value Code line to edit a dimension.
- To add a new dimensions, click New in the Home ribbon and select the Dimension Code and Dimension Value Code from the drop down lists.
Creating a Financial Analysis Dataset
If Project Financial Information is deployed over the Financial Analysis Portal, details about the Project can be automatically transferred to a dataset.
To transfer details to a dataset:
- In the Project Card, in the Actions ribbon, click Create DataSet.
The Project Create DataSet page displays.
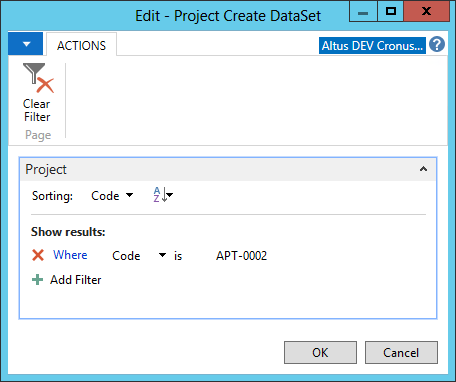
- Select the proper filters and click OK. A dataset will be created with the Project Code and Description and Default Starting and Ending dates for the Project.
NOTE: Review instructions for setting up Datasets in the Financial Analysis – Setup and Administration Guide for more details about managing datasets and assigning them to users. Datasets need to be attached to EWA users in the normal way.