

Master Records are things in the database like vendors, items, employees, g/l accounts, customers, and fixed assets. The following article explains how to use attributes to track additional data related to certain master files.
For information on importing attributes, see How to Import Attributes.
Overview
Attributes enable you to track additional data related to certain master files. Attributes are typically physical characteristics that you add to items– for example, color, model year, and so on. Users can quickly search on these attributes.
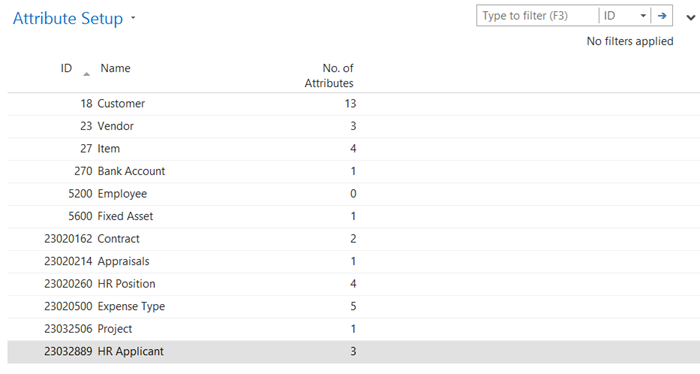
For a list of supported attributes, access the Attribute Setup list in Microsoft Dynamics NAV.
Viewing and Creating an Attributes
- Access the Attribute Setup page. In the Search field, type Attribute Setup and then select the page from the drop-down list.
The Attribute Setup page displays a list of all attributes, organized by page.
- To view the defined attributes for a particular page, select the page and from the Ribbon click Attributes.
The Edit Attributes Page displays.
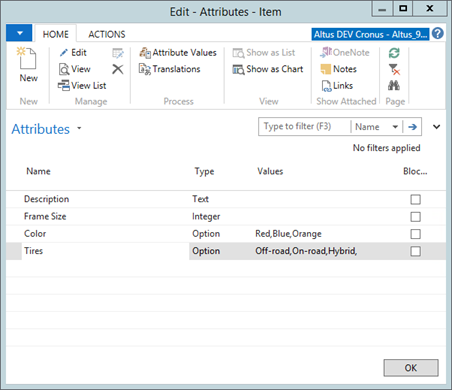
- To edit an existing attribute, from the Ribbon click Edit.
- The Edit Attribute Page displays. Modify the attribute as needed.
- To add a new attribute, from the Ribbon click New.
The New Attribute Page displays. - Do the following:
- Provide values for the Name and Type fields. Valid types are: text, data, date, option integer, and decimal.
- Click OK when finished, or click OK and New to save this attribute and create another.
Note: You can hide item attributes that are no longer in use by adding a checkmark to the Blocked checkbox.
- If you are creating attributes of type Option, specify the possible values. From the Ribbon, click the Actions tab and then click Attribute Values.
The Attribute Values page displays.
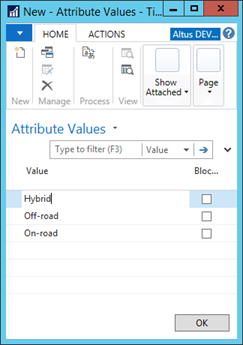
- Click New and in provide the attribute value text in the Value field. Repeat this step for every attribute value that you want to add.
- Click OK.
Assigning Attributes
In the following example, attributes are assigned to a particular item, but this example works for all master record types (vendors, items, bank accounts, employees, and so on).
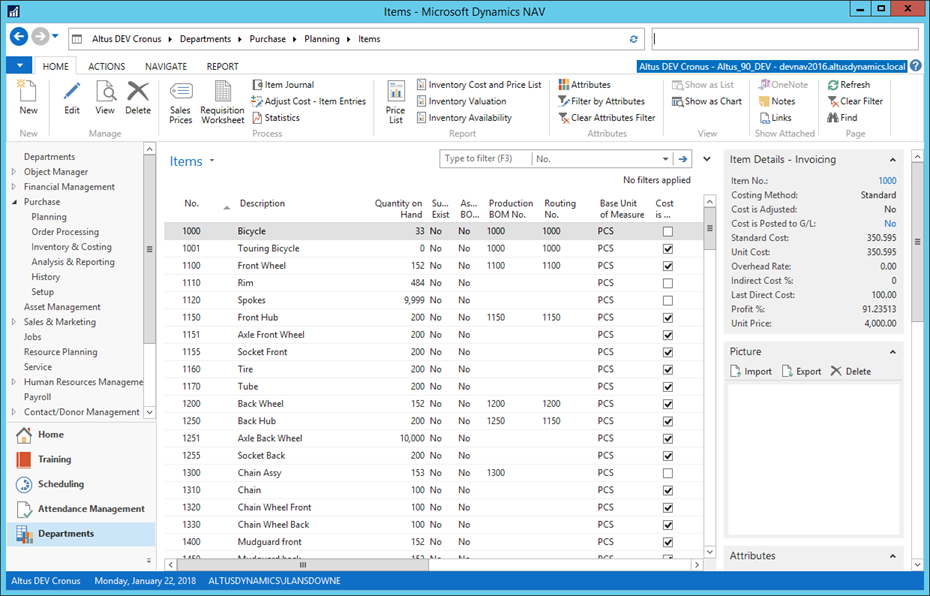
- Open the page that you want to assign attributes to. For example, open the Items list. In the Search field, type Items and then select the Item list from the drop-down list.
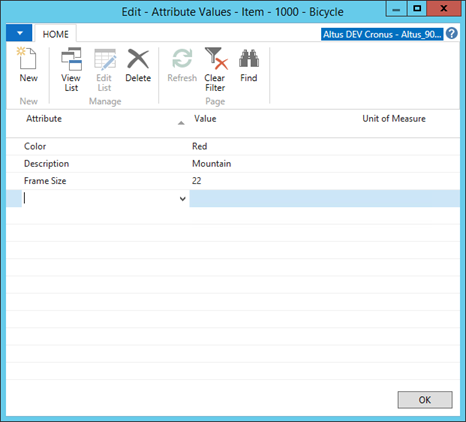
- Select the item that you want to assign attributes to, and then from the Ribbon click Attributes.
The Attributes Values page displays.
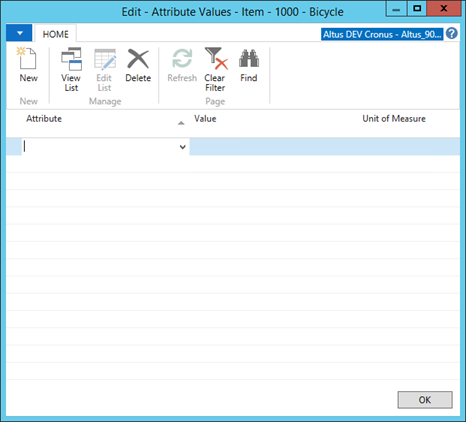
- In the Attribute field, choose an attribute that you want to assign to this item from the drop-down list.
- In the Value field, choose an attribute value.
- Repeat steps 3 and 4 for each attribute that you want to assign.
- Click OK.
Filtering on Attributes
You can filter a Page based on a particular Attribute value.
To filter based on attributes:
- Open the page that you want to filter. For example, the Items page.
- From the Ribbon, click Filter by Attributes.
The Filter by Attributes page displays.
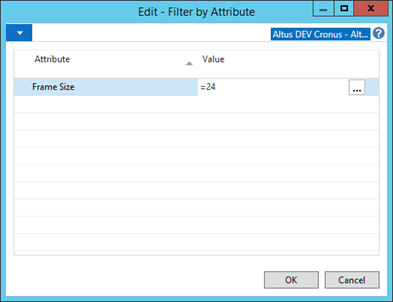
- In the Attribute column, choose the attribute that you want to filter on from the drop-down list.
- Click the AssistEdit button.
The Specify Filter Value page displays. - In the Condition field, select an operator from the drop-down list. For example, “= Equals”.
- Provide a value that you want to filter on in the Value field.
- Repeat steps #3-6 for every additional attribute that you want to filter on.
- Click OK to return to the Filter by Attribute page.
- Click OK to filter your results.
- You can remove the filters from your results by clicking Clear Attributes Filter from the Ribbon.