

Rather than cash receipts journals, you can use the deposit function as an alternate way to record the collection of funds. With deposits you can create a deposit transaction that matches your bank deposit slip and facilitates smooth reconciliation. Follow these steps to post entries using deposits.
Creating a new deposit batch
- From your Home page, go to Cash Management --> Deposit and select the batch you want to work with.
- If required, you can create a new batch by selecting New on ribbon to generate following screen:
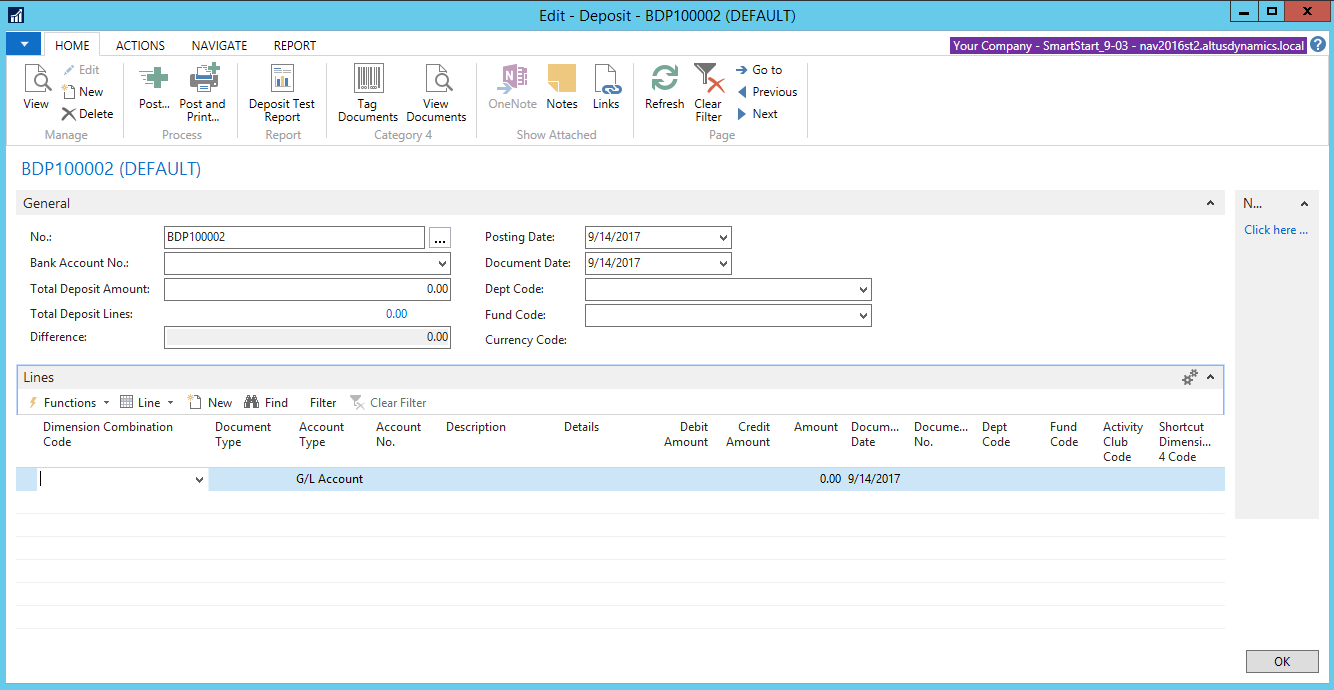
Complete the General fast tab
- In General fast tab you will enter following information that will become the header of your document:
| Field Name | Details |
| No. | The serial No. will auto populate when you move to the next field depending on No. Series setup. |
| Bank Account No. | Select the bank account where the deposit is made. |
| Total Deposit Amount | The total sum of all checks being deposit that matches the bank slip. |
| Total Deposit Lines | The amount will auto populate when you enter lines below. |
| Difference | The system will update the balance remaining to be entered in the lines area. |
| Posting Date | Date to be reflected in GL, preferably the same date it was deposited in the bank. |
| Document Date | Date when posting takes place. It could be same as deposit. |
| Programs Code | Dimension value if required for posting. |
| Funder Code | Dimension value if required for posting. |
| Currency Code | Generally left blank for local currency. Enter only when dealing with foreign currency. |
Complete the Lines fast tab
- In Lines fast tab you will enter information for the individual checks that are being posted from different customers/sources.
Note: The columns can be adjusted to suit your needs for efficient data entry.
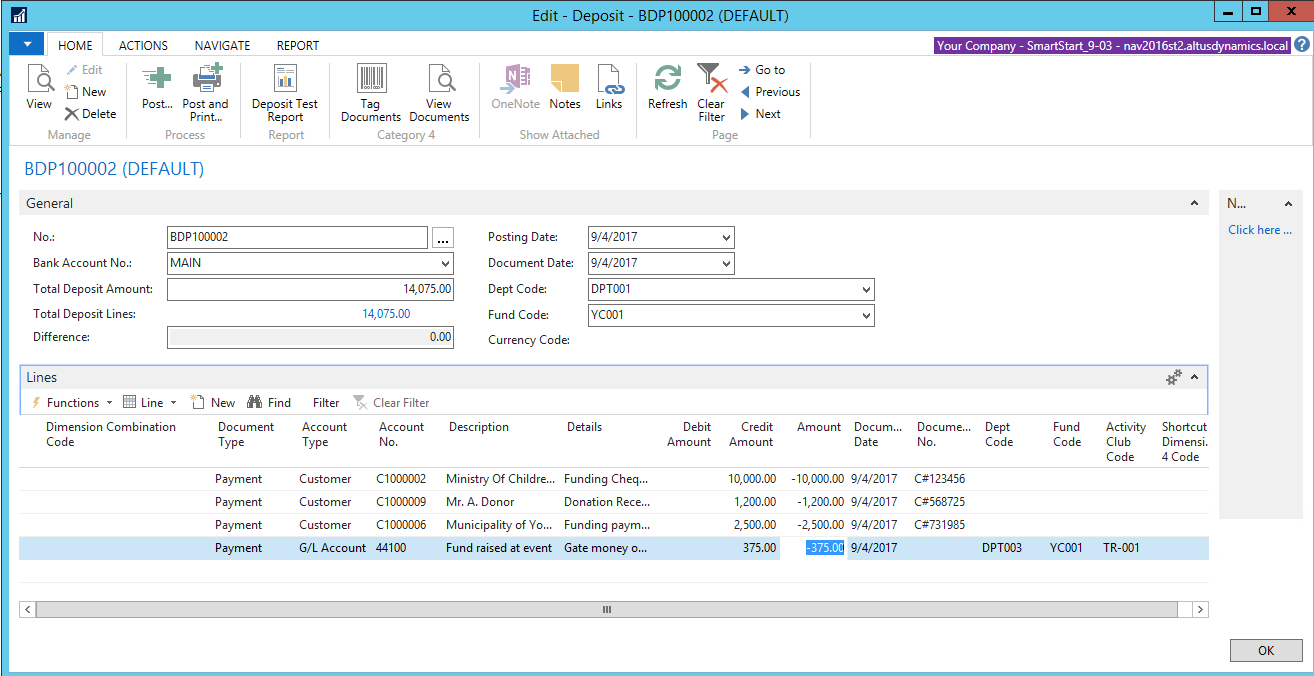
The table below provides the details for completing the Lines fast tab.
| Field Name | Details |
| Dimension Comb Code | Choose the appropriate combination if available or leave blank. |
| Document Type | Enter the nature of the document (payment or Refund). |
| Account Type | Select appropriate type (Customer, G/L Account etc). |
| Account No. | Select the account number for the type selected. |
| Description | The system will populate the description based on default data. However it can be edited. |
| Details | Enter any additional information to support the line. |
| Debit Amount | Enter the amount in this column if the account selected is to be debited. |
| Credit Amount | Enter the amount in this column if the account selected is to be credited. |
| Amount | The system will populate based on the previous column. |
| Document Date | The date from header will be defaulted here. This is editable. |
| Document No. | Enter customer check no. here or any other info to identify the document. |
| Programs Code | Dimension value if required for posting. |
| Funder Code | Dimension value if required for posting. |
| Expense Cat Code | Dimension value if required for posting. |
Applying customer payment to open invoices
- Once all lines are entered you can apply customer payment to open invoices. In order to do so, highlight the line for the first customer and click on Functions.

- Click on Apply Entries to generate the list of all documents open for the specific customer.
- Select the invoice that is being paid and click on Set Applies-to ID icon on ribbon.
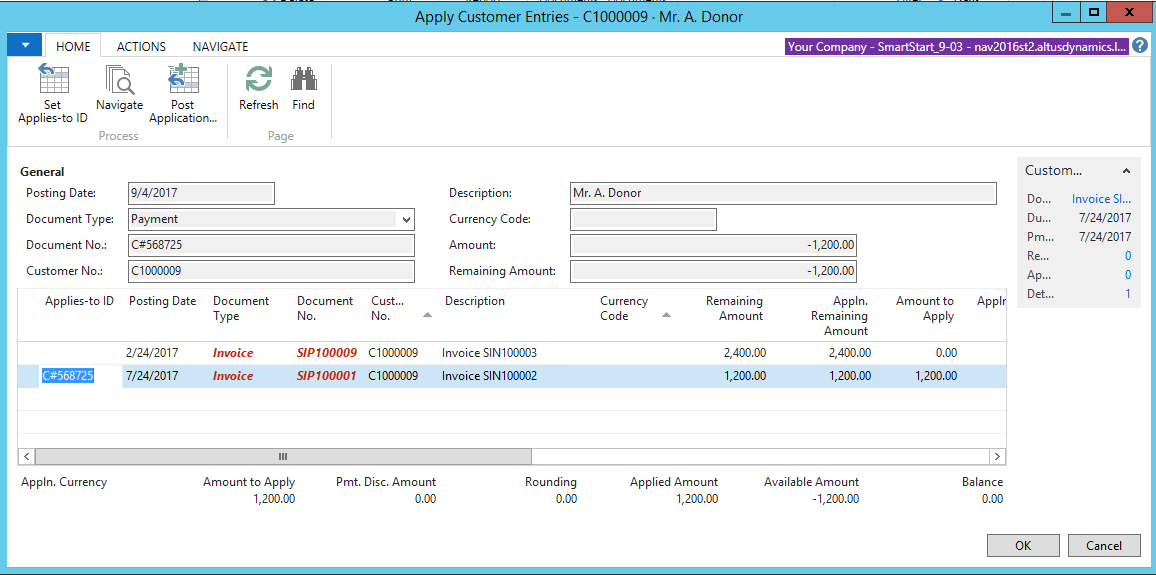
NOTE: If the amount of invoice selected is same as the amount on the check, the balance will become zero. In a situation where more than one invoice is being paid, you can select more lines until the balance becomes zero. - When done selecting the invoices to clear and balance is utilized, click Ok.
- Once all applications are done you can proceed to post, test, or approve your document.
- You can select Deposit Test Report and view/print entries that will be posted.
- Printed option can also be used for getting approval from the supervisor if required.
Posting Entries
Once all approval/checking process is performed the document can be posted.
- Click on the Post icon on ribbon to post the deposit.
- The posted document/entries can be viewed in the Posted Deposit page.