

You need to create a payment request and submit it to the payable department in order to initiate payment of an invoice for supplies or services. You can quickly create that request in Employee Center by following these steps.
After you have logged into your Employee Center / EWA web page by signing in, you need to:
- On the welcome page click on the Finance & Purchasing link to drop down your options.
- Select Payment Requests from the list.
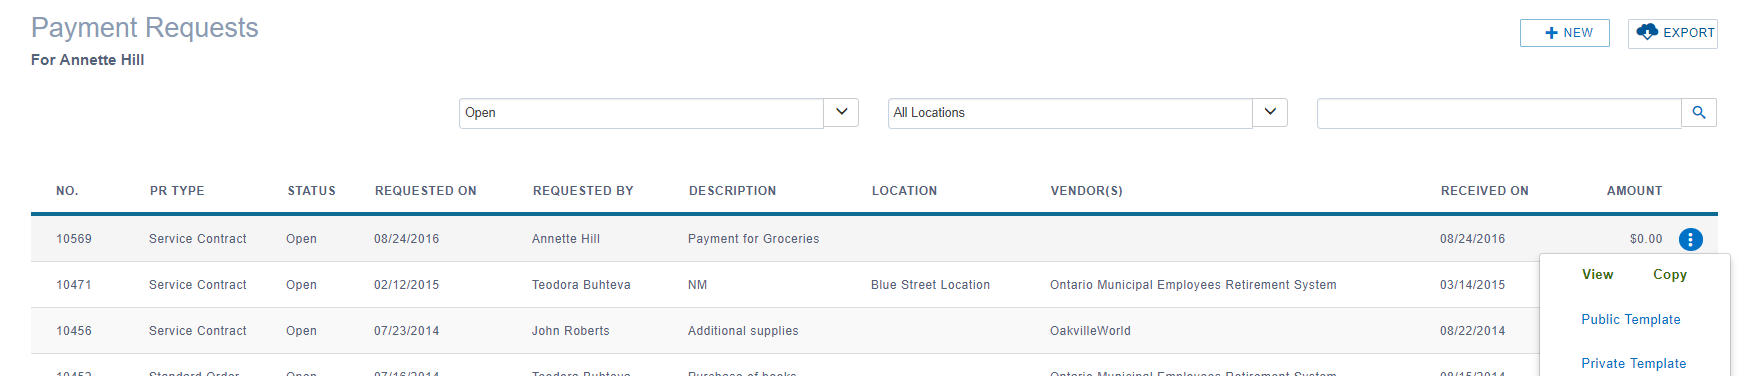
- The system will display list of document in various stages as shown below. You can edit any of the open documents by selecting View from the blue icon.
Create a new request
- Click on +New at the top of the page to create a new request. The new page displays.
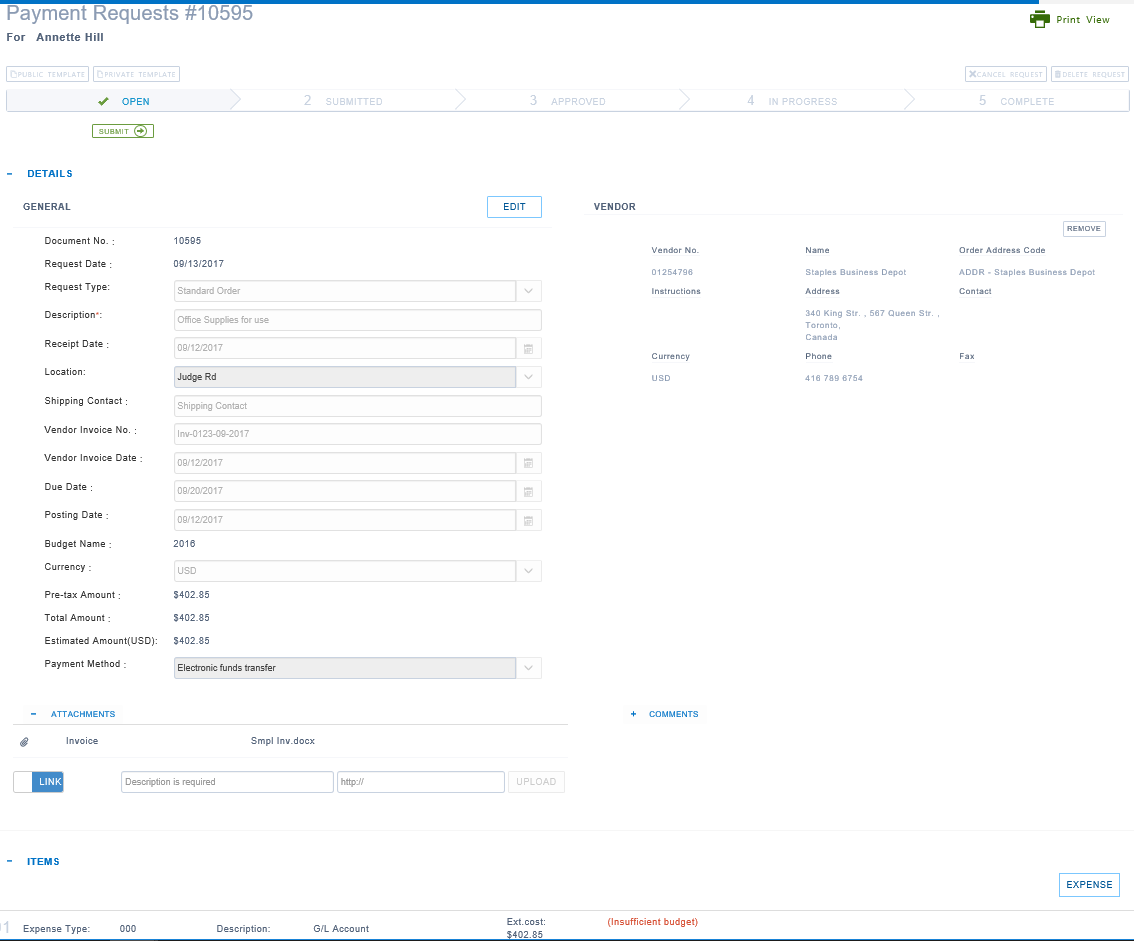
Complete the payment details
-
Use the table below to complete all relevant fields.
The table below contains information about the fields in the Details fast tab.
| Field Name | Details |
| Document No. | System Generated automatically populated. |
| Requisition Date | Defaulted to current date. |
| Requisition Type | Select one from the dropdown by clicking on arrow icon . |
| Description* | Mandatory field enter brief description about your request. |
| Receipt Date | Enter the date on which the items were or are to be received. |
| Location | Select the location where the item received (if applicable). |
| Shipping Contract | Provide the name of the person who is/was to be contacted for the items. |
| Vendor Invoice No. | Provide the invoice number being entered. |
| Vendor Invoice Date | Provide the invoice date being entered. |
| Due Date | Date payment is to be made from invoice. |
| Posting Date | System generated defaulted to current date. |
| Budget Name | Defaulted to current applicable budget as setup. |
| Currency | Defaulted to local currency, can be changed if required. |
- Click on Save.
- Move to the Vendor section by clicking on Select Vendor.
- You will be provided with the list of vendors, scroll down till you find the vendor or you can search by entering value in search field.
- Click on +Select against the vendor you require. You can add a new vendor if your request is for a new supplier.
- Under attachment you have the option to attach external document (invoice, receiving etc.) or attach links to sites in support of your request.
- You can also enter comments for internal use to support the request.
- You can also use the external comment for notes to vendor,
Note: These will be copied only to external documents.
Enter the payment items
Next enter your line items for the document by expanding the Items tab
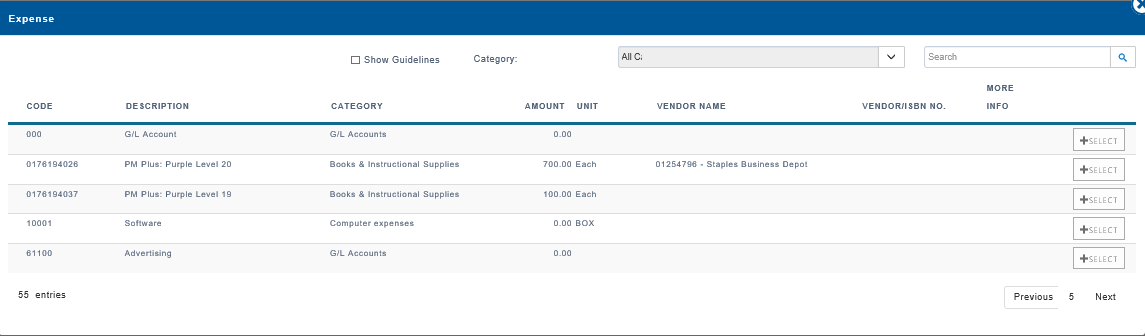
- Click on the Expense icon. A list of possible expense categories available based on your access and default settings will be displayed. You can further filter to narrow down your choices.
- Choose the one you require by clicking on +Select against the item you want.
 Following screen will display.
The table below is a brief description of the fields to be populated:
| Field Name | Details |
| Expense Type | Populated based on the selection in last step. |
| Account No.* | Mandatory field populated depending on Expense Type selection. |
| Purchaser Code | Optional, select purchaser if applicable. |
| Comb Code | Select the Dimension Combination pertinent to your item, you will get list based on your setting. In the event no combination exists you need to enter the Dimension Values individually in the fields provided under Categorization. |
| Details | You can use this area to provide information to support your request. |
| Description | System generated based on the Expense Type selected. |
| Quantity* | Enter here the quantity for the line item, mandatory field needs value. |
| Unit Cost* | Enter the rate/price for the item, mandatory field must be populated. |
| Vendor Item No. | Optional field, if applicable can be given (product code of supplier). |
| Vendor | Auto populated based on the selection above. |
- The fields in the Categorization section are populated if Dim Comb is used. Otherwise they need to be entered based on the requirement of your organization.
- Once all mandatory fields are populated and all information updated, click Save.
- Repeat the above process to enter more lines if required.
Submit the payment request
- Once all items are entered and saved you can submit your document for further processing by clicking on the Submit link on status bar. This will change the status of the request from Open to Submitted and will be available for review and approval by the manager/supervisor.

- Changes in the status of the document will be reflected on the status bar as it is further processed. In the event any changes are required, you will have to re-open the document and make required changes.
Note: When you re-open an approved document, all approval will be removed and fresh approval will be requested after the modifications to the document are made and submitted.