

You spent money for expenses while performing organizational duties and now want to claim reimbursement for eligible expenses. To successfully claim your payment you need to follow these steps.
After you have logged into your Employee Center web page by signing in, you need to:
Create expenses
- On the welcome page click on the Finance & purchasing link to drop down your options.
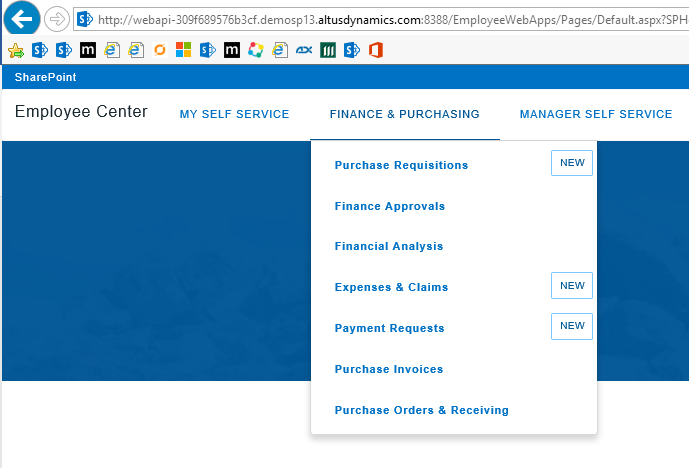
- Select Expenses & Claims, or you can select New to directly go enter your expense line, alternately you can go to the page and from there select New.
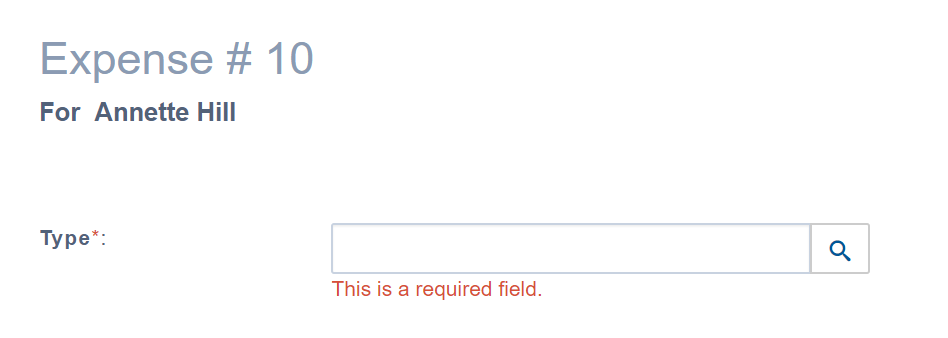
- You will be presented with new screen with serial number and your name assigned to the expense item. Select the expense type by clicking on the search view for options.
- Once selected, the new screen will be available to enter details of your expense explained below.
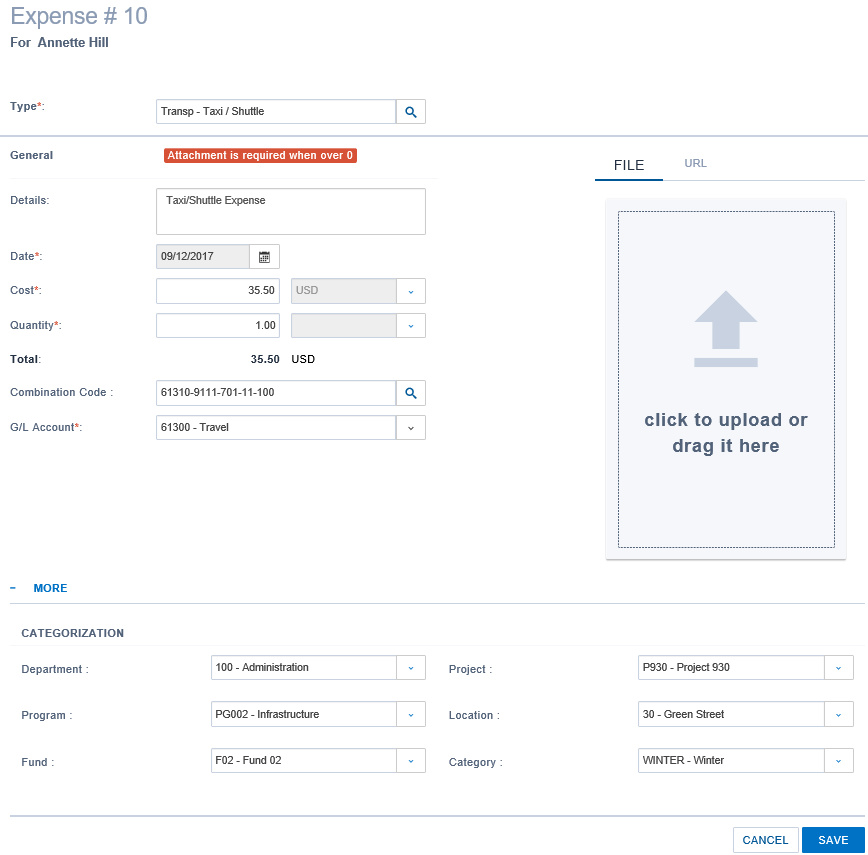
- Once all fields are properly populated click on Save, repeat these steps for each expense item being claimed.
The table below describes the different sub-categories shown in the image in detail:
| General | Details |
| Details | Provide brief description of the expense. |
| Date* | Defaulted to current date. |
| Cost* | Enter the amount of your expense. |
| Quantity* | Enter the quantity, if non quantifiable, enter 1. |
| Total | System will update this field based on cost and quantity. |
| Combination Code | If applicable select the appropriate code for your expense. |
| G/L Account* | Will be populated if combination code is used with G/L, otherwise select G/L |
| Posting Date | System generated defaulted to current date. |
| Budget Name | Defaulted to current applicable budget as setup. |
| Currency | Defaulted to local currency, can be changed if required. |
| More | |
| Categorization | These are the dimension values, if you are working with dimension combinations these fields will be populated automatically. If no combination is selected, you will enter appropriate values in each dimension applicable to the expense being recorded. The dimensions and its values will be unique to your organization. |
Prepare expense claims
- On the main page of Expense & Claims select the Claims tab and click on the New to create your claim.
- A blank claim form will be created with assigned claim number and your name. Update all fields as described below:
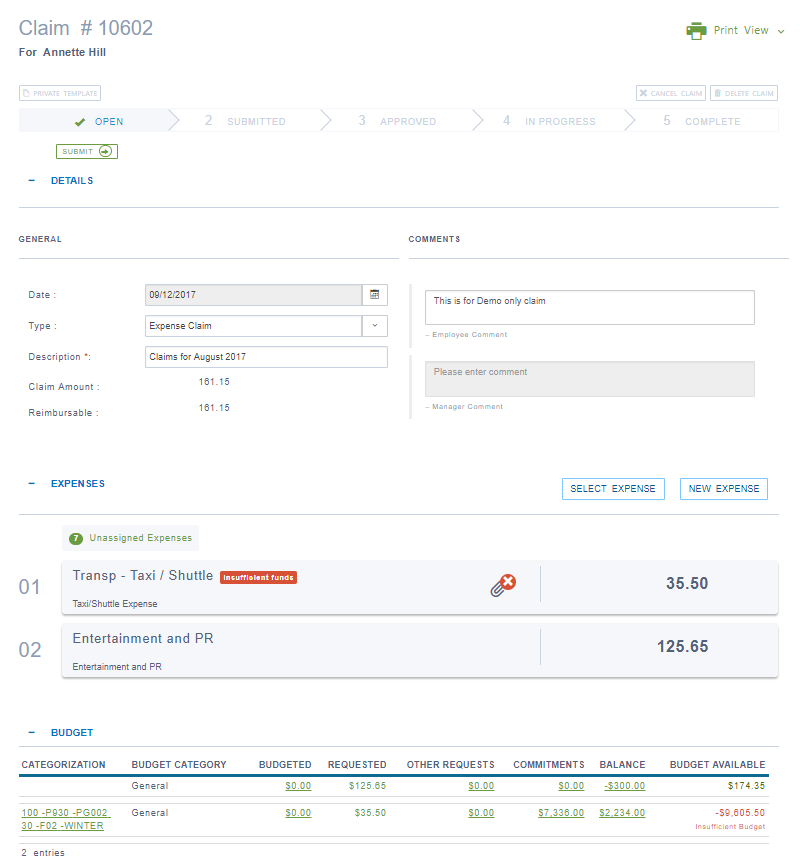
The table below describes the different sub-categories shown in the image:
| General | |
| Date* | Defaulted to current date. |
| Type | Select appropriate type, generally Expense Claim. |
| Description* | Mandatory field enter brief details of your expenses. |
| Claim Amount | System will update this field based on expenses added. |
| Reimbursable | System will update this field based on expenses added. |
| Comments | |
| Employee Comment | You can enter any explanatory notes for the manager. |
| Manager Comment | This space is for the manager to write about his decision. |
- Next, you will attach expenses to your claim, by clicking Select Expense and the system will open all expenses available. Select the expense lines that you want to claim on this occasion.
- Once you have selected all your expenses and have attached them to the claim, you are ready to submit.
- At the top of the claim form on the status bar, click Submit. The claim is submitted for approval and the status of your claim is changed to submitted.

You can modify your claim by clicking Re-Open on the status bar.
Note: By re-opening, all approvals will be removed and the claim will require approval again.