

If you have revenue transactions that require deferral or are to be recognized over an extended period, you can create a deferral template that allows you to book your revenue. Your system will recognize the revenue over the assigned period. By following these steps you can create and record such transactions in NAV.
Create a deferral template
- In the search field type Deferral Template and select the link.
- Click New on the Deferral Template List and NAV will open the New - Deferral Template Card.
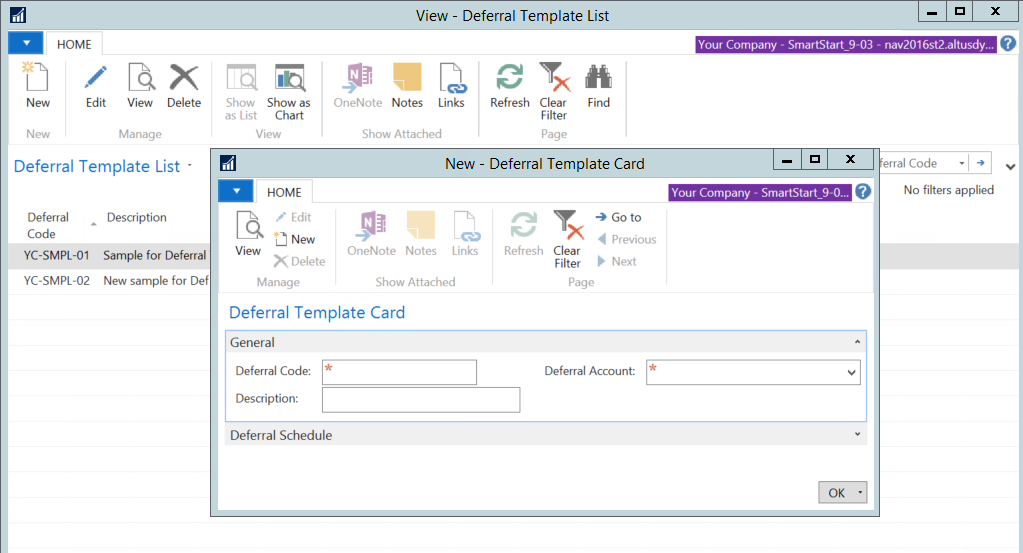
- Complete the required information on the General fast tab of the card by populating Deferral Code (add a short name), Description (details of template nature) and Deferral Account (GL account number for the revenue account being deferred).
- In the Deferral Schedule fast tab you should enter your basis of deferral and allocation of deferred revenue using drop down options.
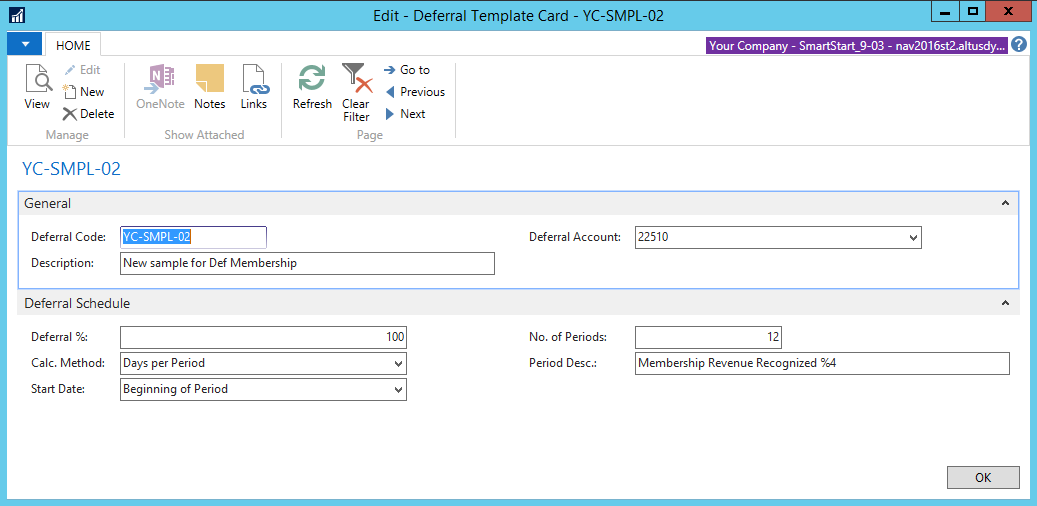
- When finished click Ok to save your template.
- Repeat steps 1 to 4 if you need to create more templates.
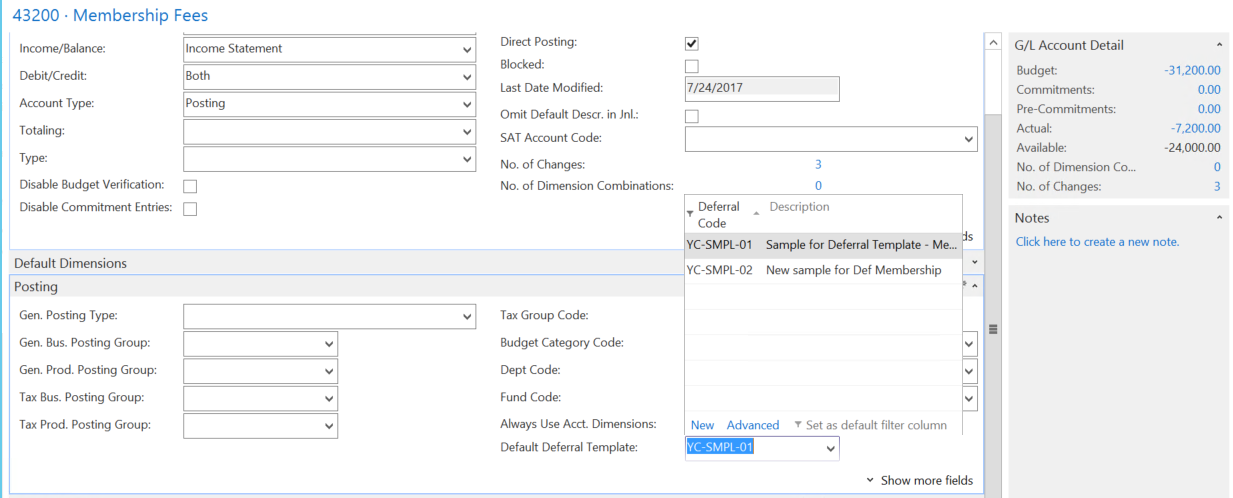
Assign the template to a GL account
- Under Departments, go to General Ledger and click Chart of Accounts.
- Open relevant GL account card in Edit mode.
- Under the Posting fast tab click the drop down in Default Deferral Template field to select the appropriate template.
Record a deferred revenue transaction (invoice)
- Search Sales Invoice in the search bar and click on New.
- To record a deferred revenue transaction proceed with Sales Invoice procedure as normal, complete the General fast tab as usual adding all necessary information.
- Under the Lines fast tab, select the usual values (Dimension Combination/General Ledger Account) and quantity price dimensions if using GL etc.
- In Deferral Code under the Lines fast tab, select the appropriate template from the drop down.
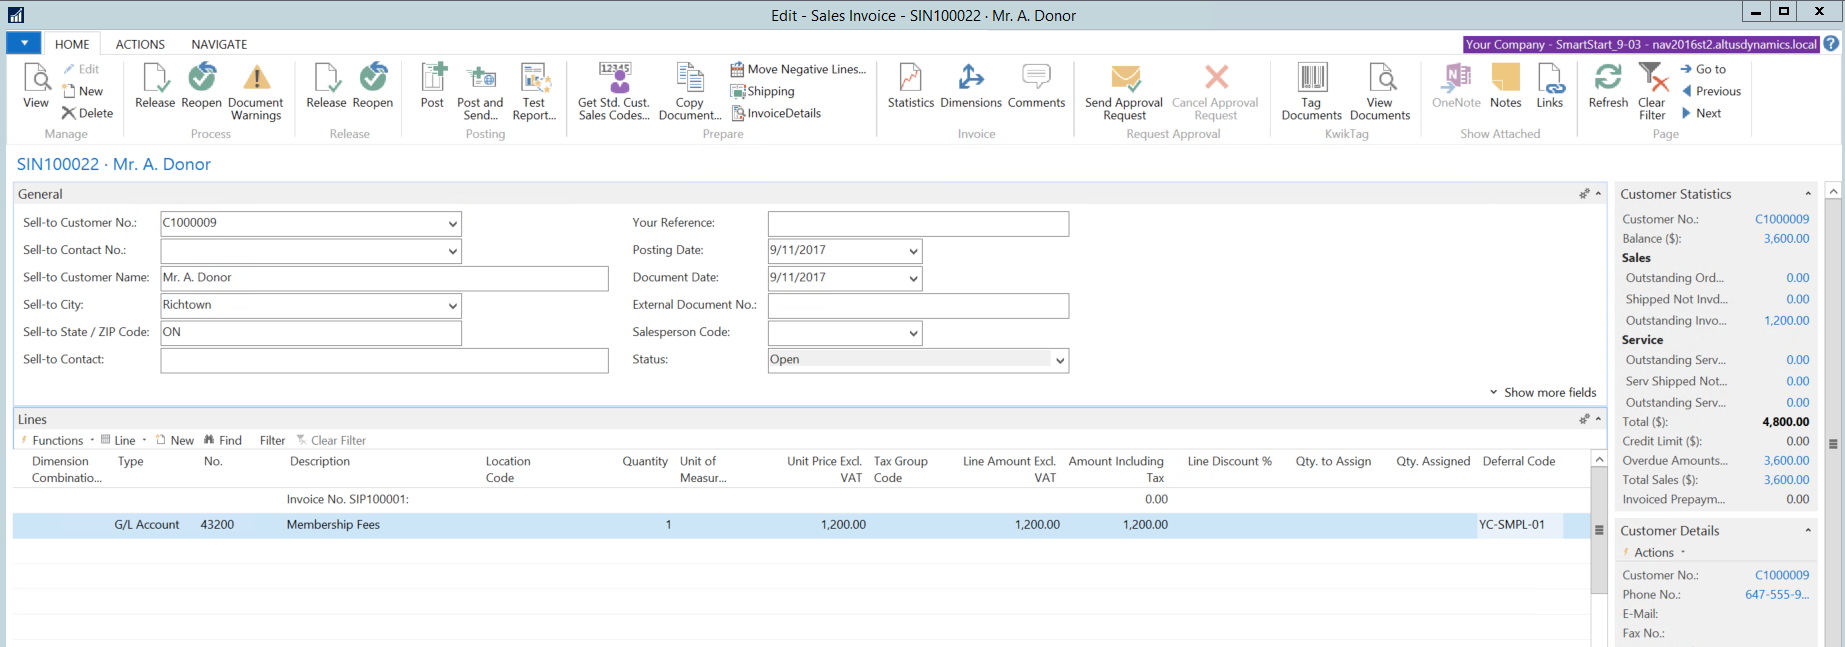
- Once all information is entered and the document is released, review the posting that will be created when the document is posted.
NAV will display the lines for the deferral entries for each month as shown below:
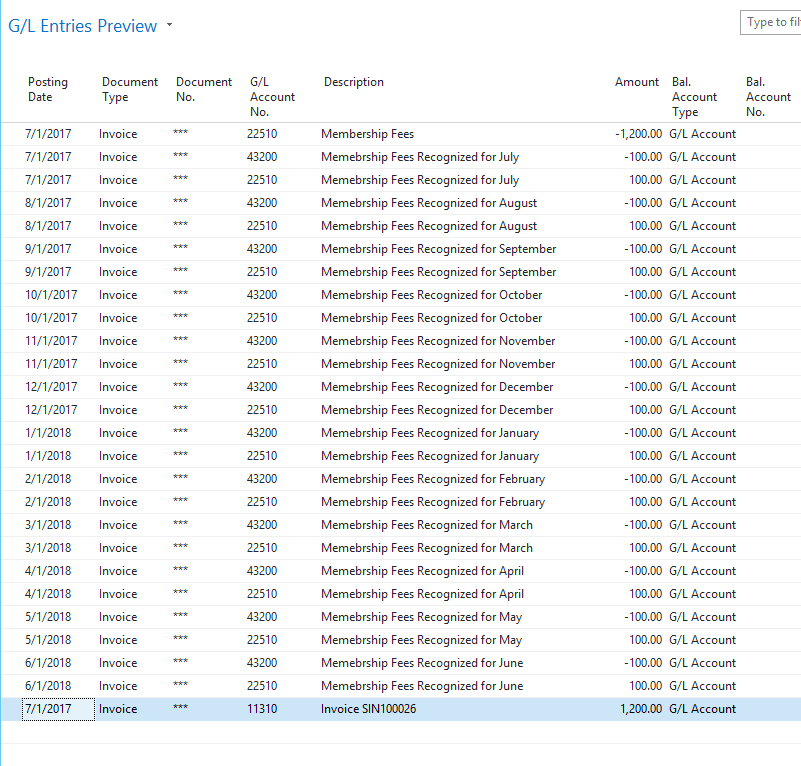
- Make sure the lines are as expected.
- You can now post the invoice.
Note: The above entries show the next set of entries taking place on the 1st of each month.