

Data Sets are a group of predefined GL accounts and Dimensions to facilitate analysis of accounting information in web environment. Each Data Set represents a view that will help the user review the financial status of the organization.
Creating data sets
To create a new data sets:
- Enter Data Sets in the search field and select the link or use following link: Department --> Administration --> Application Setup --> Web Apps --> and select Data Set.
- On the screen of existing data sets, you can also edit existing sets, select New from the ribbon to create the data set.
- On the newly created line enter the following field values:
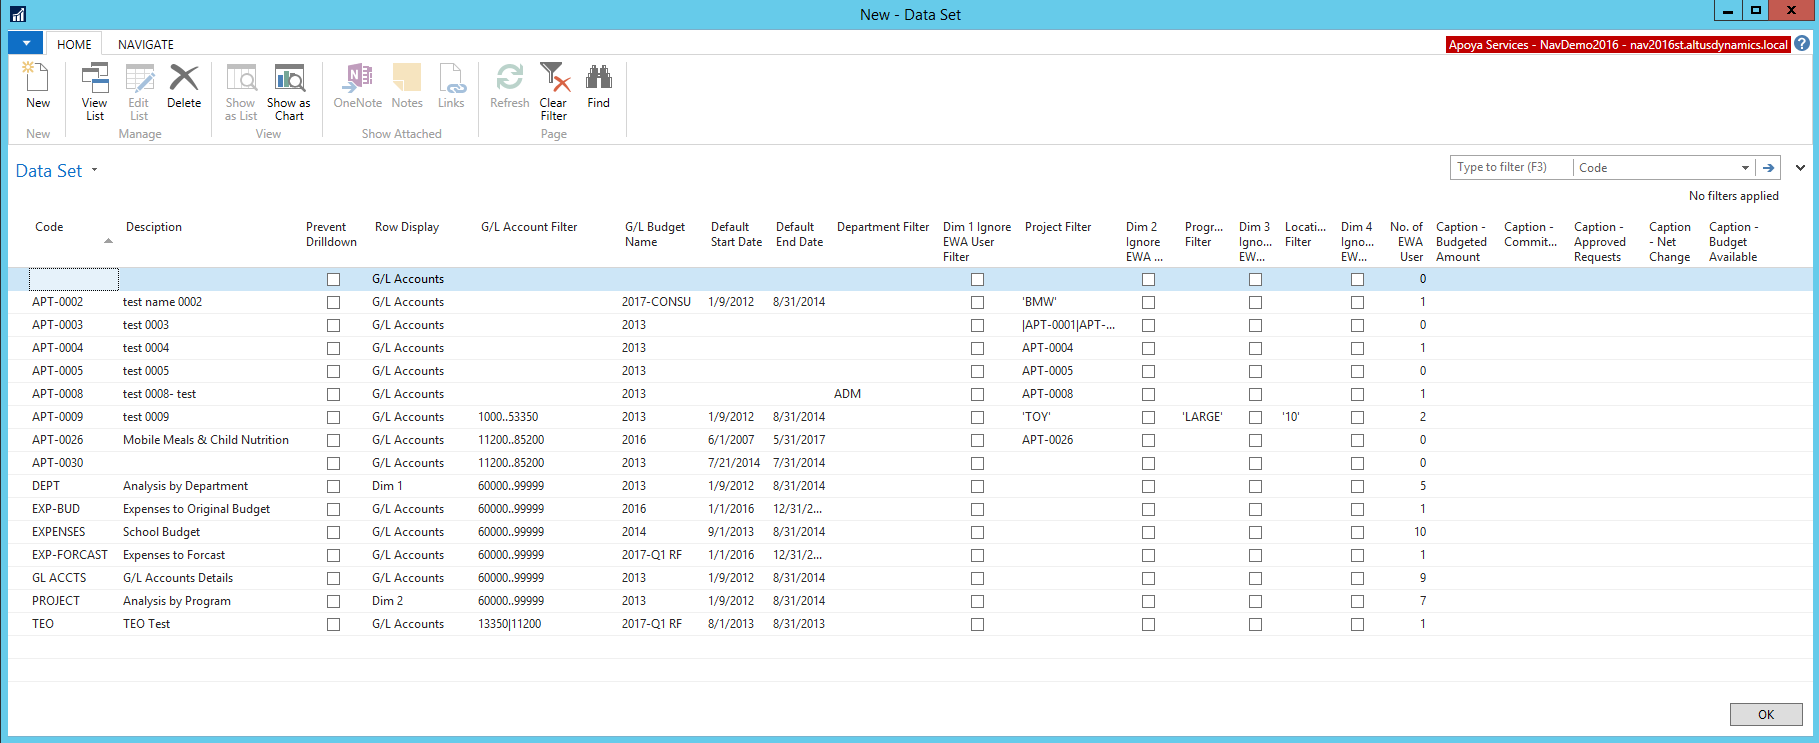
The table below describes the different tabs shown in the image in detail.
| Field Name | Details |
| Code | Select a unique code to identify the data set. |
| Description | Brief description of the information that will be provided by the analysis. |
| Prevent Drill Down | Select this field if you want to restrict drill down to transactions for users. |
| Row Display | Choose between G/L Account or any of the dimensions to appear in rows. |
| G/L Account Filter | Define the accounts that are to be included in the report. |
| G/L Budget Name | Select the budget that is being used for comparison (approved budget). |
| Default Start Date | Start date for data in the reports. |
| Default End Date | Date up to which data will be pulled. |
| Dimensions | Multiple columns to filter the view for the users; can be one, more, or a series. |
| Dimension Ignore | |
| EWA User Filter | Select this if you want to override restrictions/access on User's setup card. |
| Captions | In these columns, you can choose to have different display of column headings. |
- Click OK when finished.
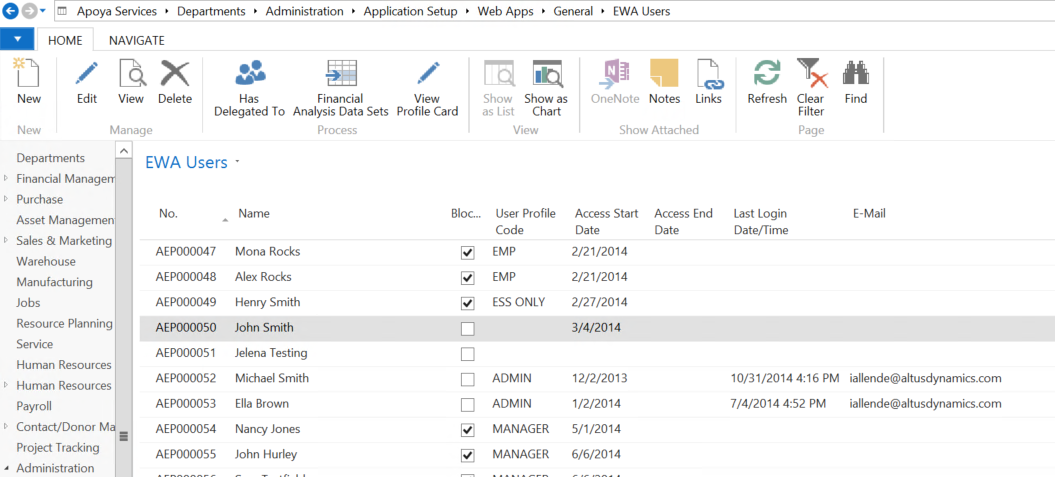
Assigning data sets to users
- In NAV, go to EWA Users list to assign the data set.
- Highlight the user you are assigning the data sets to and click on Financial Analysis Data Sets:
- On the pop up screen select New.
- Leave the EWA User Name field and go to Data Set Code column and select the data set that needs to be assigned.
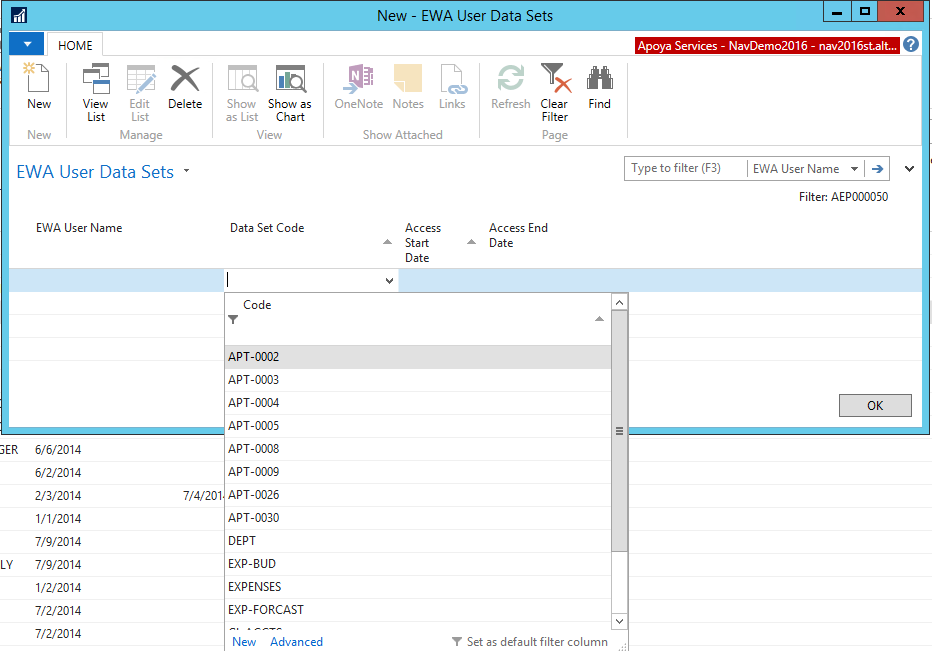
- In the Access Start Date and Access End Date populate values for the user to have access to the selected report.
- Repeat this for assigning more data sets as needed.
- Click OK.