

Use account schedules to arrange accounts listed in the chart of accounts in ways that will provide information about those accounts. You can set up various layouts to define the information you want to extract from the chart of accounts.
One of the main purposes of account schedules is to provide a place for calculations that cannot be made directly in the chart of accounts, such as creating subtotals for groups of accounts, which can be included in new totals and then can be used in other totals.
For example, you can create account schedules to calculate profit margins on such dimensions as departments or customer groups.
Furthermore, you can filter any G/L entries and G/L budget entries, for instance, by net change or debit amount. You can also compare two or more account schedules and column layouts by using formulas.
This kind of comparison provides the ability to:
- Create customized financial reports without using the Report Designer.
- Create as many account schedules as needed, each with a unique name.
- Set up various report layouts and print the reports with the current figures.
Account Schedules Overview
An account schedule consists of:
- An account schedule name
- Several lines
- A column layout
Several account schedule names can be set up in the Account Schedule Names page:
- In the Search field, type Account Schedule and select the page from the drop-down list.
The Account Schedule Names page displays.
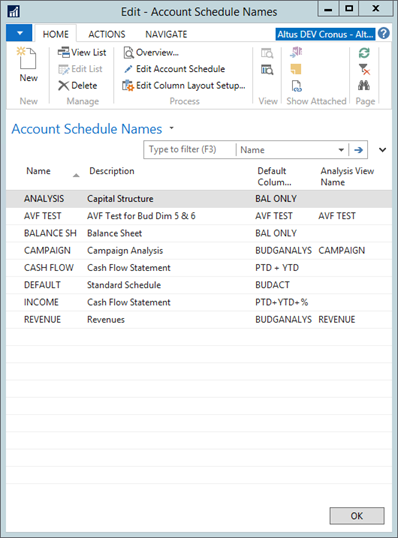
- To create a new schedule name, on the Ribbon click New and then complete the fields as necessary.
- To define the lines, from the Ribbon click Edit Account Schedule.
- The Account Schedule page contains the fields shown in the following table for setting up row layout:
| Field | Description |
| Row No. | A number of the account schedule line. Row numbers are optional, and the same number can be used on more than one line. The rows with the same number are then treated as a group. For example, if the row number is included in a formula in the Totaling field, it will represent the sum of all the lines that have that row number. If the Insert Accounts function is used, this field is automatically copied from the No. field in the chart of accounts. |
| Description | Text that will appear on the account schedule line. If the Insert Accounts function is used, this field automatically copied from the Name field in the G/L account list. |
| Totaling Type | Determines which accounts within the totaling interval, specified in the Totaling field, will be totaled. The options are:
If the Insert Accounts function is used, accounts that have an Account Type of Total or End-Total on the chart of accounts will be assigned the totaling type Total Accounts. All other lines will automatically be assigned the totaling type "Posting Accounts". |
| Totaling | Indicates which accounts are totaled on this line. This field is filled in based on the contents in the Totaling Type field.
When creating formulas, use the following symbols:
If the Insert Accounts function is used, this field is automatically copied from the No. field in the G/L account list. Note: To include a number in the formula, that number must not be used as a row number in the account schedule. |
| Row Type | Determines how the amounts in the row are calculated for the period defined in the Date Filter field on the report or page. The options are:
|
| Amount Type | Determines the type of entries that are included in the amounts in the account schedule row. The options are:
|
| Show | Determines whether the account schedule line is printed on the report. The options are:
|
| New Page | If selected, there will be a page break after the current account when the account schedule is printed. |
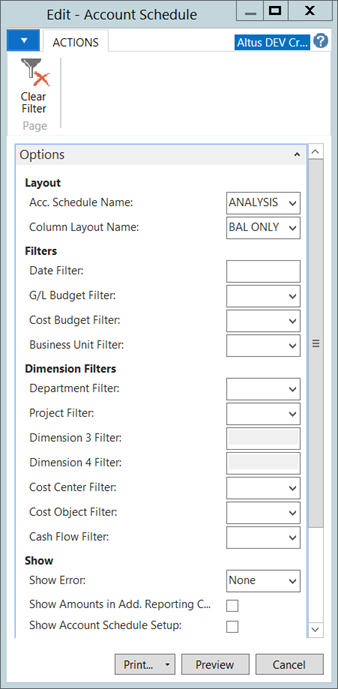
Optional Account Schedule Fields
The following table shows the additional columns that you can add to the Account Schedule page using the Choose Columns function.
| Field | Description |
| Dimension Totaling Filters | Dimension values or dimension value ranges that will be used to filter the amounts shown in the row. These filters are described in more detail in the Filter Account Schedules using Dimensions section. |
| Bold, Italic, and Underline | If selected, the row contents are bolded, italicized, or underlined. Only bold formatting is displayed in the Acc. Schedule Overview page, while the printed Account Schedule report and exported data in Microsoft Excel worksheets display all three formats. |
| Show Opposite Sign | If selected, debits in this row are displayed in reports as negative amounts (that is, with a minus sign) and credits are displayed as positive amounts. |
Accessing an Overview of Account Schedules
The Acc. Schedule Overview Matrix page enables you to view account schedules in the various layouts you have set up, as well as those layouts available in the Dimensions - Total Report.
To view the Acc. Schedule Overview Matrix page:
- In the Search field, type Account Schedules and select the page from the drop-down list.
The Account Schedule Names page displays. - From the Home Ribbon, click Overview.
The Acc. Schedule Overview Matrix page displays.
- Use the Dimension Filters to filter your results.
Column Layout Overview
The Account Schedule column layout contains the numerical information. Each column layout is defined by both the visible columns that will appear in the reports and the intermediary columns that are used for calculation only. Once you create a column layout, you can assign it as a default to any existing Account Schedule in the Account Schedule Names page.
The Column Layout page contains the fields shown in the following table:
| Field | Description |
| Column No. | Used to identify the line for the column. The column numbers are optional and the same column number can be used on more than one line. The columns with the same number are then treated as a group. For example, if the column number is included in a formula, it will represent the sum of all the lines that share the column number. |
| Column Header | The text in this field will be printed on reports that include the column. |
| Column Type | Determines how the amounts in the column are calculated. The amounts are calculated for the period defined in the Date Filer field on the report or page as follows:
|
| Ledger Entry Type | Determines the type of ledger entries that are included in the amounts in the account schedule column. The options are:
|
| Amount Type | Determines the type of entries that are included in the amounts in the account schedule column. The options are:
|
| Formula | If Formula is selected as the Column Type, enter a formula for the line. The result of the formula is displayed in the column when the account schedule is printed. Use this field to perform calculations on the other columns. Other columns are referenced through their column number. The calculation symbols are the same as those used in the row formulas. For example, to calculate the difference in percentage of the G/L entries and the budget entries, enter the following formula: 100* (Column No. of the G/L entry column/ Column No. of the G/L Budgetr entry column -1) |
| Show Opposite Sign | If selected, debits in this column are shown in reports as negative amounts (that is, with a minus sign) and credits are shown as positive amounts. |
| Comparison Date Formula | Date formula that specifies which dates must be used to calculate the amount in this column. Microsoft Dynamics NAV uses this formula to calculate the amount from the comparison period in relation to the period represented by the date filter on the report request. Use the standard time periods of W(eek), M(onth), Y(ear), or Q(uarter) to create the formulas. For example, -1Y is the same period one year earlier. |
| Show | If selected, the amounts in the column are shown in reports. Note that a maximum of five columns in an account schedule layout can be shown in the printed report. The options are:
|
| Rounding Factor | Rounding factor for amounts in the column. The default value is None, no rounding. Note:
|
Column Layout Options
The following table shows the additional columns that you can add to the Column Layout page using the Choose Columns function.
| Field | Description |
| Comparison Period Formula | Specifies which accounting periods to use when you are calculating the amount in this column. An accounting period does not have to match the calendar, but each fiscal year must have the same number of accounting periods, even though each period can be different in length. Microsoft Dynamics NAV uses the period formula to calculate the amount from the comparison period in relation to the period represented by the date filter on the report request. The abbreviations for period specifications are:
For examples of formulas, press F1 to access online help for this field. |
| Business Unit, Global Dimensions, and Dimensions 3 and 4 | Totaling fields used to create column layouts that show global dimension information across columns.
Analysis views are linked to column layouts in the Column Layout Names page, in the Analysis View Name field. |
Account Schedule Overview Features
The Account Schedule Overview Matrix page is used to view an account schedule without having to print it.
| Field | Description |
| Account Schedule Name | To view a different row layout, select the required account schedule in this field. |
| Column Layout Name | To view a different column layout, select the required column layout in this field. |
| Show Error | Contains the selected option of which errors are displayed in the page in case of division by zero or period ends. The options are:
|
| Show Amounts in Add. Reporting Currency | If selected, report amounts are shown in the Additional Reporting Currency. Normally, the amounts are shown in the company's local currency (LCY). |
The Matrix Options FastTab contains the fields shown in the following table:
| Field | Field |
| View by | Determines the time period displayed for each line. The options are:
The date in the Start Date field on each line will always be the starting date for each period. |
| Column Set | This is a non-editable field that displays the column headings range. |
Printing Account Schedule Reports
The account schedule can be printed from the Account Schedule Overview page, Account Schedule Overview Matrix page, or under Reports on the General Ledger page.
The report contains the same options and filters as the Account Schedule Overview page; however, the report is limited to printing the first five columns of the account schedule. The Account Schedule Overview Matrix page can show all columns.
Complete the following steps to print from reports on the General Ledger page:
- On the General Ledger page, under Financial Statement, click Account Schedule.
The Account Schedule page displays.
- In the Acc. Schedule Name field, enter Revenue.
- Press TAB or ENTER.
The cursor moves to the Column Layout Name field, where a column layout is automatically entered. - Enter Default to use the Standard Column Layout.
- Click OK to close the Column Layout Names page.
- In the Date Filter field, type 01/01/13..01/31/13.
- Click Preview to review the Revenue Account Schedule.
- Close the Print Preview page.
Complete the following steps to print from the Account Schedule Overview page:
- Open the Account Schedule Names page.
- Select the Account Schedule and click Navigation > Overview.
- On the Action Ribbon, click Print.
- Close the Account Schedule report request form.
Complete the following steps to print from the Account Schedule Overview Matrix page:
- On the Account Schedule page, click Overview.
- Set filters and click Show Matrix.
- On the Related Information menu, point to Reports and then click Print.
Note: When printing from this page, the layout, date filter, dimension filters, and budget filters are automatically copied to the Account Schedule report request form.
Exporting Account Schedules to Excel
Account Schedules can be exported to Excel from the Account Schedule Overview Matrix page. Exporting to Excel enables one to manipulate the data using Excel pivot tables, and share data with others working outside the Microsoft Dynamics NAV environment.
Complete the following steps to export an account schedule:
- In the Acc. Schedule Overview page for the Revenue account schedule, enter Month in the View by field.
- On the Action Pane, click Show Matrix.
- On the Actions menu, point to Functions, and then click Export to Excel.
- The Option field defaults to Create Workbook to create a new workbook. If there is an existing Excel spreadsheet, one can click the drop-down arrow, select Update Workbook, and then enter the Excel Workbook File Name and Worksheet Name.
- Click OK.
- In the information dialog page, click the proper server access to Microsoft Office Excel Application option, and click OK. Microsoft Dynamics NAV opens Excel and exports the data and the filter information from the selected account schedule. The worksheet name is the same as the account schedule name.
Note: Amounts that were totals in the Acc. Schedule Overview Matrix page are not exported as formulas in Excel. The value of the total will simply be copied to a cell in the Excel worksheet. In addition, rounding factors are not applied in the amounts exported to Excel.
Filtering Account Schedules Using Dimensions
The entries used to calculate amounts in account schedules can also be filtered using dimensions. Dimension filtering can be applied by row; dimension filtering on a row applies to all amounts in all columns in that row. Column layouts can also be set up with dimension filters.
Filters set on rows and filters set on columns can potentially interact. When an amount is to be printed in a particular cell in the account schedule, it must pass through both the row and the column filters.
If you do not select an analysis view, the first two dimension totaling fields will always be the two global dimensions. If you assign an analysis view to the account schedule, the dimensions included in the analysis view determine the Dimension Totaling fields.
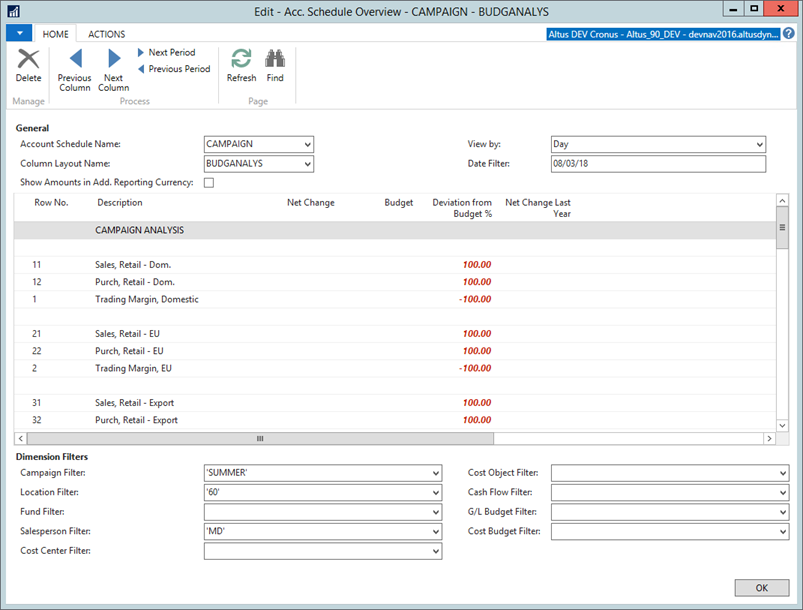
Complete the following steps to review an account schedule using dimensions with analysis views:
- Open the Account Schedule Names page.
- On the Campaign Analysis line, notice that the Analysis View Name field is set to CAMPAIGN.
- In the Analysis View Name field, click the drop-down arrow.
- With the Campaign Analysis (Retail) line selected, click Advanced.
- Review the values in the Dimension 1 Code through Dimension 4 Code fields for Campaign Analysis. Note that the values are:
- SALESCAMPAIGN
- AREA
- BUSINESSGROUP
- SALESPERSON
- Close the Analysis View List page.
- With the Campaign Analysis line selected, click Edit Account Schedule.
- On the menu bar, click Customize and then click Choose Columns.
- Add the Salescampaign Code Totaling, Area Code Totaling, Businessgroup Code Totaling, and Salesperson Code Totaling columns.
- Click OK to close the Customize Account Schedule page. Notice that the dimension totaling fields contain the dimensions specified in the analysis view.
Note: You may have to close the Account Schedule page after using the Choose Columns function to make the changes appear.