

Overview
Expense claims are composed of one or more expenses. You can use one of two methods when entering and submitting expense claims:
- Start by creating expenses: with this method, you first create a list of expenses on the Expenses tab, group them together into a claim, and then submit the claim for approval. For information on creating a list of expenses, see Creating Expenses.
- Start by creating an expense claim: with this method, you first create an expense claim on the Claims tab, import/add expenses to that claim, and then submit it for approval.
The following sections assume that you start with an expense claim. If you have the Delegates functionality enabled, you can also prepare and submit expense claims for users that have assigned you as a delegate. For more information, see Managing Delegates.
Once an expense claim has been prepared and submitted it is sent to your assigned approver.
Preparing an Expense Claim
Expense claims are made up of one or more expenses. To prepare and submit an expense claim:
- Log in to the Employee Center web page.
- From the Finance & Purchasing page, click Expenses & Claims.
The Expenses & Claims page displays. - From the Expense & Claims page, select the Claims tab.
The Claims tab displays all expense claims associated with this user or this user's delegate. You can filter this list by selecting the particular claim type (for example, open claims or claims waiting approval) that you want to display. - Click NEW to create a new claim.
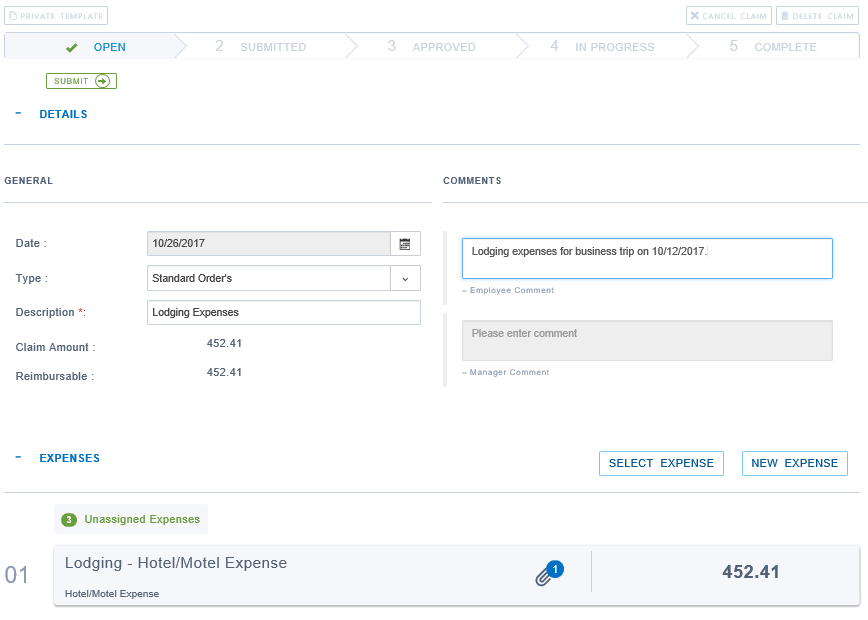
- A blank claim form is created with your name and the assigned claim number.
NOTE: Alternately, you can create an expense claim directly from the Expenses page. Select expenses that you want to include and then select either Add to Existing or Make a New Claim. - In the Details section, enter the following:
- Date: Enter the expense claim date. This field defaults to the current date.
- Type: Select the appropriate expense claim type.
- Description: Type a description for the expense claim. This field is required.
- Employee Comment: Type additional notes for the approving manager.
- Attach expenses to your claim by doing one of the following:
- Click Select Expenses to add an existing expense to your expense claim.
- Click New Expenses to create a new expense that you want to add to your expense claim. For more information on creating expenses, see Creating Expenses.
Submitting Expenses for Approval
Submitted expense claims are sent to your defined approver(s), who can either for approve or deny the request. For more information, see Approving Procedures.
Once you have finished preparing your expense claim, submit it for approval by clicking Submit at the top of the claim form.
Clicking Submit changes the Expense Claim workflow from Open to Submitted. You can modify submitted claims by clicking the Re-Open icon on the Status Bar. Re-opening an expense claim removes all approvals requires the claim to be re-approved.
Note: At any point in the process you can click either Cancel Claim or Delete Claim.
Printing Expenses
From the Expense Claims page you can print two different reports:
- Use the Employee View to generate a printed copy that contains expense details for your records.
- Use the Approver View in cases where you need to print a report for approval. This view include tax and cost center info.
To print your expense claims:
- At the top of the Expenses & Claims page, click Print View and then click either Employee View or Approver View.
A printable version of your expense claim displays. - Click Print.
Exporting Expense Claims
To export a list of expense claims:
- From the Expenses & Claims page, navigate to the Claims tab.
- Click Export at the top of the expense page. An XSLX file (Claims.xls) downloads that can be opened in Microsoft Excel.