

Making account changes with administration tools
The Administration section of Employee Center enables you to change your password, define email settings for how you want to receive request and response emails, and select delegates.
To change your password or notification preferences:
- Log in to Employee Center.
- Click on Administration in the menu bar.
- Click the Change Password link.
The Change Password page opens. It has two sections: Change Password and Notifications.
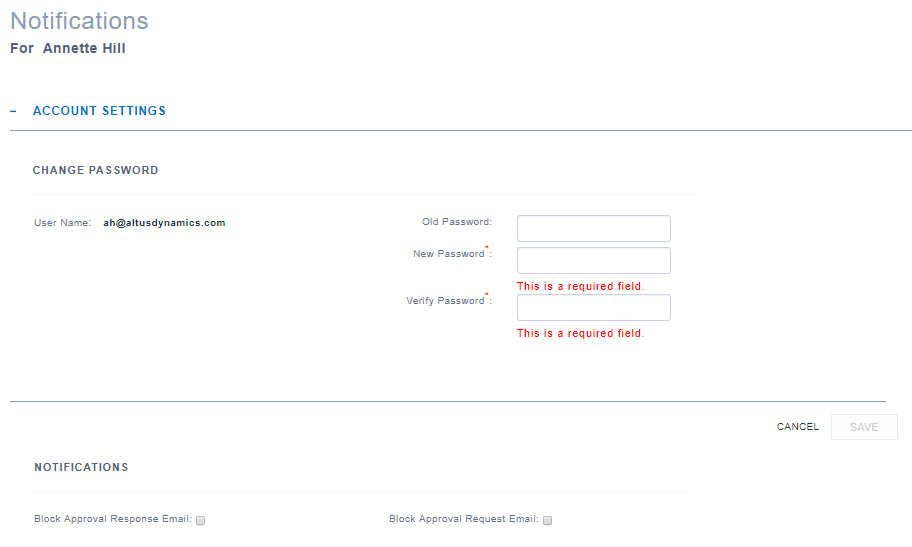
- To change your password:
- Enter the system default password in the Old Password field. This is the password you currently have or that was assigned by the system.
- In the New Password field, enter your new password.
- In the Confirm Password field, enter your new password.
- Click Submit. A confirmation message displays at the top of the tab to indicate the password change was successful.
- To manage your notification preferences, add or remove checkmarks to the Block Approval Response Email and Block Approval Request Email in the Notification section.
NOTE: This section only applies if you are logging into the application using username/password or email based authentication. If you are logging in with your Windows ID, follow standard processes for changing your Windows password and the Employee Center password is updated through that process.
- For more details about the Notifications section, see the Notifications section.
Secure password requirements
The requirements for a secure password are as follows:
- The password must be at least eight characters in length.
- The password must contain at least one special character (symbol).
- The password must contain at least one number.
- Your name, birth date, spouse's name, anniversary, and so on. (information that is commonly known or easily guessed) should not be used as your password.
Delegates
When accessing the delegate link, you may be able to add or delete delegates or select the types of delegations you wish a delegate to do in your favor. You are able to change start and end dates that apply to a specific delegate. Each organization will be set up in one of three ways.
Note: The way in which your organization is set up in Microsoft Dynamics NAV 2016 will determine what changes you can make when managing delegates in Employee Center.
The table below explains the three possibilities an organization may choose for NAV set up and the corresponding options each setup will enable in Employee Center:
| Employee Center Setup in NAV | Delegation Management on Employee Center |
| Enable Delegate Entry | Enable Delegation Type Entry | User can add/delete Delegates | User can change Delegation Type | User can change Delegation Start/End Dates |
| No | No | No | No | Yes |
| No | Yes | No | Yes | Yes |
| Yes | Yes | Yes | Yes | Yes |
- When both Enable Delegate Entry and Enable Delegation Type Entry are set to No in NAV, Employee Center users are only able to adjust their delegates' start and end dates.
- When Enable Delegation Type Entry is set to Yes in NAV, Employee Center users are able to adjust delegates' start/end dates and which items each delegate can manage.
- When both Enable Delegate Entry and Enable Delegation Type Entry are set to Yes in NAV, Employee Center users can adjust start/end dates, decide which items their delegates can manage, and add or delete delegates.
Managing Delegates
To manage delegates:
- Click on Administration in the menu bar, then click on the Delegates link.
The Delegates page opens.
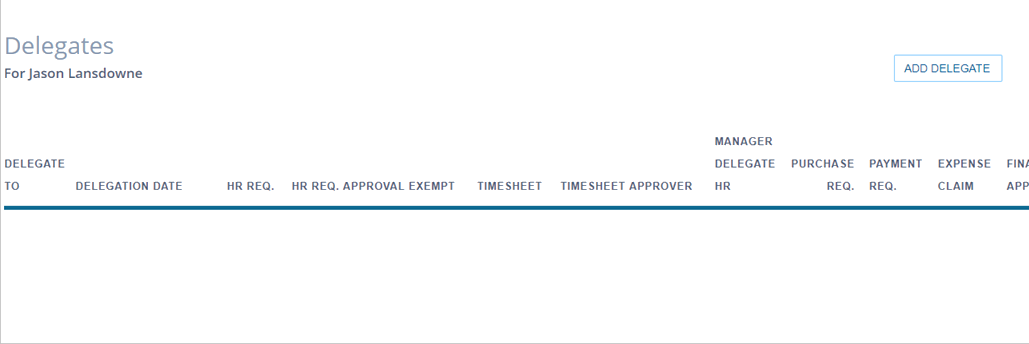
- To add a delegate, type the name of the person who you want to delegate responsibility in the Add Delegate field.
- Click Add Delegate.
The Delegates page updates to allow you to add a delegate.
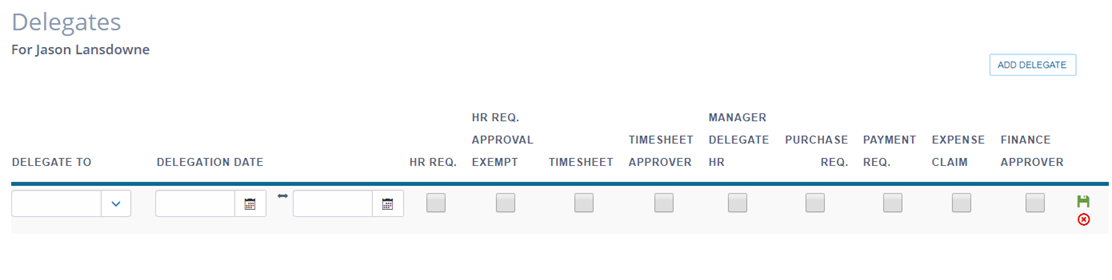
- In the Delegate To field, choose the person to which you want to delegate.
- In the Delegation Date fields, specify the active dates for this delegation.
- Add a checkmark to the specific items your delegate is able to manage. This availability depends on your organization's setup in NAV. You can remove all checkmarks by clicking Reset, which is located at the bottom of the page.
- Click Save update all changes. A saved successfully message appears at the top of the page.

- To delete a delegate, click the Delete icon
 , which is located beside the delegate name. If your organization is not set up to enable delegate deletion in Employee Center, the delete option will not be visible to you. You may be able to add a delegate depending on your organization's setup in NAV.