The Welcome Page displays after a user clicks on the Employee Center link from the home page. In this page you can select the company you want to access.
To display the Main Menu:
- In the Navigation Pane of the Home page, click the Employee Center link. The Welcome Page will open.
- At the top right you can click Sign Out under your username.
- If your organization has multiple companies you will need to select the particular company for which you want to view data. Please Select a Company is located at the bottom right of the Welcome page.
- If your organization has multiple companies but you do not have access to some of them, when you select one such company you will receive the following message: The current login user was not allowed to access the selected company. Please contact NAV administration.
- Also, the menu bar and your username will not display in the welcome page. Select a different company.
Note: Depending on your organization, Please Select a Company will default to the only company for which your organization is configured. Also, the Welcome page will display your name and the menu bar as soon as you click on Employee Center from the Home page. - Once you select a company, the Welcome page displays your username and a menu bar across the top.
 Your organization’s settings, your location, and your permissions level, will determine which menu bar items display for you.
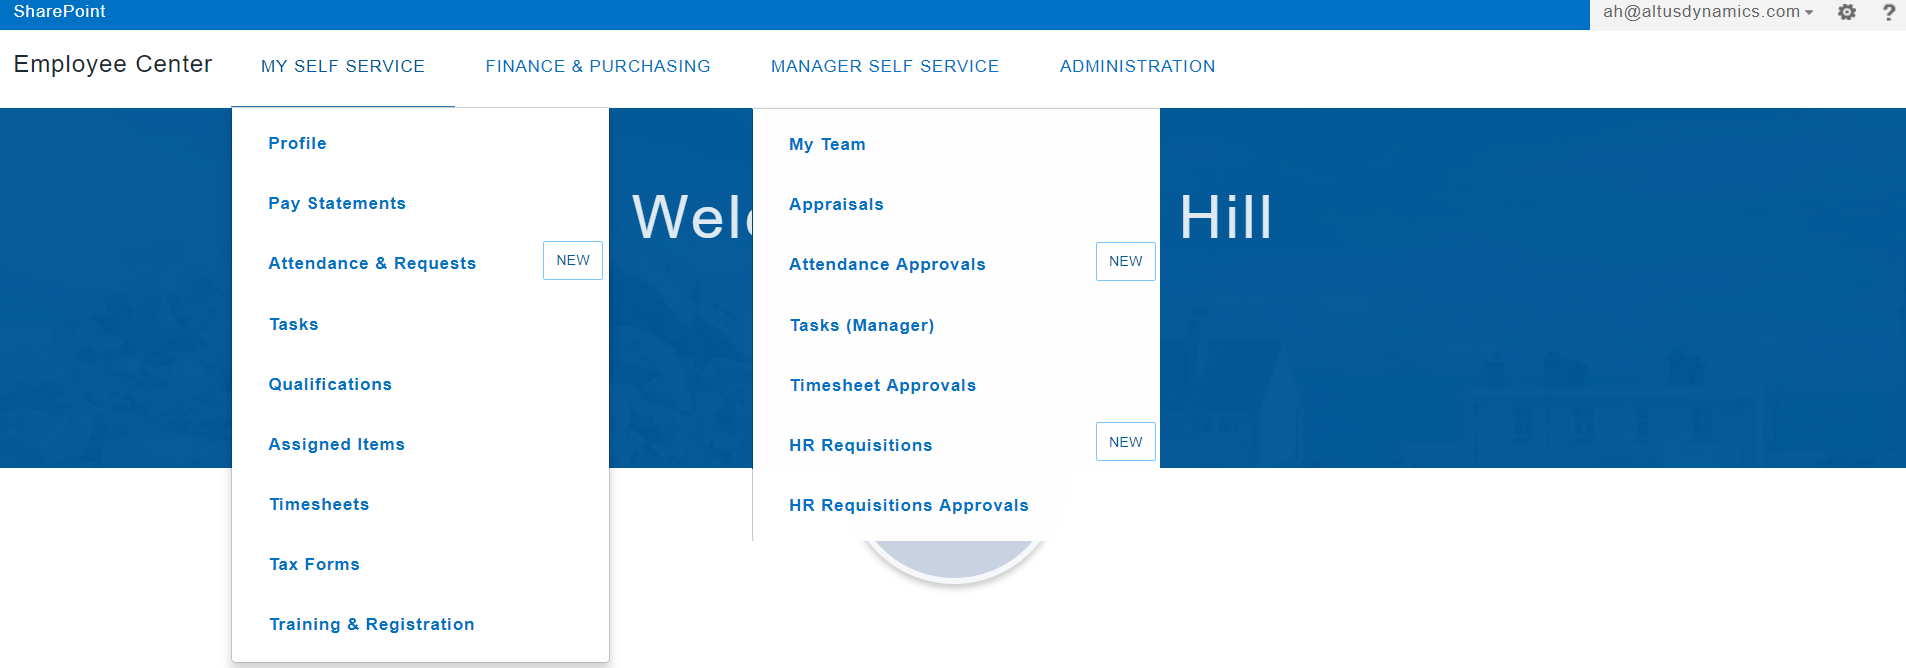
- Click on one of the menu bar options to view the full list of links available.
NOTE: The image below is a compilation of images. It is not possible to view the list of links for more than one menu bar option at once. Also, the options for Finance & Purchasing and Administration are not displayed in the image. Finally, when a menu bar items is clicked, your particular permissions level will determine which links display.
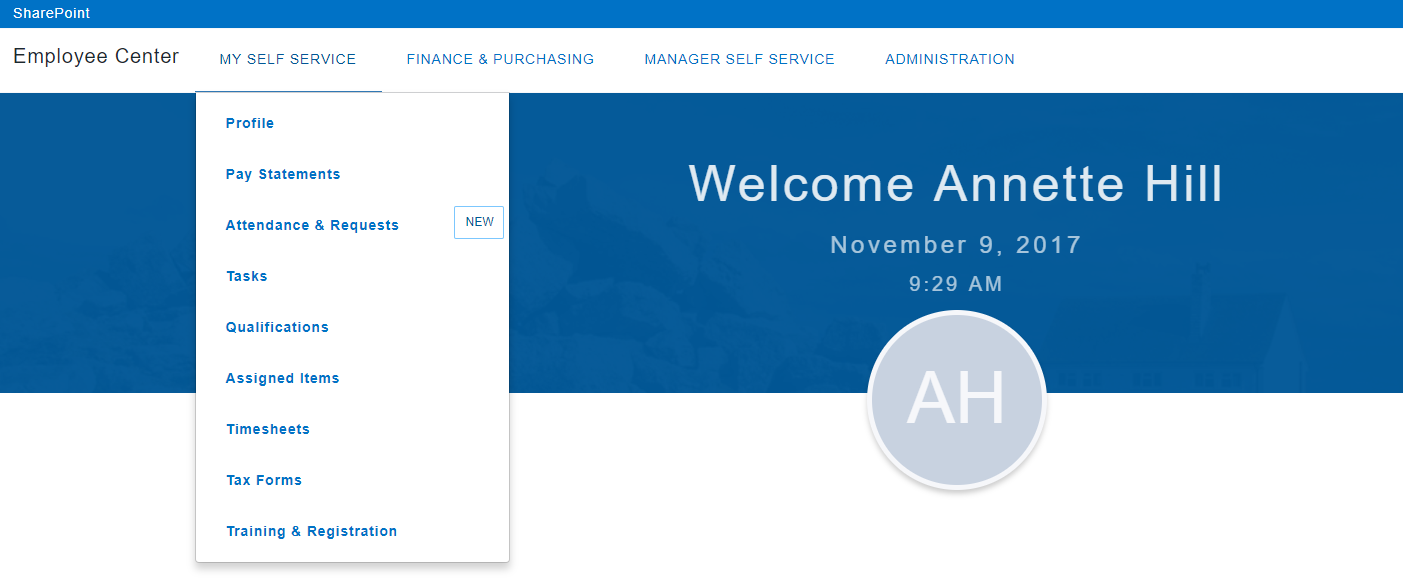
- Click on Profile.
Your Profile displays with the General collapsible section expanded.
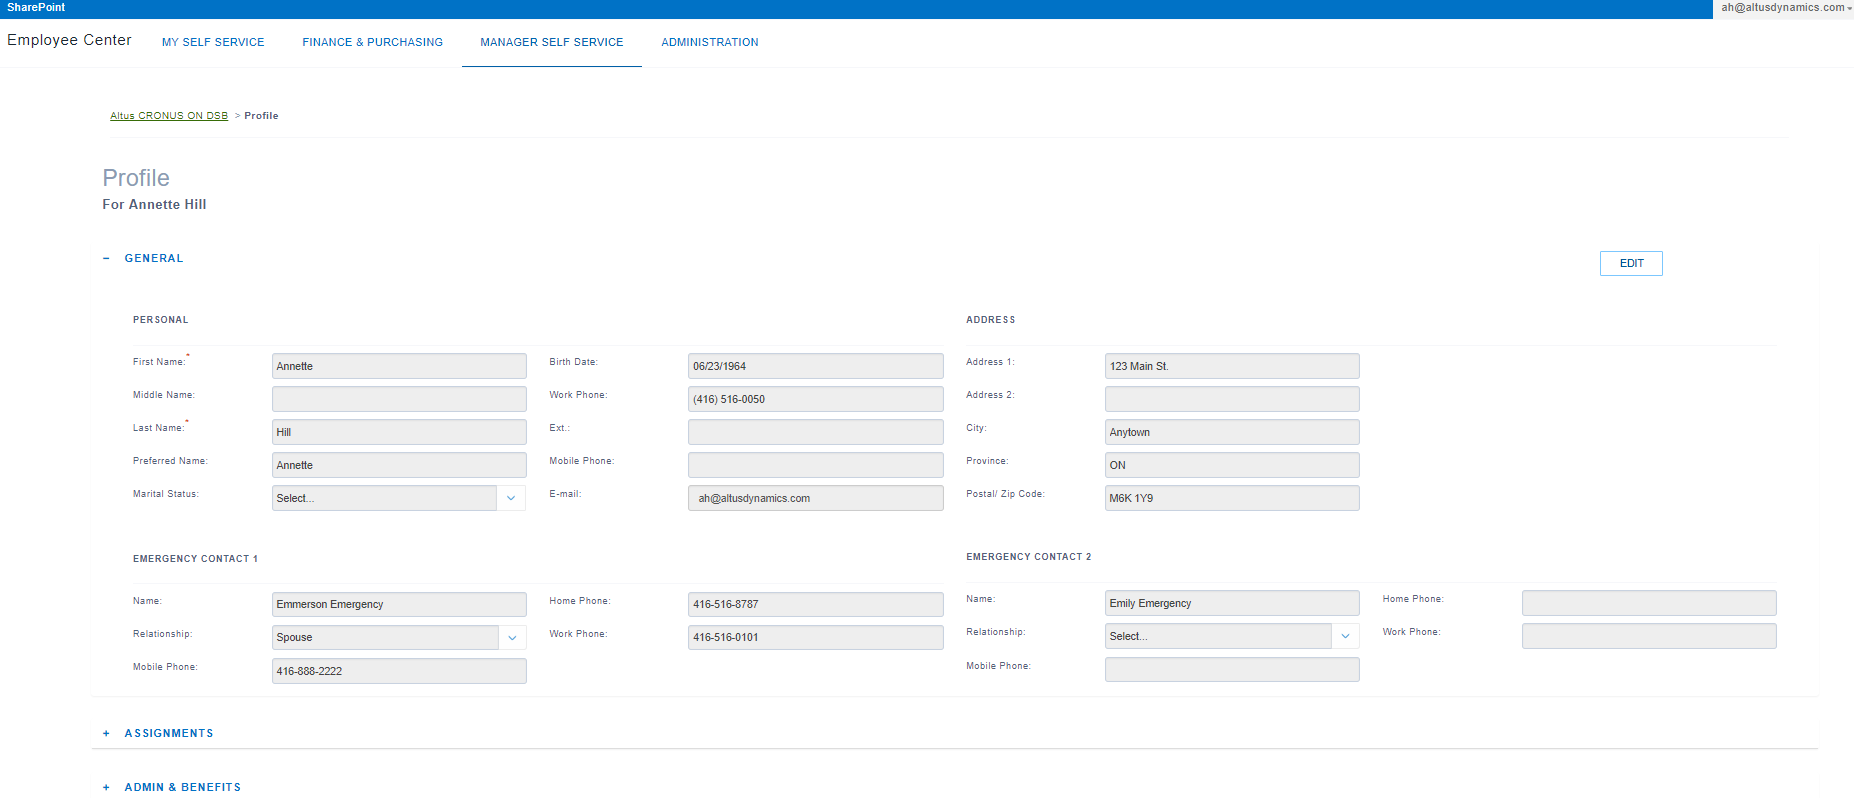
You will notice the menu bar continues to display at the top of the page.
Navigating around Employee Center
- To navigate to other parts of the Employee Center, you can easily check to expand any of the items in the menu bar and select any of the links available to you.
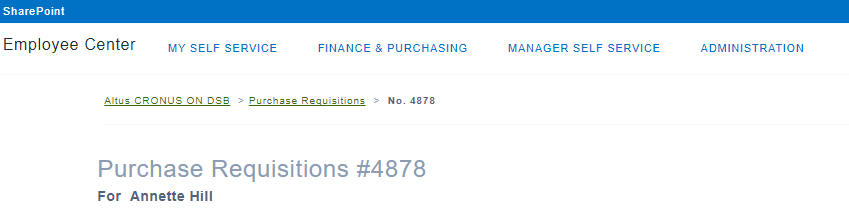
- If you wish, you can also click on the bread crumb to navigate back to the previous page in the application.
Using search and filtering
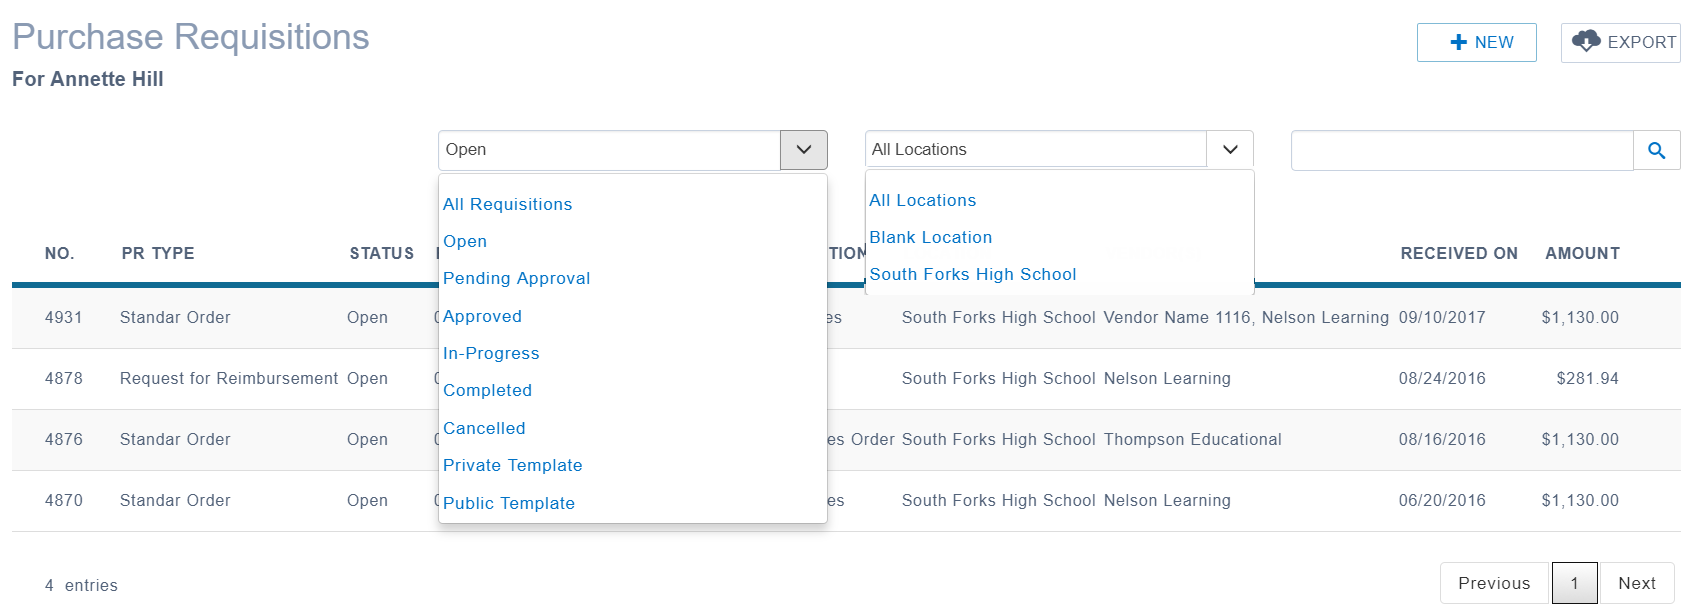
When navigating in Employee Center, you will notice a search field available in many of the pages. The search field searches all fields and columns and completes both alpha and numeric searches.

- To search, enter text, numbers, or a combination of both into the search field and click the search icon.
- There are also filtering options in pages that present lists of items, such as the lists of purchase requisitions. You are able to make selections from options across the top of the list to refine data.
Using hidden menu options
- To drill down on an item in the list, hover over the extreme right of the particular item to expose the hidden menu (a blue circle with three dots) and click it.
- The hidden menu options display. Choose and click within the menu to drill down.

Exposing tools within a line
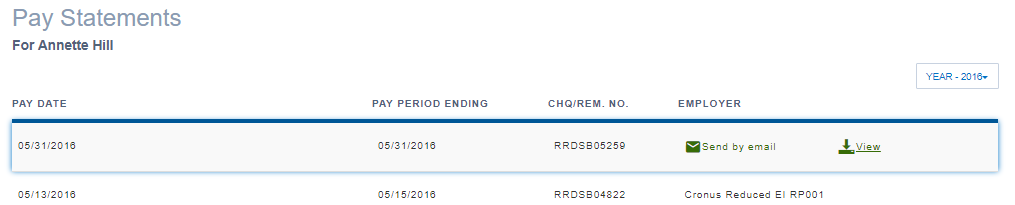
Some of the lists in Employee Center display more options when you hover over a line. To view these options:
- Hover over a line so available actions appear.
- Click on the icon for the action you wish to perform (see the image below for examples of lines with actions that appear when you hover over the line).
Using line expansion to view more detail
Some of the lines in Purchase Orders and Receiving, Purchase Requisitions, and Payment Requests contain more detail, which you can view by expanding the line. When you are done looking at the detail, the line can be collapsed again.
- To see more detail for a particular line, click on the line.
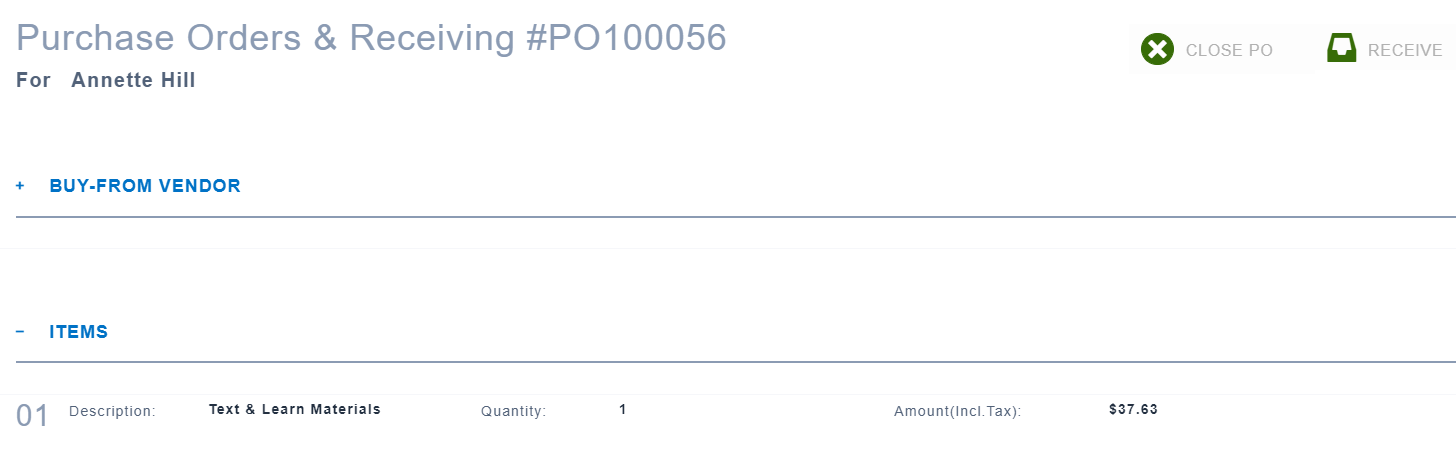 The line expands to reveal more detail.
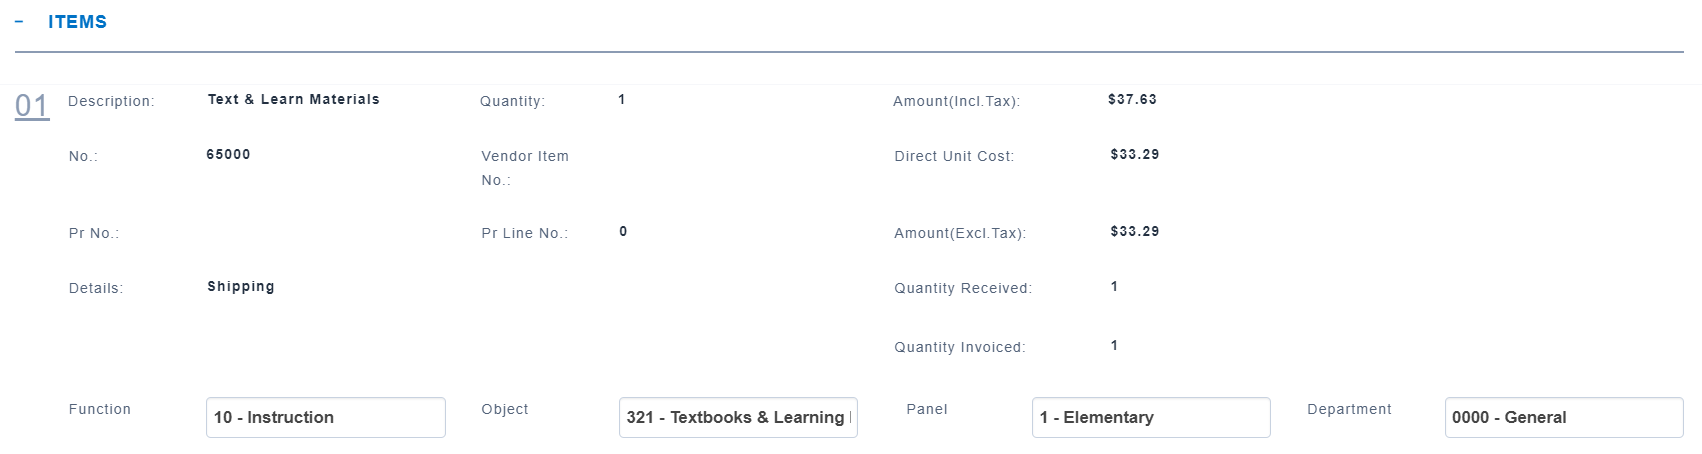
- Click again and the line collapses.
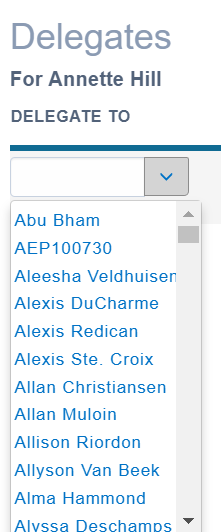
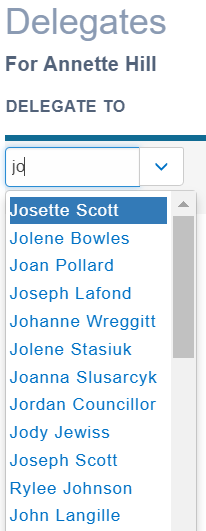
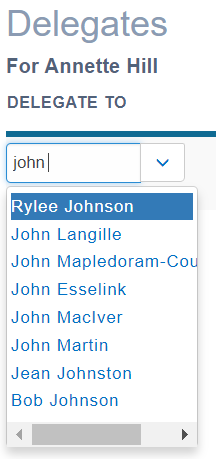
Using type ahead functionality
In some fields, you are able to start typing as a way of refining the quantity of options from drop downs. This facilitates locating the appropriate entry instead of looking through a long list of options. These are called Type ahead fields. Type ahead fields are available when the list of options in a drop down is so long it becomes difficult to locate the correct option. See the images below.
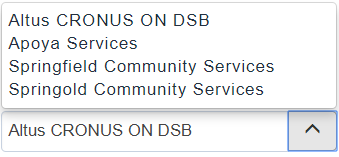
- To select a delegate, instead of clicking the drop down, start typing the name or number of the person to whom you wish to delegate. The list refines as you type.
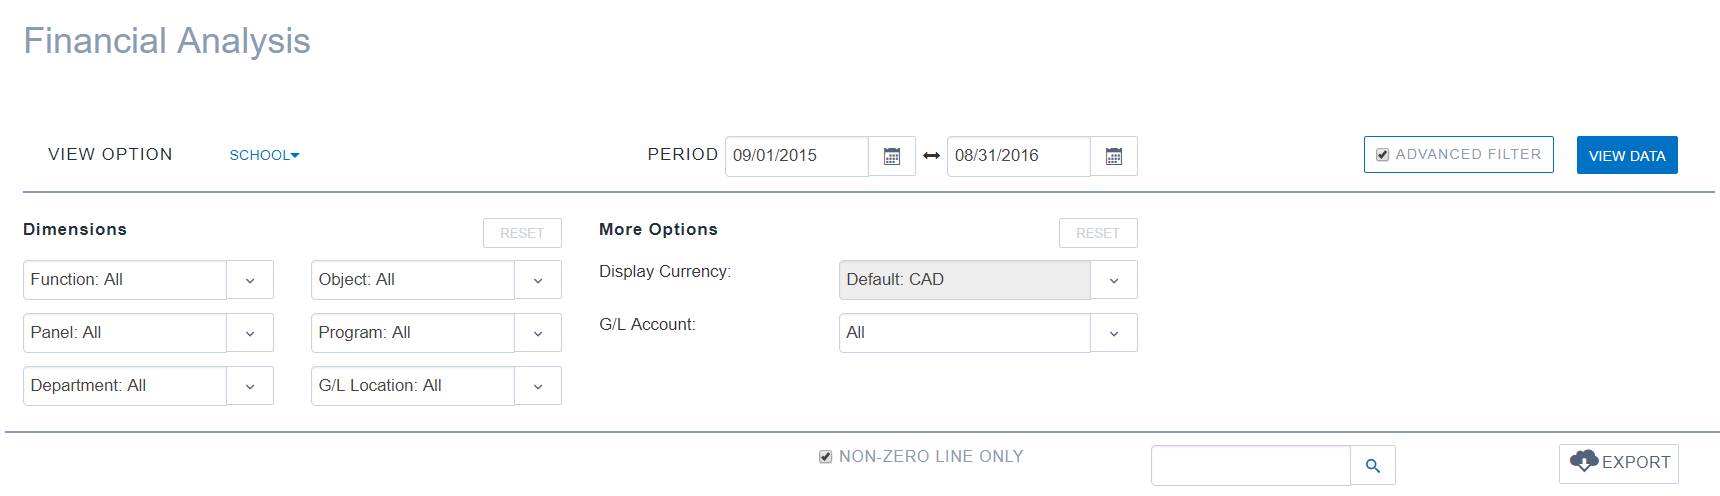
- Type ahead is also used for the Advances Filter in Financial Analysis. Add a check to Advanced Filter and instead of selecting Dimensions and More Options from the drop downs, simply start typing in the fields.