

There are two ways to record Cash Receipts in Microsoft Dynamics NAV:
- Cash Receipt Journals
- Cash Receipt Batches
- Deposits
(all three options are in Cash Management).
Using Deposits
Deposits represent the same functionality as filling in a manual deposit slip and entering the details of receipts from several customers. It combines everything into a single bank entry.
Deposits are made as a result of cash receipts recorded for payments made or to record sales or other income. These entries are grouped by Bank Account, Date, and Deposit. The Deposit Slip Form in NAV provides a simplified means to record and post cash receipts while maintaining the ability to apply those deposits to outstanding invoices or credit memos.
The Deposit Slip allows users to enter multiple customers’ deposits on a single deposit slip as long as the deposits are posting to the same bank and each customer entered for a deposit has the same currency code.
It offers the ability to enter deposit lines for each customer’s checks received and apply it in full or in part to the different outstanding documents while still taking any applicable discounts available.
To access the Deposit page:
- Open Microsoft Dynamics NAV 2016.
- In the Search field, type Deposits and select the page from the drop-down list.
The Deposits page displays. - Either double-click an existing deposit or click New in the Ribbon.
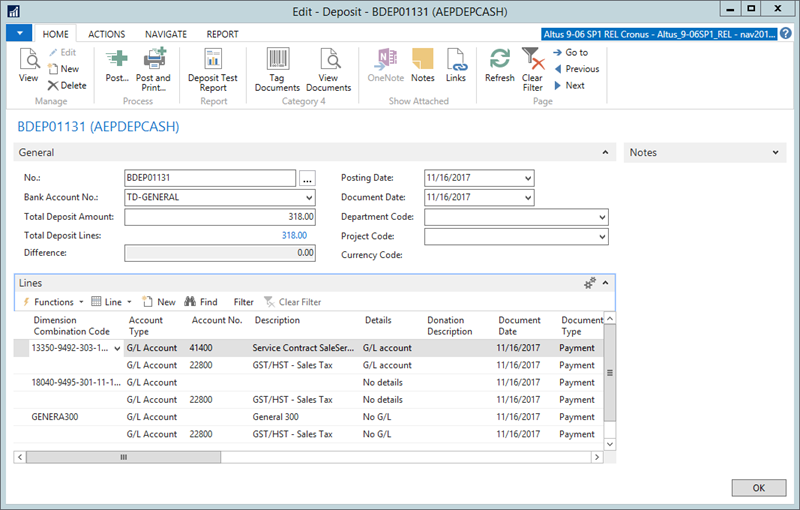
The Deposit page allows users to enter daily cash receipts easily while providing complete information about the payment and the distribution of non-sales receipts to any cost center, department or general ledger account.
The page's fields are discussed below:
| Field | Description |
| No. | The deposit number. This number will automatically default based upon the number series established and identified within the Deposit Nos. field in the General Ledger Setup. |
| Bank Account No. | Use to select which bank account the cash receipts will be deposited into. The program automatically fills in the currency code based on the information on the Bank Account Card. |
| Total Deposit Amount | Use as a point of reference field to indicate the calculated total of all checks that will be entered on this particular deposit slip. The Total Deposit amount and Total Checks amount must equal in order to post the deposit slip. |
| Total Deposit Lines | Calculated field based upon the total amount reflected in the deposit slip lines. |
| Difference | Calculated field that will reflect the difference between what the user entered in the Total Deposit Amount field and sum located in the Total Deposit Lines field. The Difference field must be zero before posting can take place. |
| Posting Date | Used to enter the date on which the deposit slip should be posted. The posting date will be copied to entries when posting occurs. |
| Document Date | Used to indicate the date on which the deposit was created. |
| Shortcut Dimensions 1 and 2 | Used to enter analysis markers to the deposit information. |
| Currency Code | The currency of the selected bank account. |
To enter daily cash receipts from the Deposit page:
- Each check deposit must also have the same currency code as specified on the deposit slip as well. The user will enter the check information into the lines of the deposit indicating the origin and the amount of the cash receipts.
- Once the check information is entered into the deposit Lines, the user can select the Apply Payment function to indicate what open entry the cash receipt should apply to.
- In the Lines FastTab section, enter the Account Type which is generally Customer for payments for customers on account or G/L Account for any miscellaneous cash receipts like GST refunds, and so on.
The document no. is generally the check #. - Leave the amount blank if NAV must calculate it based on the invoices selected as being paid on this check. However, if the invoices do not equal the amount on the check, the amount should be filled in or edited.
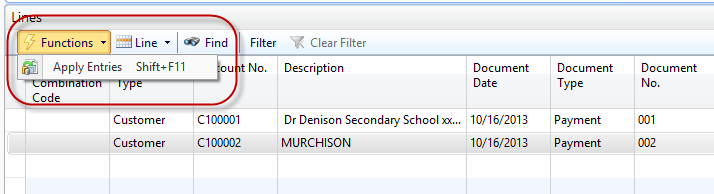
To apply the payment to multiple outstanding invoices:
- Select Lines Actions > Functions > Apply Entries.
This will display all outstanding invoices for this customer.
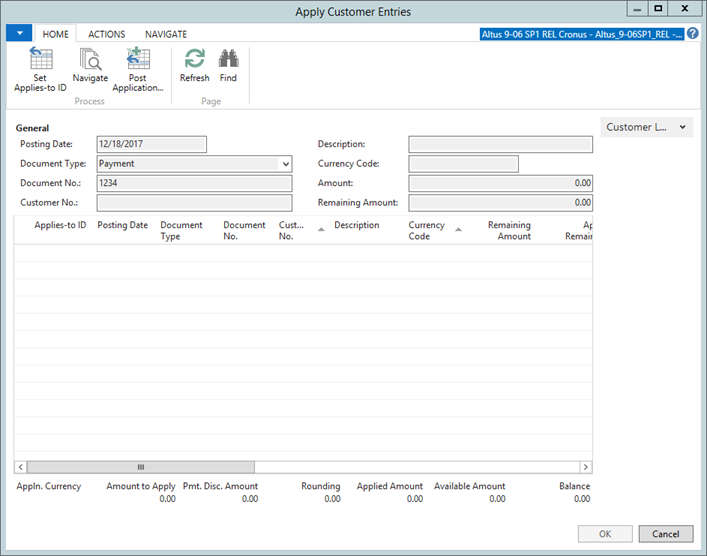
To pay invoices:
- Select the invoice to be paid and click Set Applies-to ID in the Ribbon.
This will indicate the check # in the column marked Applies to ID and summarized the total applied in the lower right hand corner. - Ensure that the total amount of the check balances to the invoices selected.
- Close the page.
Depositing Test Report
- Navigate to Reports > Deposit Test Report.
Prior to posting the deposit slip, the user can print a Deposit Test report. This report includes any errors that would prevent the seposit slip from posting. The level of detail displayed in the Deposit Test report can be controlled, based on the options chosen in the Request Form.
It can be specified that the Deposit Test report show only the checks or the checks as well as the applications (see Options FastTab). Dimension information can also be shown.
After posting the deposit slips, the deposit information by retrieved or viewed under Cash Management > History > Posted Deposits. Users can print the deposit slips or view the application entries from the Posted Deposits page.
Using the Cash Receipts Journal
To access the Cash Receipt Journal:
- From the Search field, type Cash Receipt Journal and select the page from the drop-down list.
The Cash Receipt Journal displays.
Note: You can also access the Cash Receipt Journal by navigating to Cash Management > Tasks > Cash Receipt Journals.
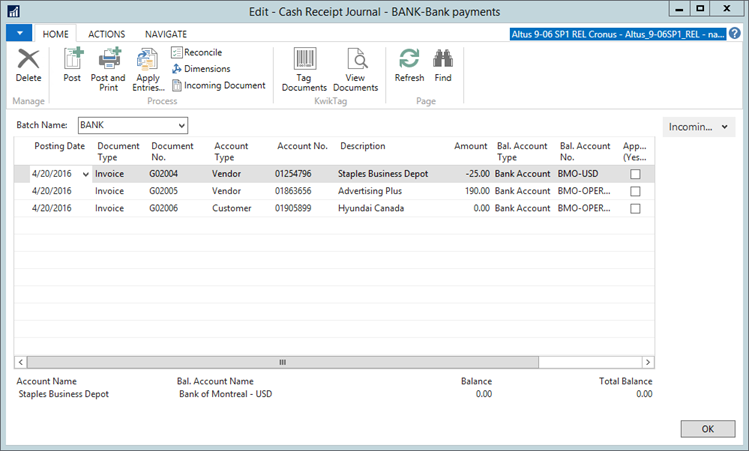
- Columns in the Cash Receipts Journal include:
| Field | Description |
| Posting Date | The date on which the entry will be posted. The posting date will be copied to entries when posting occurs. |
| Document Type | Payment should be the type for calculating any discounts. |
| Document No. | The document number. |
| Account Type |
This field is one of:
|
| Account No. | Customer No. (when Account Type is Customer) |
| Amount | Amount of the entry. Leave blank if NAV should calculate the Amount from invoices or documents applied to. This field must contain a negative value. Credit Amount can also be used. |
| Balance Account Type | Bank Account. |
| Bal. Account No. | The bank account that the deposit is going into. |
| Applies-to Doc. | Leave blank and similar to the Deposits feature, use the Actions > Functions > Apply Entries to apply the cash receipts against open invoices. |
To apply the payment to invoices select the invoice to be paid and click Set Applies-to ID. This will indicate the check # in the column marked Applies-to ID and summarized the total applied in the lower right hand corner.
Ensure the amount selected equals the total amount of the check. Click OK.
Once all the checks are recorded and the Total Balance matches the amount of the total deposit, the batch can be posted by clicking Post or Post and Print in the Action Pane.
To post the Cash Receipt Journal, follow these steps:
- Click Post.
- Click Yes to post the journal lines then click OK.
- Click OK to close the Cash Receipt Journal.
To review the entry posted to the bank account, follow these steps:
- In the Cash Management folder, click Bank Accounts.
- Locate and select bank account.
- Click Related Information, point to Bank Acc., and then click Ledger Entries.
- Locate the payment line.
- This entry represents the payment posted in the Cash Receipt Journal.
- Close the Bank Account Ledger Entries.
To review the posted customer ledger entries for this payment, follow these steps:
- On the Financial Management menu, click Receivables and then click Customers.
- Locate and select customer.
- In the Action Pane click Ledger Entries.
- Review the payment lines.
Using Cash Receipt Batches
This functionally supports the generation of cash receipt batches, individual receipts and the ability to transfer released receipts to deposits based on tenders. A typical process would involve the following steps.
- User “A” creates a new Cash Receipts batch.
- User “A” enters Cash Receipts against that batch throughout the day, categorizing the entries by tender (Cash, Check, Visa etc.)
- At the end of the day, User “A” can review and reconcile entries with the Cash Receipt Batch Report.
- User “B” would validate the Cash Receipt Batch Report and use the Transfer to Deposit function to create a deposit based on Tenders and make the deposit to the bank.
Creating a Cash Receipt Batch
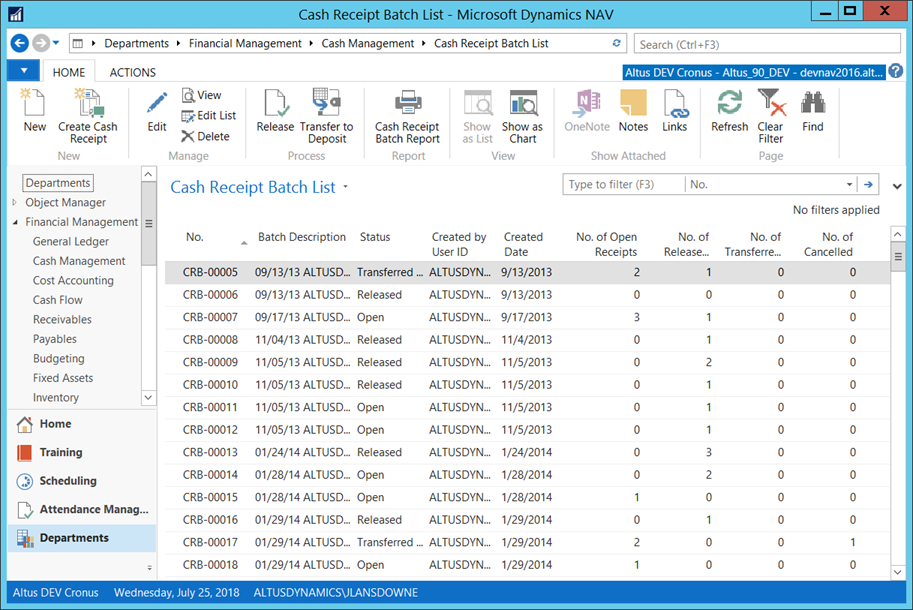
- From the Role Center, select Manage Cash Receipt Batches or in the Search field type Cash Receipt Batches and select the page from the drop-down list.
The Cash Receipt Batch List displays.
- From the Ribbon, click New.
The New - Cash Receipt Batch Card displays.
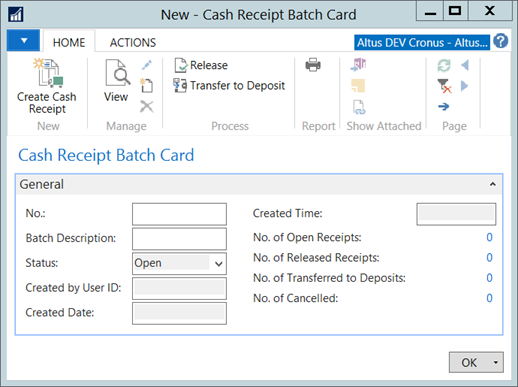
- Complete the No. and Batch Description fields and from the Ribbon click Create Batch Receipt.
The Cash Receipt Card displays.
Creating Cash Receipts
- Do one of the following to create a cash receipt:
- From the Role Center, select New Cash Receipt.
- From the Cash Receipt Batch Card, on the Ribbon click Create Cash Receipt.
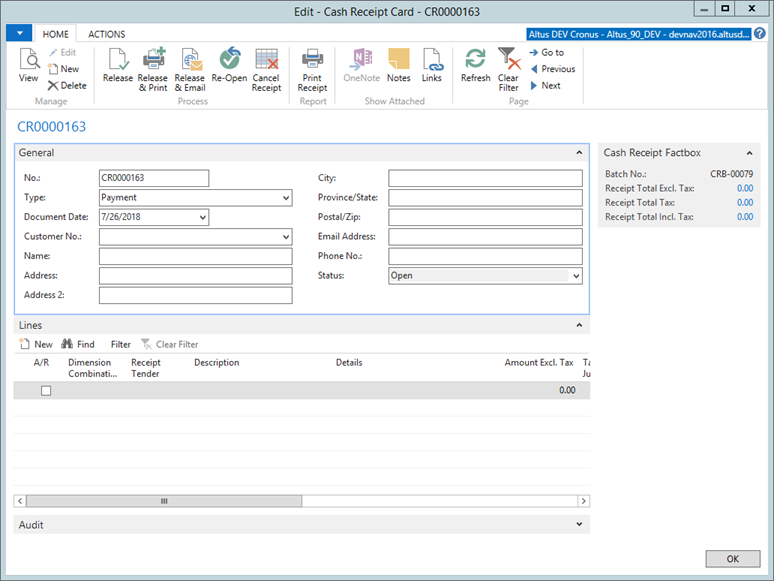
- The Cash Receipts Card displays.
- Move out of the No. field to have the system generate a number automatically for the receipt. The receipt will be assigned to the latest open batch created by the same user, or automatically assigned to the batch the receipt was created from if the Cash Receipt was created using the Create Cash Receipt button on the batch.
- Enter the header fields according to the following:
- Type: select Payment if this represents a payment made to your company. Select Refund if you are returning funds.
- Document Date: enter the date of the receipt. The system defaults this value to Today.
- Customer No.: If the cash receipts is related to a customer that is already set up in NAV, use this field to search for and select this customer. The remaining name and address fields will be populated with data from the customer card.
If the cash receipt is not related to a customer, leave this field blank and enter the values directly in the name and address fields. - Name, Address and Phone No. fields: enter the name and address to be printed on the receipt.
- Email Address: enter an email address to be used for sending the receipt via email.
- Enter line(s) for the cash receipt. Lines support the following types:
- Standard line with or without tax:
- A/R: leave this value unchecked to ensure the line is not linked to a customer and does not flow through accounts receivable.
- Dimension Combination Code: select the dimension combination where the transaction is to be posted.
Note: only dimension combination codes that have been set up with Cash Receipts display. - Description: enter a description for the transaction.
- Details: enter any additional details for the transaction if required.
- Amount Excl. Tax: enter the Amount excluding tax for the receipt.
- Tax Jurisdiction Code: if you would like tax added to the line, select the Tax Jurisdiction Code. If not, leave this field blank.
- Tax Amount: this is a calculated field. The system calculates this field based on the jurisdiction selected and the percent set up on that jurisdiction.
- Amount Incl. Tax: this is a calculated field. It is the Amount Excl. Tax plus the Tax Amount.
- A/R Line that is to be linked to the customer:
- A/R: place a checkmark in this field.
Note: Cash Receipts does not support applications. Therefore, A/R entries entered using this method must be either posted to Customer with an automatic application method or the applications need to be done on the Customer record after the fact.
- A/R: place a checkmark in this field.
- Line that requires a donation tax receipt:
- Columns above: enter in the same way as described above.
- Charitable Tax Receipt: place a checkmark in this field if a tax receipt is to be generated by the transaction.
- Donation Description: enter a description for the transaction.
Note: Any entries requiring donation tax receipts will be transferred to the deposit lines and once posted you can generate the Charitable Donation Tax Receipt report.
- Standard line with or without tax:
- Click OK.
Issuing Cash Receipts
To release and print a receipt:
- From the Cash Receipt Card, on the Ribbon, click Release & Print.
The Print dialog displays. - Follow the prompts on the Print dialog.
To release and email a receipt:
- From the Cash Receipt Card, on the Ribbon, click Release & Email.
The Email Processing Cash Receipt page displays.
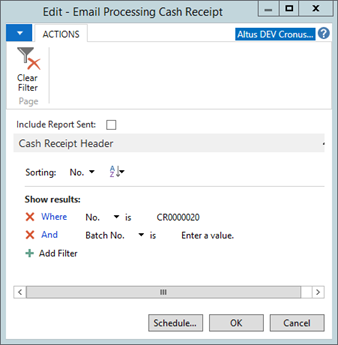
- Click OK.
The Altus Email Start Page displays.
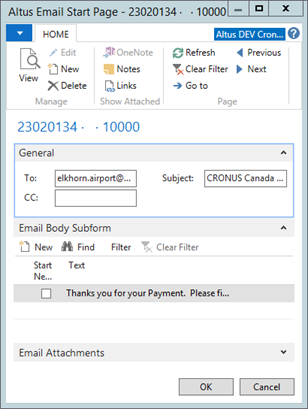
- In the General FastTab, complete the To and Subject fields.
- In the Email Body Subform FastTab, either select the default text or click New to create a new email text.
- Click OK.
The system emails a PDF copy of the report to the vendor.
Finalizing the Cash Receipt Batch
To generate the Cash Receipt Batch Report:
- To review the Cash Receipt Batch Report details, open the Cash Receipt Batch card and click on the Ribbon item Cash Receipt Batch Report.
- Follow the prompts to generate the report and subtotals.
To transfer the entries to deposits:
- To transfer the lines to deposits, open the Cash Receipt Batch card and on the Ribbon click Transfer to Deposits.
- The lines will all be transferred to deposits and the Deposit detail information tagged to the line items.