

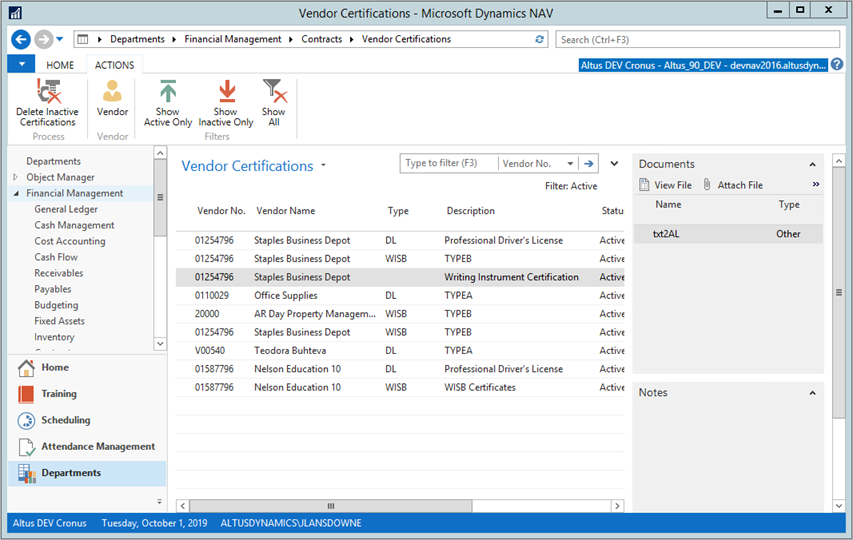
You can use Vendor Certifications to configure certification types and then add certifications to a vendor with date, expiry date and attachments. This functionality is useful for tracking various documents per vendor like WSIB, various insurance types, and other documents that are required for vendor compliance.
Viewing Certifications
To view Vendor Certifications, navigate to Departments > Financial Management > Contracts > Vendor Certifications.
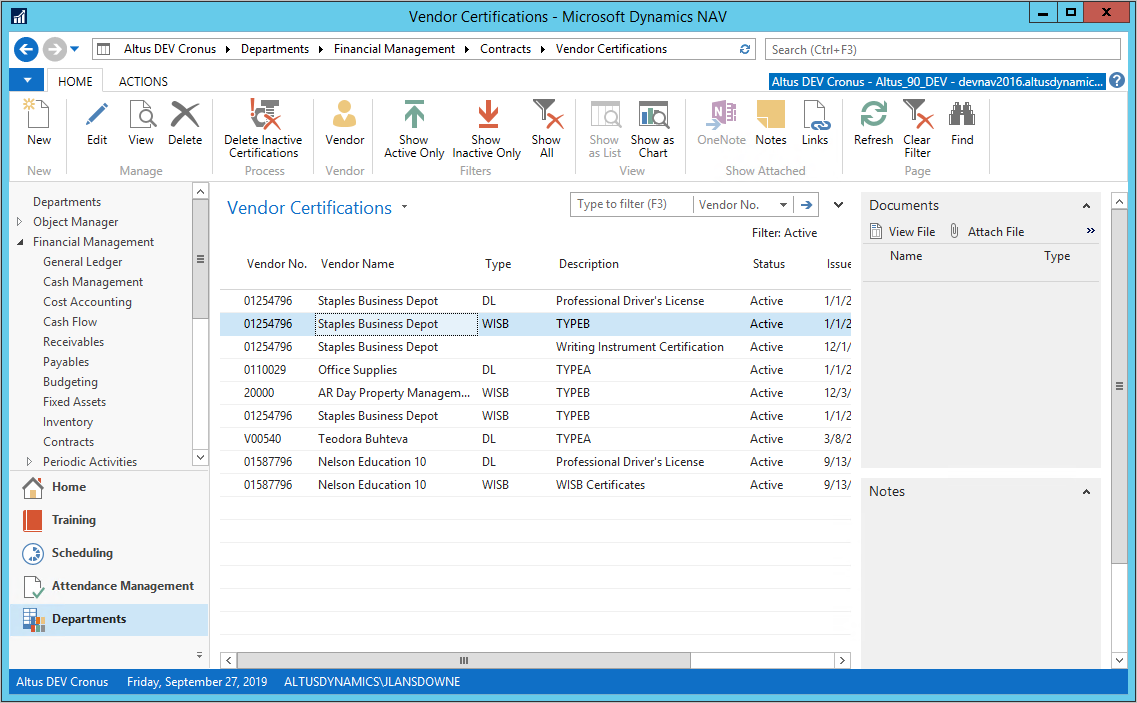
Double-click the appropriate line to view more details.
Viewing Vendor Certifications from the Vendor List
To view Vendor Certifications from the Vendor List:
- In the Search field, type Vendor List and select the page from the drop-down list.
The Vendor List displays.
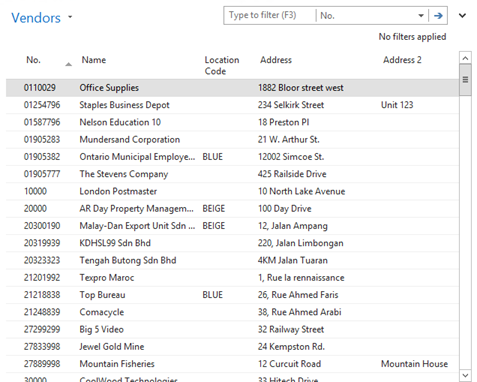
- Double-click the line for the vendor for which you want to view certifications.
The Vendor Card displays
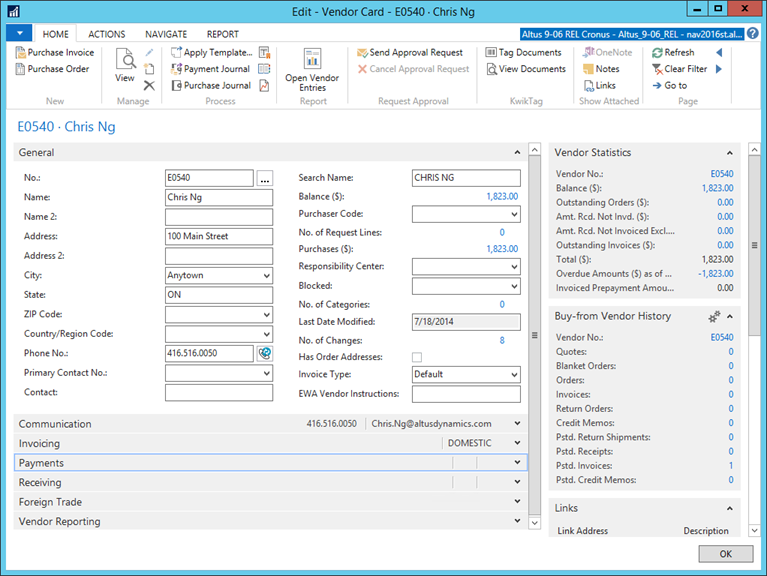
- On the Ribbon, click Navigate > Certifications.
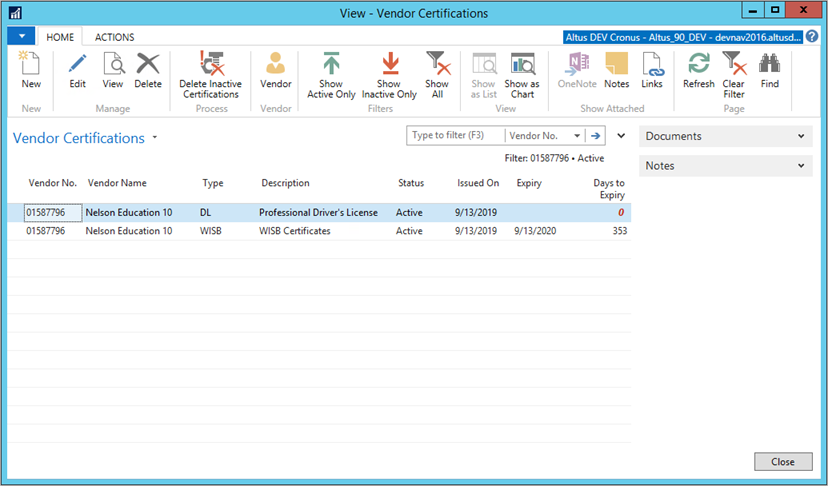
The Vendor Certifications page displays.
Viewing Vendor Certifications from the Contracts List
To view Vendor Certifications from the Contracts List:
- In the Search field, type Contracts and select the page from the drop-down list.
The Contracts List displays.
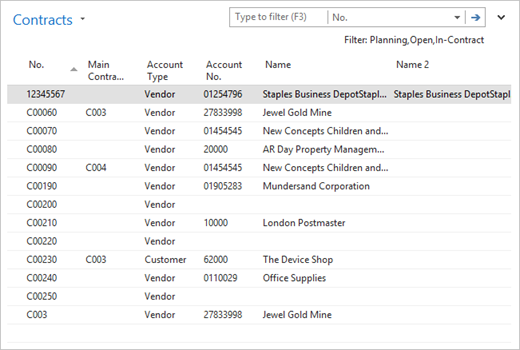
- From the Contracts List, double-click the line to view the Contract Card.
The Contract Card displays.

- On the Ribbon, click Navigate > Vendor Certifications.
Configuring the Vendor Certification Number Series
Before you can create new vendor certifications, you must configure the number series that you want to use.
- In the Search field, type Contract Management Setup and select the page from the drop-down list.
The Contract Management Setup page displays.
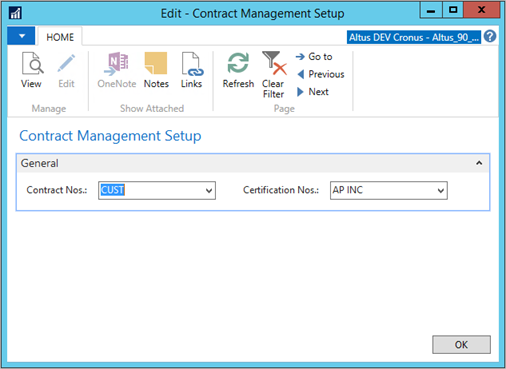
- To use an existing number series, select the series from the Certification Nos. drop-down list.
- To create a new number series:
- Click the drop-drown menu and then click New. The No. Series List page displays.
- Specify a Code and Description in the respective fields.
- Click in the Starting No. field. The No. Series Lines page displays.
- In the Starting Date field, specify the date when this number series is active.
- In the Starting No. and Ending No. fields, specify the valid range of numbers to use.
- In the Increment No. field, specify the value to use to increment the series.
Creating and Editing Vendor Certifications
To create a new Vendor Certification:
- In the Search field, type Vendor Certifications and select the page from the drop-down list.
The Vendor Certifications List displays.

- On the Action Bar, click New.
A new Vendor Certification Card displays.
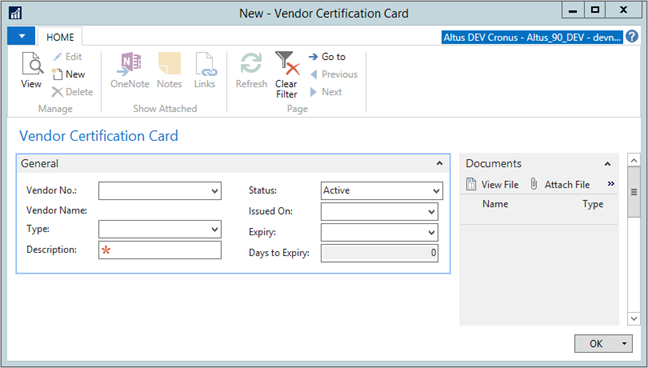
- In the Vendor No. field, select the vendor to which this certification applies. When you select a Vendor No., the Vendor Name field updates.
- (Optional) In the Type field, click the drop-down list and do one of the following:
- Choose en existing certification code.
- Click New.
The New Vendor Certification Type dialog displays.
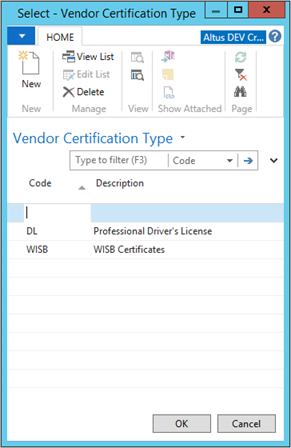
- Provide a Code and Description for the new vendor certification.
- Click OK to return to the Vendor Certification Card.
- In the Status field, specify if the Vendor Certification is either Active or Inactive.
- In the Issued On field, specify when the Vendor Certification was issued.
- In the Expiry field, specify when the Vendor Certification expires.
Note: If the certification does not expire, leave the value in this field blank.
To edit an existing Vendor Certification:
- On the Vendor Certifications page, select the Vendor Certification that you want to edit.
- On the Ribbon, click Edit.
The Vendor Certification page displays. - Make any changes as necessary.
Working with Vendor Certification Types
You can add, edit, or delete Vendor Certification types from the Vendor Certification Type page:
- In the Search field, type Vendor Certification Type and select the page from the drop-down list.
The Vendor Certification Type page displays.
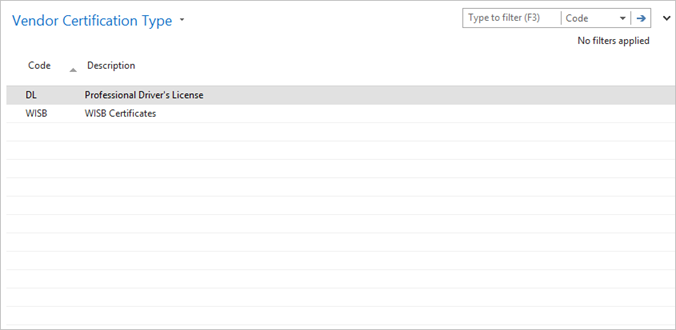
- To add a new Vendor Certification type, click New on the Ribbon. Specify the Vendor Certification Code and Description.
- To delete a Vendor Certification type, select the line and then click Delete on the Ribbon.
- To edit an existing Vendor Certification type, click Edit List on the Ribbon, and then make your desired changes.
Adding Attachments to Vendor Certifications
To add an attachment to a Vendor Certification:
- On the Vendor Certifications page, highlight the vendor to which you want to add an attachment.
- In the Documents section, click Attach File.
The Insert File dialog box displays. - Browse for the file you want to attach and click Open.
Deleting Inactive Vendor Certifications
You can use the Delete Inactive Certifications command to quickly remove all Vendor Certifications that have expired.
To delete inactive Vendor Certifications:
- Click Tell Me and search for Vendor Certifications. Select the page from the drop-down list.
The Vendor Certifications list displays. - On the Ribbon, click Delete Inactive Certifications.
The Delete Inactive Certifications dialog box displays.
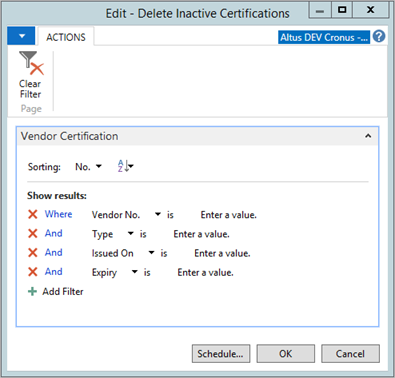
- Apply the desired filters and click OK.
A Confirmation dialog box displays.
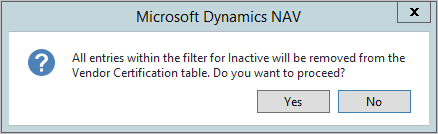
- Click Yes.
All inactive certifications that match the filter criteria are removed from the Vendor Certifications list.
To schedule an inactive Vendor Certification deletion:
- Click Tell Me and search for Vendor Certifications. Select the page from the drop-down list.
The Vendor Certifications list displays. - On the Ribbon, click Delete Inactive Certifications.
The Delete Inactive Certifications dialog box displays.
- Apply the desired filters and click Schedule.
The Schedule a Report - Delete Inactive Certifications page displays.

- In the Earliest Start Date/Time field, specify the date when report should begin running.
- In the Expiration Date/Time field, specify the date when the report should expire.
- Click OK.
This is currently done on the Contract Management Setup page, but as of the Fall Release number series are configured on the Purchase & Payables Setup page.