

Managing Delegates
The Delegates feature gives you the ability to assign delegates for HR Requests, Time Entry, Purchase Requests, Payment Requests, Expense Requests, and Approvals. Additionally, the functionality is flexible enough to enable you to assign different delegates across your different responsibilities.
When delegate relationships are set up, you can view the details for the user that has been assigned as a delegate as well as view the details for a user that has assigned other users as delegates.
Viewing Delegate Relationships
In NAV, you can view the existing delegate to and from relationships for an individual.
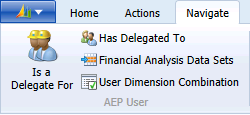
Note: Is a Delegate For is for viewing only, while Has Delegated To is editable. (This is where you can view and/or setup delegates for the user.)
You can review the details for the delegate relationship including the specific responsibilities for which an employee is acting as delegate.
To review an employee’s delegate roles:
-
Open the EWA User card for the user for which you want to view delegate relationships.
-
Click the Navigate menu tab.
-
On the Ribbon, click Is a Delegate For.
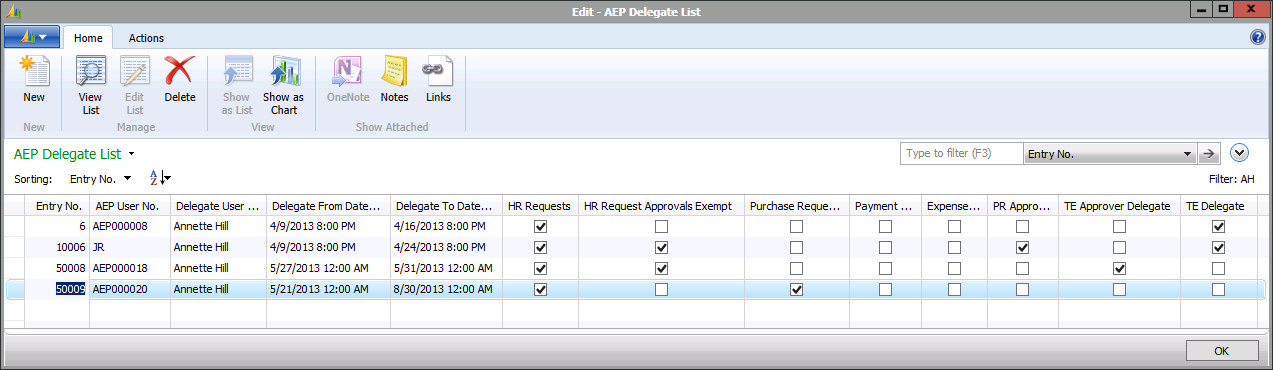
The EWA Delegate list opens displaying the individuals for whom the employee acts as a delegate.
In the example below, AH is a delegate for the four users listed in the EWA User No. column. In particular, AH is a delegate for user AEP000020 for HR Requests, HR Request Approvals, and Purchase Requests.
Viewing the Employees to which an Employee has Delegated Responsibilities
When Administrators assign delegates, the delegate functionality allows for assigning individual employees to specific responsibilities. You can view the details for who is assigned to what specific role.
To view the people to which an employee has delegated responsibilities:
-
Open the EWA User card for the user for which you want to view delegate relationships.
-
Click the Navigate menu item.
-
Click Has Delegated To.
The EWA User card displays the individuals acting as delegates for the employee.
Note: The ability to update delegates on Employee Center is defined in EWA Setup page. Delegate Entry is enabled if Delegation Management has been made available as a page through the EWA menu control.
Assigning Delegate Relationships
You can create a delegate to relationships by assigning delegates to specific users.
To assign a delegate to a user:
-
Open the EWA User card for the individual for whom you want to add as a delegate.
-
Click the Navigate menu item.
-
Click Has Delegated To.
The EWA User Delegates card opens.
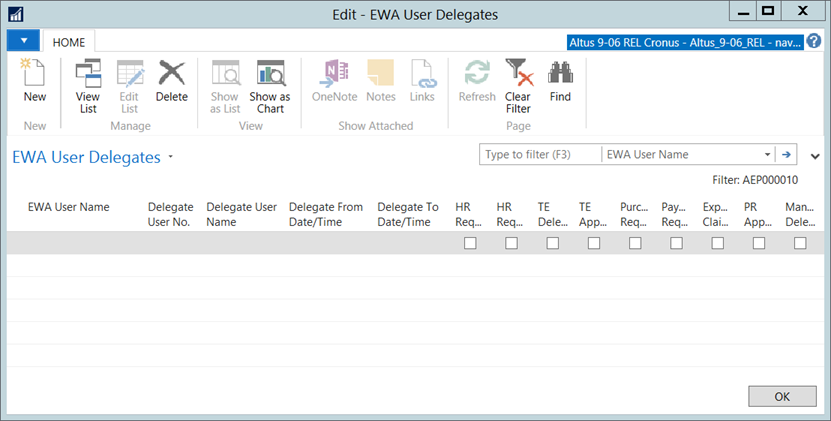
- On the Ribbon, click New.
A new blank record is inserted. - Use the following table for assistance in completing the fields for assigning a delegate to the selected user.
Notes:
- When logged into Employee Center, users assigned as a delegate can use the Requests For drop-down (available on the pages where delegation is enabled) to see a list of the delegators who assigned the user as a delegate for the particular request type. Me is the default, which represents the user’s requests.
- When selecting to be a delegate for a request, the logged-in user assumes all security filters from the delegator while the delegation is active.
| Field | Details |
| EWA User No. | Displays the user number for the employee to whom a delegate is being assigned. |
| EWA User Name | Displays the EWA user name for the individual to whom a delegate is being assigned. This field is auto-populated based on the EWA user number selected. |
| Delegate User No. | Displays the delegate's user number. From the drop-down, select the EWA user number for the individual you want to assign as delegate. |
| Delegate User Name | Displays the delegate's EWA user name. This field is not editable and is populated based on the selection made in the Delegate User No. field. |
| Delegate From Date/Time | In the Delegate From Date/Time field, enter the start date at which the user will begin acting as delegate (optional). |
| Delegate To Date/Time | In the Delegate To Date/Time field, enter the date upon which the user will no longer act as delegate (optional). |
| HR Requests | Click this checkbox to indicate this user is authorized to enter and submit HR Requests on behalf of this employee. |
| HR Request Approvals Exempt | Click this check box to indicate this user’s requests do not require approval. |
| TE Delegate | Click this check box to indicate the delegate is authorized to enter and submit Time Entry on behalf of this employee. |
| TE Approver Delegate | Click this check box to indicate the delegate can approve Time Entry submissions (from employees reporting to this employee) on behalf of this employee. |
|
Notes:
|
|
| Pur. Req. Delegate | Click this check box to indicate the delegate is authorized to enter and submit Purchase Requests on behalf of this employee. |
| Pmt. Req. Delegate | Select this check box to indicate the delegate is authorized to enter and submit Payment Requests on behalf of this employee. |
| Exp. Req. Delegate | Click this check box to indicate the delegate is authorized to enter and submit Expense Requests on behalf of this employee. |
| PR Approver Delegate | Click this check box to indicate the delegate can approve Purchase Request submissions (from employees reporting to this employee) on behalf of this employee. Note: Approval Emails will be sent to all the approvers and the delegate approvers of those approvers. |
| Manager Delegate HR | Click this check box to indicate that the delegate can approve HR submissions on behalf of this employee. |
-
Click OK.
-
Open the EWA User card for the employee you assigned as a delegate.
-
Click EWA User and then select Is a Delegate For.
The EWA Delegate list opens showing the individual for whom this employee is acting as delegate.
Performing Mass Updates for Approvers
Mass updates enable you to change the settings for approvers all at once. There are options for updating approvals to assign different approvers permanently or on a temporary basis.
Managing Global Approval Settings
Use this function to manage or update the following:
-
Change all (or only filtered) approver records
-
Reassign Open/Pending Approvals
-
Email Pending Requests list to the new approver
To perform a mass update the existing threshold approvers:
-
In the Search field, type EWA Users.
-
Select EWA Users.
The EWA User list displays. -
Select the EWA user for which you want to re-assign open and pending approvals to another approver.
-
On the Ribbon, click Edit.
The EWA User card for the selected individual opens. -
Click the Actions menu tab.
-
On the Ribbon, click Mass Update Threshold Approvers.
- The EWA - Mass Update Approvers card opens.

-
In the Options FastTab under the From section, provide the following:
-
From the Rename From Approver EWA User No. drop-down, select the current approver.
-
Complete the Filters section by selecting the filters you want to apply (to which the current approver is assigned).
-
In the To section, complete the following:
-
Select the Reassign Pending/Open approvals checkbox to have all requests of this status reassigned to the new approver.
-
Select the Email Pending Request to New Approver checkbox to forward (by email) all pending requests to the new approver.
-
From the Rename To Approver EWA User No. drop-down, select the new approver.
- Click OK.
Updating EWA Request Approvers
You can use the Update Request Approvers function to assign open and pending approvals only to a temporary approver.
To update request approvers:
-
Open the EWA User card for the individual to which you want to re-assign open and pending approvals to another approver. (See the previous section for steps to displaying the EWA User card.)
-
Click the Actions menu tab.
-
On the Ribbon, click Update Request Approvers.
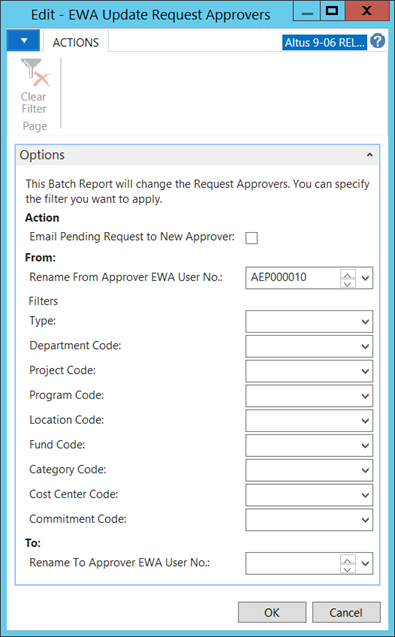
The EWA Update Request Approvers card opens.
-
In the Action section, click the Email Pending Request to New Approver checkbox to send email notifications to the temporary approver for all pending requests.
-
In the From section, provide the following:
-
From the Rename From Approver EWA User No. drop-down, select the current approver.
-
Complete the Filters section by selecting the filters you want to apply (to which the current approver is assigned).
-
In the To section, from the Rename To Approver EWA User No. drop-down, select the temporary approver.
- Click OK.