

Now that the setup steps are complete, you are able to begin processing payments. When you are ready to transmit an EFT payment to a vendor, there are some tasks you need to perform to create a record of the payment, provide the required details to the bank and the vendor (remittance advice), and then finally, transmit the funds.
Capturing the Transaction in the Payment Journal
The Payment Journal is the journal that captures transactions that will be processed.
When processing EFT transactions, you can select filtering options to ensure the batch process only captures items flagged as EFT based on the vendor configuration you set up.
To capture vendor payment transactions:
1. In the Search field, enter Payment Journals.
2. Select any of the options displayed.
The Payment Journal opens.
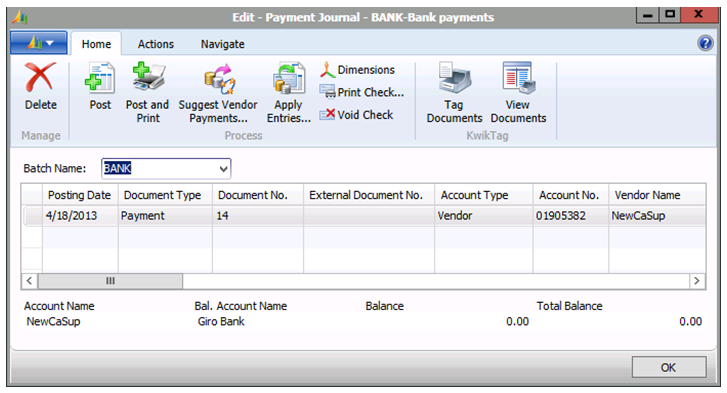
1. Click the Batch Name drop-down arrow.
2. Select the appropriate batch and click OK.
TIP: You may want to create a separate batch to process electronic payments separate from other cheque payments.
3. On the Ribbon, click Suggest Vendor Payments.
The Suggest Vendor Payments window opens.
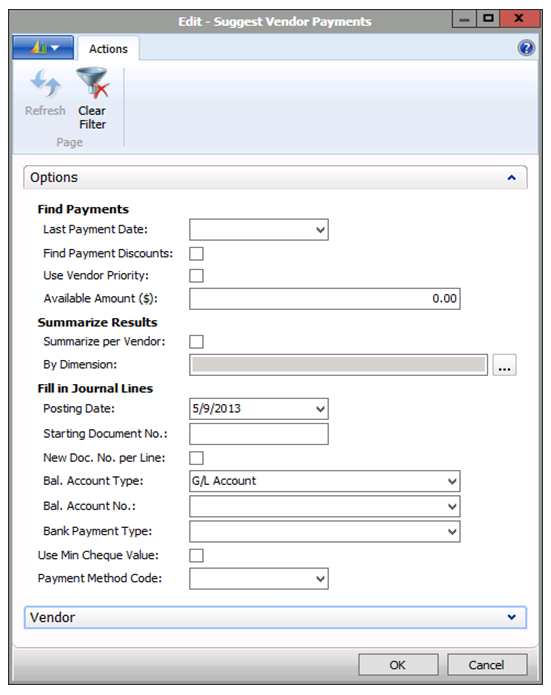
4. In the Options Fast Tab, populate the following fields specific to the EFT process:
-
From the Bal. Account Type drop-down, select Bank Account.
-
Click the Bal. Account No. drop-down arrow to open the Bank Account List.
-
Select the bank used to transfer the funds to the vendor account and click OK.
-
From the Bank Payment Type drop-down, select Electronic Payment.
5. Click the Expand icon to display the Vendor Fast Tab.
6. Complete the following steps:
-
Click the Add Filter icon to open the filter options.
-
Select the Payment Method Code filter.
-
From the Payment Method Code drop-down, select EFT.
7. Click OK.
The payment journal is populated with the appropriate entries based on your selections.
Creating the Remittance Advice and Bank Transfer Files
You can create the remittance advice document that combines all letters in one file and the bank transfer export file simultaneously.
To generate a full remittance advice document and bank export file:
1. Click the Navigate menu tab.
2. On the Ribbon, click Electronic Payments > Export.
The Edit - Export Electronic Payments window opens.
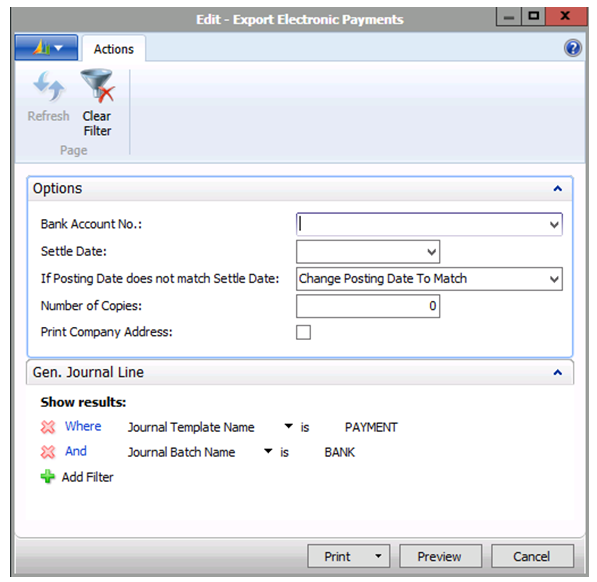
3. In the Options section enter or confirm the following:
- Bank Account field: This defaults to bank number last used. Verify that this is the correct account to use for these transactions. If not, select a different bank account.
- Settle Date field: The date displayed is the date that will be set in the bank transfer file to make the bank payment transfer. Select a date from the drop-down calendar.
- If Posting Date does not match Settle Date field: This field enables you to set the action you want if there is a discrepancy between the posting date in the journal and the settlement date selected. You can select to change the posting date or to ignore entries where the date does not match.
- Number of Copies field: Enter the number of additional copies you want to generate.
- Print Company Address check box: Click to add a check mark if you want the company address to display on the remittance document.
The information in the Gen. Journal Line section defaults to the information selected for the Journal and Batch name.
4. Click the Print button and select PDF.
If you do not want to print the file with all remittance letters on paper, you can save it as a PDF if you want to have an electronic copy of the file.
This process generates two outputs:
- A flat file to be used to upload to the bank the EFT information.

- The remittance advice PDF document that will be emailed to the vendor.
Uploading the File to the Bank
Once you have the export file prepared, you transmit the file to the bank for processing. After the file is transmitted to the bank, you get a notification from the bank indicating that the process completed without errors.
To upload the export file to the bank:
- Follow the instructions provided by your financial institution.
If you receive an error or notice that something prevented the file from transmitting successfully, you can void the transmission and try again.
Voiding the Payment Transmission Process in the Event of an Error
Should anything go wrong with the electronic file sent to the bank, the full payment process can be reversed by voiding the batch. The EFT process only voids full batches and NOT item by item.
To void the payment process:
1. Click the Navigate menu tab.
2. On the Ribbon, click Electronic Payments > Void.
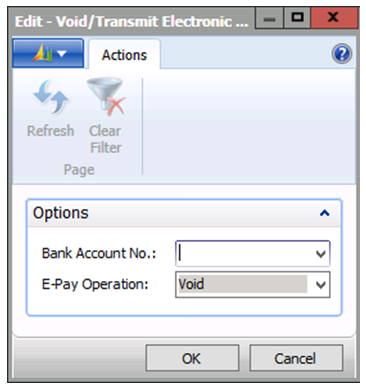
The Void/Transmit Electronic Payments window opens.
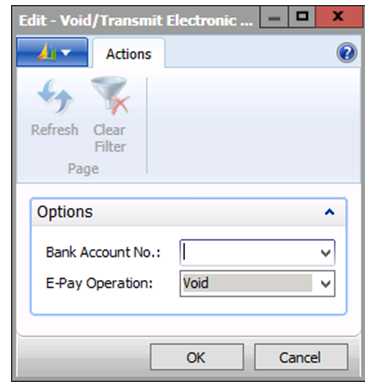
3. From the Bank Account No. drop-down menu, select the bank to which you originally transmitted the export file containing the electronic payment details.
The E-Pay Operation field displays Void by default. Leave this option as selected.
4. Click OK.
The Void process begins. This process deletes (voids) the batch.
Once the void is complete, you can attempt to re-transmit the payment to the bank.
Sending the Remittance Advice to the Vendor
Once you transmit the payment to your banking institution and you receive notification that the file transmitted to the bank without error, you can notify the vendor that the payment has been made by sending the remittance advice.
To send the remittance advice to the vendor:
1. Click the Navigate menu tab.
2. On the Ribbon, click Electronic Payments > Email Remittances.
The email remittance is sent to the vendor.
Transmitting the Payment to the Payment Journal
Once the bank confirms that the file is without errors, you need to indicate that the process was successful by transmitting the file in the Payment Journal.
To transmit the export file:
1. Click the Navigate menu tab.
2. On the Ribbon, click Electronic Payments > Transmit.
The Void/Transmit Electronic Payments window opens.
3. From the Bank Account No. drop-down menu, select the bank to which you want to transmit the export file containing the electronic payment details.
The E-Pay Operation field displays Transmit by default. Leave this option as selected
4. Click OK.
The Transmit process begins. This process ‘moves’ the generated file from the Export directory to the Export/Transfer directory.
NOTE: Do not remove this file manually. This process is used as a safeguard to ensure that all steps are taken in the right sequence.
You cannot post a payment journal before you perform the transmit process. Also, you cannot delete or void payments after the file has been transmitted. The transmission locks the entries in the Payment Journal and the only available action is to post them.
Posting the Payment to the General Ledger
Now that the payment has been transmitted you can select an option to flag the items in the journal as transmitted. Flagging items as transmitted then enables you to complete the next step, which is to post the payment to the Payment Journal.
You have two options:
- post the payment
- post the payment and print a copy as a report
To post the payment to the general ledger:
1. Click the Actions menu tab.
2. On the Ribbon, click Post or Post and Print.

A confirmation message window opens.
3. Click Yes to complete the posting process.
A window opens to show the processing.
When complete another confirmation window opens.
4. Click OK.