

Explaining Prepayments
Prepayments in NAV allow prepayments to be made where vendors require payment before a delivery is made. (This is also available for sales and customers).
Microsoft Dynamics NAV can be set up to:
- Set up certain vendors (or customers) with a specific percentage.
- Require specified prepayment percentages to selected vendors for all items.
- Require specified prepayment percentages for selected combinations of vendors and items.
- Require verification that the prepayment has been made before shipping or receiving items.
To use prepayments, the following must be set up:
- General Ledger accounts and posting groups for prepayments.
- Number series for prepayment documents.
- Payment terms for prepayment invoices.
- Prepayment percentages for selected vendors.
- Prepayment percentages for combinations of: – customers, customer groups, or all customers and items – vendors and items.
- Check boxes to require before the posting of purchase receipts: the issue of prepayment amounts from vendors for purchases.
Prepayment General Ledger Accounts
Because the prepayment amount belongs to the buyer until the buyer has received the goods or services, (an asset), General Ledger accounts to post the prepayment amounts until the final invoice is posted. To recognize ownership, the system must be set up to:
- Record sales prepayments in a liability account until the items are shipped.
- Record purchase prepayments in an asset account until the items are received.
Setting Up Prepayment General Ledger Accounts
To set up General Ledger accounts for prepayments, if there are none, follow these steps:
- Open Microsoft Dynamics NAV.
- In the Search field, type Chart of Accounts and select the page from the drop-down list.
The Chart of Accounts page displays.
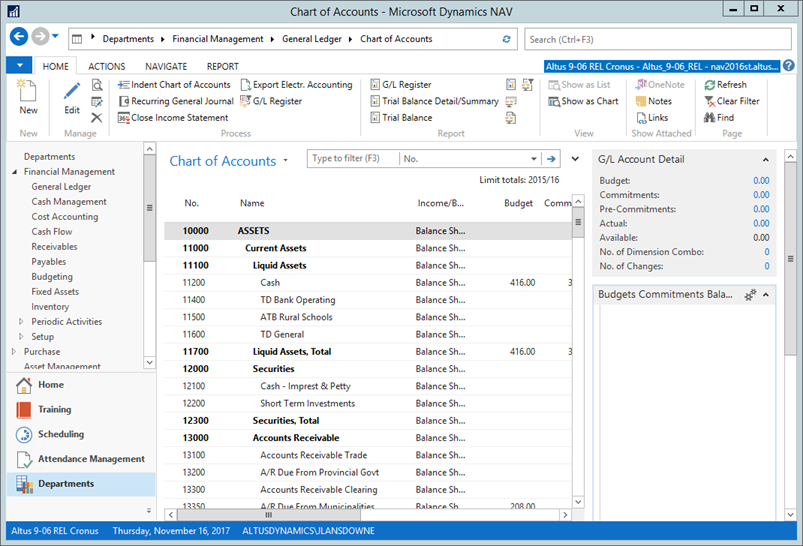
- Click New.
- On the General FastTab, create the new accounts for sales prepayments and purchase prepayments by filling in the following fields:
- No.
- Name
- Income/Balance
- Account Type
- Gen. Bus. Posting Group
- Gen. Prod. Posting Group
- Click OK.
Assigning Prepayment General Ledger Accounts
After creating the prepayment accounts, assign them in the General Posting Setup form by following these steps:
- In the Search field, type General Posting Setup and select the page from the drop-down list.
The General Posting Setup page displays. - For every line that contains a combination of business group and product group that requires sales or purchase prepayments, enter the following:
- Select the line and from the Ribbon click Edit.
- Expand the Sales FastTab.
- In the Sales Prepayments Account field, enter the number of the General Ledger account to use for posting sales prepayment amounts.
- Expand the Purchases FastTab.
- In the Purch. Prepayments Account field, enter the number of the General Ledger account to use for posting purchase prepayment amounts.
- Click OK.
Prepayment Percentages for Customers and Vendors
For customers and vendors, a default percentage for prepayments can be specified to use for all items. The percentage is filled in on the header of sales or purchase orders on the Prepayment FastTab. To set up a default prepayment percentage for all items, follow these steps:
- In the Search field, type Vendors and select the page from the drop-down list.
The Vendors page displays. - Double click a vendor that requires a default prepayment percentage.
- Expand the Invoicing FastTab.
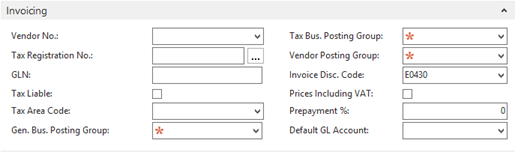
- In the Prepayment % field, enter the default percentage for vendor.
NOTE: Prepayment percentages specified on vendor cards apply to all lines entered on purchase orders, not simply Items. - Click OK.
Prepayment Percentages for Vendor-Item Combinations
For an item being purchased, a default prepayment percentage may be set up for a specific vendor.
The various combinations of items and vendors may be set up from the Vendors card or from the Item card. The same form is used from both locations, but the system filters that are preset differ depending on whether the form is opened from the Vendors card or the Item card.
Setting up Prepayments Verification for Purchases
To set up the prepayments verification when posting purchases, follow these steps:
- In the Search field, type Purchases & Payables Setup and select the page from the drop-down list.
The Purchases & Payable Setup page displays.
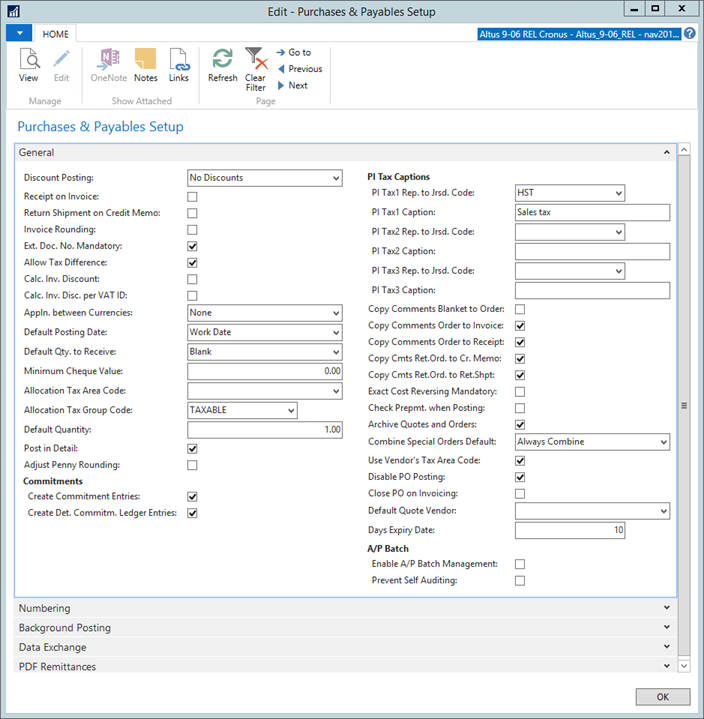
- Expand the General FastTab.
- Add a checkmark to the Check Prepmt. When Posting check box to prevent posting invoices before issuing the prepayment amount.
- Click OK.
Using Prepayments
Prepayment invoices are created from a sales or purchase order, using the new prepayment invoice option. The prepayment amount on the order is calculated based on the prepayment percentage populated from item, customer, or vendor cards. Users can edit the prepayment percentage or amount.
Prepayment Order Process
For prepayment purchase orders, the following steps list the typical process flow:
- Create a purchase order with a prepayment requirement.
- Post a prepayment invoice for the prepayment amount.
- Send the prepayment amount to the vendor.
- Apply the prepayment amount to the purchase order.
- The vendor ships the order.
- Create a purchase invoice for the total amount of the purchase order minus the prepayment amount.
- Send the payment to the vendor and post the payment to the purchase order.
When an order is created for an item, customer, or vendor that has a prepayment rule defined, the system retrieves the prepayment requirement from the item, customer, or vendor card and enters it into the order.
Creating Prepayment Orders with Percentages
Creating prepayment orders is similar to creating other sales and purchase orders. To create a prepayment order, follow these steps:
- Create new purchase order and fill in the header.
- From the the Ribbon, click the Navigate tab and then click Statistics.
The Purchase Order Statistics page displays. - Expand the Prepayment FastTab.
- The Invoiced % of Prepayment Amt. field is filled in automatically if there is a default prepayment percentage on the vendor card. The contents of this field can be edited. The prepayment percentage from the customer or vendor card only applies to lines that do not have a default prepayment percentage set up for the customer-item or vendor-item combination.
- Place a check mark in the Compress Prepayment check box to combine the prepayment lines on the invoice when both of the following are true:
- They have the same General Ledger account for prepayments (as defined in the General Posting Setup).
- They have the same dimensions.
The Compress Prepayment check box is selected as a default. If the Compress Prepayment check box is left blank, an invoice is created by using a separate line for each prepayment amount.
- Fill in the sales or purchase lines.
- For each order line, the contents of the Prepayment % field are determined as follows:
- If a default prepayment percentage is set up for the item on the line, it is automatically copied into the Prepayment % field.
- If no default prepayment percentage is set up for the item, the prepayment percentage from the Customer or Vendor card is copied from the order header.
- The Prepayment % field can be entered or changed manually on a line-by-line basis.
- Although there can be different prepayment percentages for each of the order lines, a single prepayment percentage can be applied to the whole order.
- To enter one prepayment percentage that applies to all the order lines:
- On the Prepayment FastTab in the order header, enter the prepayment percentage in the Prepayment % field.
- The program displays a warning message. Click OK.
- The prepayment percentage on all the lines is updated to match the header.
Specifying a Prepayment Amount
Instead of using prepayment percentages, a prepayment amount can be defined for the whole sales or purchase order. Prepayment amounts are set in the Sales Order Statistics page and the Purchase Order Statistics page.
To apply a total prepayment amount to the order, follow these steps:
- Open an existing completed purchase order.
- From the Ribbon, click the Navigate tab and then click Statistics.
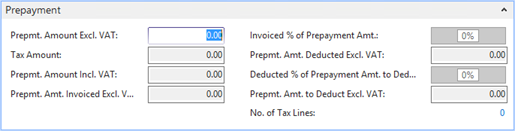
- Expand the Prepayment FastTab.
- In the Prepmt. Amount Excl. VAT field, enter the prepayment amount to be charged for the whole order. The amount in the Prepayment Amount field is distributed proportionately between all lines in the order, except those that have 0 in the Prepayment % field.
Managing Prepayment Status
In the Sales Order and Purchase Order forms, the Status field has been modified to include the status Pending Prepayment.
The Status field is set to:
- Open when an order is created.
- Pending Prepayment when the order is released by clicking Actions > Release.
- Released when the Prepayment invoice is posted.
Prepayment Percentage Priority for Order Lines
A sales or purchase order can have a prepayment percentage on the header and a different percentage for the items on the lines. For each sales or purchase order line, the program searches for the prepayment percentage in the following order, and applies the first default that it finds:
- A prepayment percentage for the item on the line and the customer or vendor on the order header.
- A prepayment percentage for the item on the line and the customer price group for the customer.
- A prepayment percentage for the item on the line for all customers.
- The prepayment percentage on the sales or purchase header.
- A prepayment percentage for the customer or vendor on the order header.
Prepayment Sales and Purchase Invoices
After a sales or purchase order is entered, a prepayment invoice can be created. The default percentages for each sales or purchase line can be used, or the amounts can be adjusted as necessary.
When the final invoice is posted, the system:
- Verifies receipt or issue of the Prepayment amount based on setup.
- Deducts the prepayment amount from the amount due.
- Reverses prepayment amounts previously posted to the balance sheet as assets or liabilities.
Creating Pre-Payment Invoices
To create a prepayment invoice, follow these steps:
- On the purchase order, from the Ribbon, click the Action tab then click Posting > Post Prepayment Invoice.
- Select from the prepayment options that appear:
- To print a test report before posting the prepayment invoice, click Prepayment Test Report.
- To post the prepayment invoice, click Post Prepayment Invoice.
- To post and print the prepayment invoice, click Post and Print Prepmt. Invoice.
Creating Additional Prepayment Invoices
To create additional prepayment invoices for a purchase order, follow these steps:
- Increase the prepayment amount on one or more lines.
- Adjust the document date if it is required.
- Click Action > Posting > Prepayment > Post Prepayment Invoice.
A new invoice is created for the difference between the prepayment amount invoiced to this point and the new prepayment amount.
Correcting Prepayments
After a prepayment invoice is posted, corrections or updates can be processed by adding new lines to the order and posting another prepayment invoice. Lines cannot be deleted from an order when a prepayment has been invoiced for the line.
Correcting a prepayment can be performed by using any of following options:
- Refund all invoiced prepayments for an order.
- Reduce the quantity on sales or purchase lines.
- Add new lines to an order after issuing a prepayment.
- Increase the prepayment amount.