

To leverage existing functionality the Year End receipting service has been developed using a parent-child relationship from a donation payment to multiple other donation payments. The parent donation tax receipt is the Year End tax receipt and the child donation tax receipts are the line items in the Year End receipt.
The WordMerge code has been altered in order to read the related child item template from the WordMerge template. It establishes the relationship based on the target entity in the parent template and the target entity in the child template. Using the children returned by this relationship, it populates the child template with the children. The resulting itemized child template body is populated into the parent template in place of the child template filename.
Creating Year End Tax Receipts
Some setup needs to be completed in order to create Year End tax receipt. The setup involves configuring a Donation Tax Receipt Setting. In order to configure the Donation Tax Receipt Setting, users will need to have pre-configured a new WordMerge Template for Child donations and a new WordMerge Template for Parent donations. Considering these steps, this User Setup guide will start from creating the WordMerge Template for Child donations.
How to Create WordMerge Templates
To complete the New Donation Tax Receipt setting record, users will have to create a new WordMerge template record for child donations. Next they will need to create a new WordMerge Template for parent donations that will pull in the WordMerge Template for child donations.
Child WordMerge Template
To create the new WordMerge Template for Child Donations:
1. On the navigation bar, click on the Donor Engage Setup tile.
The work area tiles display.

2. Click on WordMerge Templates icon, then at the top left of the page, click on New to create a new WordMerge Template.
The New WordMerge Template displays.

3. In the Name field, add a name that you will remember as the child template.
4. Place a checkmark in the box next to the Published field.
5. Click on the lookup icon in the Output Configuration field.
6. Options drop down or you can click to look up more records and a Look Up Record page displays.
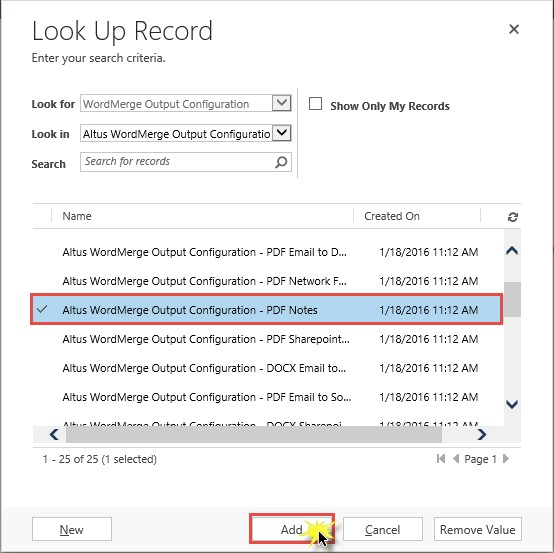
7. Choose the Output Configuration that your company setup for tax receipts, then click Add. In this sample, a PDF will be attached to the Notes section of the Donation Tax Receipt record.
NOTES: Users can choose the output configuration that their organization prefers from the following options, depending on the organization's setup:
- Email
Donation Tax Receipt document will be generated and sent to the Donor as an attachment. The donor must have a valid email address. - Network Folder
Donation Tax Receipt will be generated and stored into a shared network folder. - SharePoint
Donation Tax Receipt document will be generated and stored into a SharePoint document library. - Notes Attachment
Donation Tax Receipt document will be generated and stored as a note (Attachment) in the Donation Tax Receipt record.
The New WordMerge Template page is displayed again, now with the Output Configuration field complete.
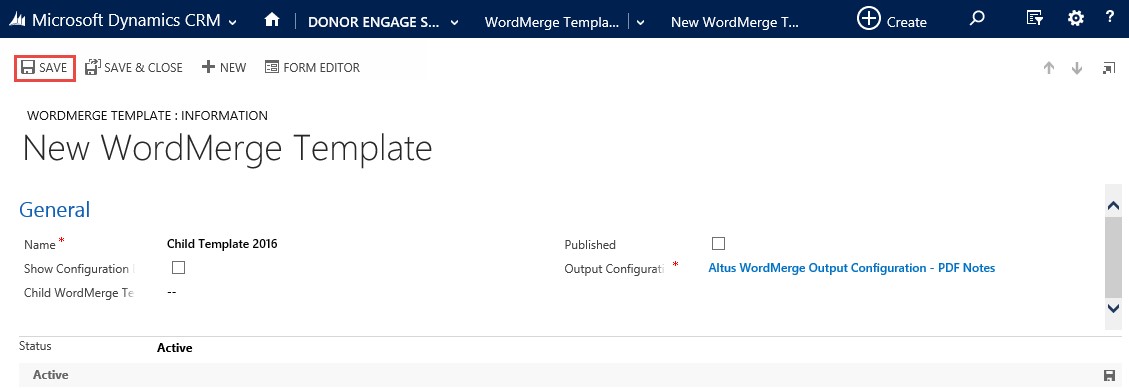
8. Click Save and refresh the page.
The name and output configuration save and a new Template Configuration section appears with a note to Please upload a Word Template.
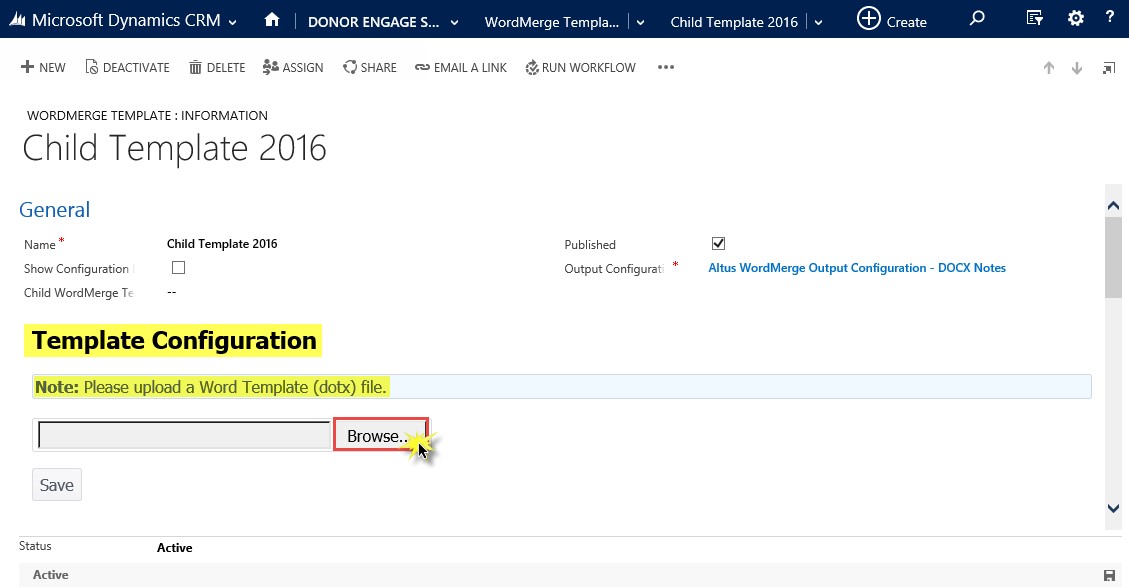
9. Click Browse and search for your child Template for tax receipts.
NOTE: The Child document must only have a single table row to process.
To help you understand, the document that was uploaded to the child WordMerge Template in the sample below contained a single line table (see table following this point). You will have to create your own document containing the information that you wish to appear in the child section of your organization's Tax Receipts.
| «DonationType» | «PaymentDate» | «PaymentAmount» | «AdvantageAmount» | «AmountToReceipt» |
10. Click Save and refresh the page again.
More fields display.

11. Click on the down arrow in the Entry field and select Donation Tax Receipt.
12. Click on the down arrow in the Doc Name Field and select Current Tax Register Record.
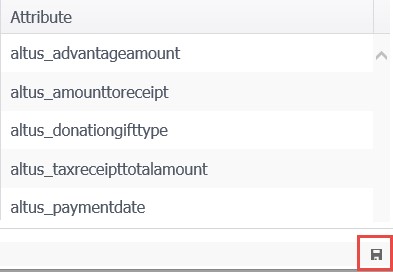
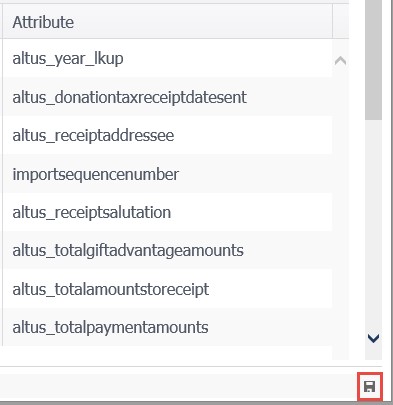
You will notice that the fields that are in the document you uploaded will display in the left column under Merge Field.
13. You will select the corresponding Attribute from the field on the right, one for each of the Merge Fields to the left.
NOTE: The image below is a sample. The fields the user needs to select form the drop-downs are dependent on their uploaded document.
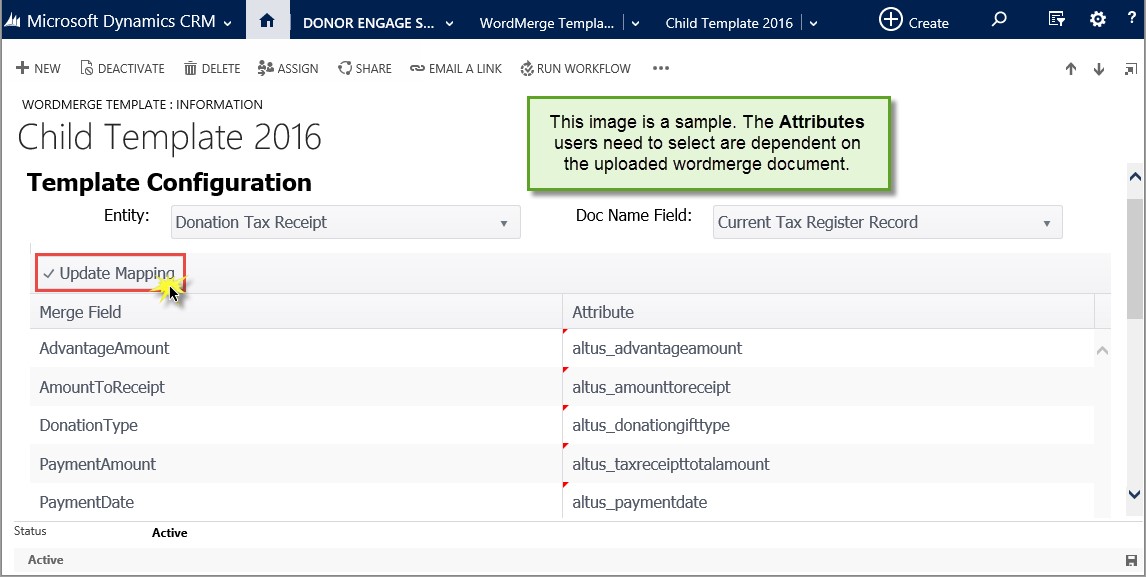
14. Click Update Mapping.
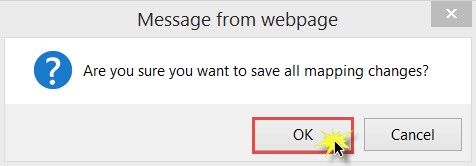
15. A web dialog box appears to confirm this action. Click OK.
16. The red triangle will no longer be visible in the upper left corner of each selected Attribute.
17. Click Save and refresh.
You have completed the Child WordMerge Template setup and are ready to move on to the Parent WordMerge Template setup.
Parent WordMerge Template
1. Click on the WordMerge Templates tile from Donor Engage Setup.
2. Click on New to create a new WordMerge Template.
The New WordMerge Template displays.
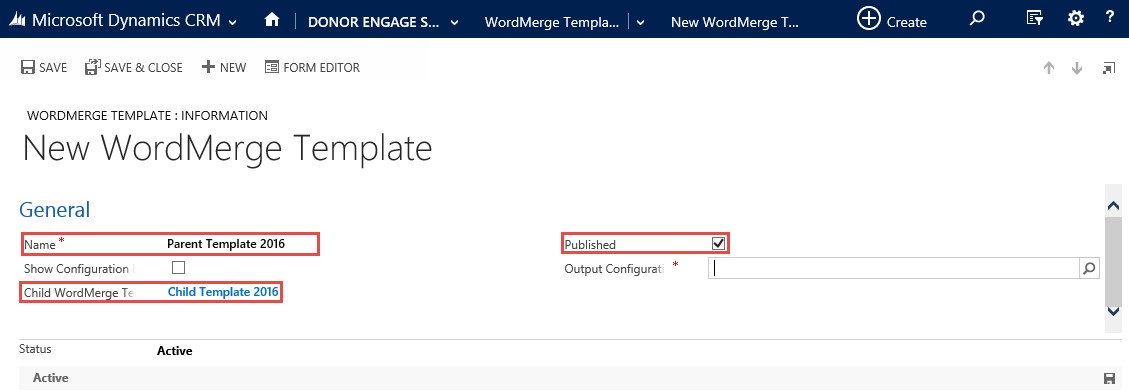
3. In the Name field, add a name that you will remember as the parent template.
4. Place a checkmark in the box next to the Published field.
5. In the Child WordMerge Template field, select the child template you created above.
6. Click on the lookup icon in the Output Configuration field.
7. In the Options drop-down menu, you can click to look up more records.
A Look Up Record page displays.
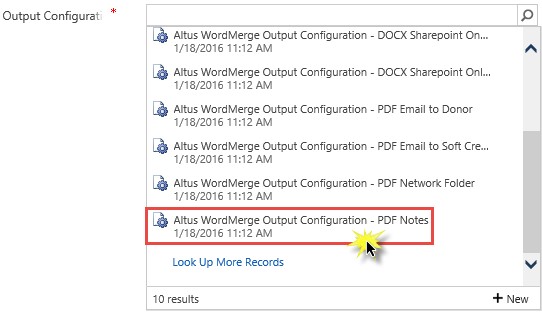
8. Choose the Output Configuration that your company setup for tax receipts. It should be the same as the one you chose above. For details, go to step 7 in the Child WordMerge Template.
The New WordMerge Template page displays again, now with the Output Configuration field complete.
9. Click Save and refresh the page.
The name and output configuration save and a new Template Configuration section appears with a note to Please Upload a Word Template.

10. Click Browse and search for your parent Template for tax receipts.
To help you understand, we've created a sample document that was uploaded to the parent WordMerge Template in the sample below. You will have to create your own document containing the information that you wish to appear in your organization's Tax Receipts.

NOTE: For this to show up in the parent receipt, the filename must be the same as the filename in the parent receipt.
11. Click Save and refresh the page again.
More fields display.
12. Click on the down arrow in the Entity field and select Donation Tax Receipt.
13. Click on the down arrow in the Doc Name field and select Current Tax Register Record.
You will notice that the fields that are in the document you uploaded will display in the left column under Merge Field.
14. You will select the corresponding Attribute from the field on the right, one for each of the Merge Fields to the left.
NOTE: The image below is a sample. The fields users need to select are dependent on their uploaded document.

15. Click Update Mapping.
16. A web dialog box appears to confirm this action. Click OK.
17. The red triangle will no longer be visible in the upper left corner of each selected Attribute.
18. Click Save and refresh.
You have completed the Parent WordMerge Template setup and are ready to configure the Donation Tax Receipt Setting.
Donation Tax Receipt Setting
1. On the navigation bar, click on the Donor Engage Setup tile.
The work area tiles display.
2. Click on Donation Tax Receipt Settings, then at the top left of the page, click on New to create a new Donation Tax Receipt Setting.
The New Donation Tax Receipt Setting displays.
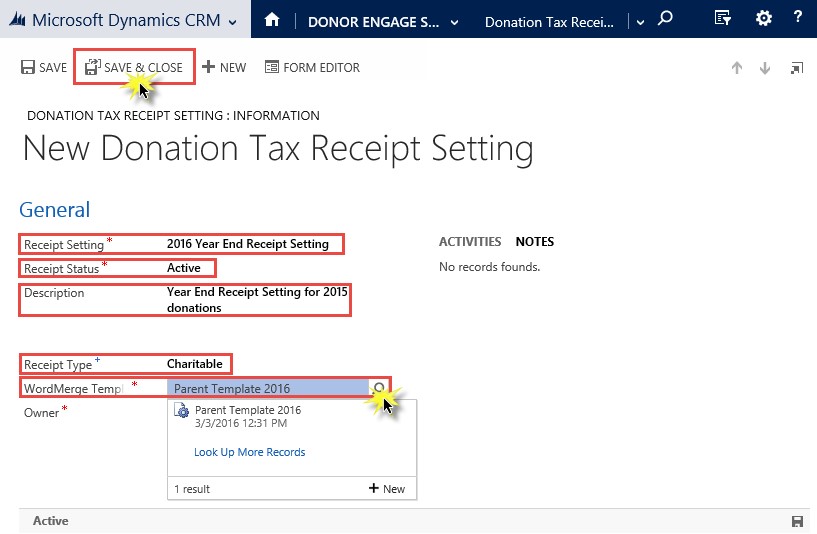
3. In the Receipt Setting field, give the setting a descriptive title.
4. The Receipt Status field, give the setting a descriptive title.
NOTE: Fields marked with the red asterisk indicate that completing the field is mandatory.
5. You may wish to add an explanation to the Description field.
6. In the Receipt Type field, select Charitable.
7. From the WordMerge Template field, click on the look up and select the Parent Template you created in the Parent WordMerge Template section above.
8. Click Save & Close.
You have completed the setup for generating Year End Tax Receipts.