

The Receipt Record is the summary of all information that will be pulled into the receipt. From here, users will have specific details for the payment and receipt including receipt number, number of times printed, and receipt template.
Tax Receipt Processing and Document Generation
Users can select from various options for generating and processing tax receipts.
To process tax receipts:
1. Ensure all information is correct.
2. Select a template in the Tax Receipt Setting field.
3. When all information is confirmed correct, select the ... button from the command bar at the top of the record.
4. Select Run Workflow.
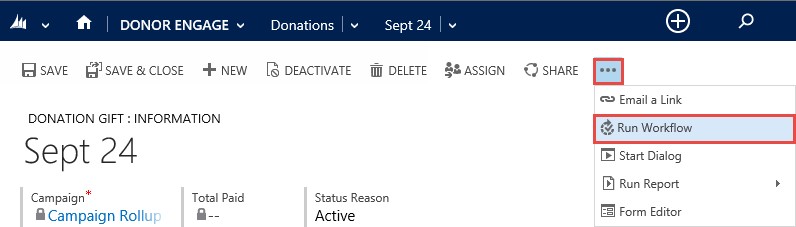
An on-demand menu will open with workflows from which you can select.
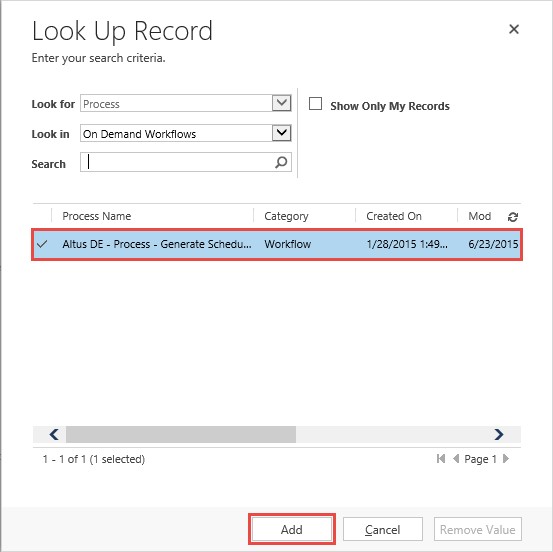
5. Select the Altus DE — Generate Tax Receipt Documents workflow and click Add.
A process will now run in the background, pushing information to generate the tax receipt document in either Microsoft Word extension or PDF extension, and push it to the selected destination.
Document Generation Options for Tax Receipts
- Email: Donation Tax Receipt document will be generated and sent to the donor as an attachment. The donor must have a valid email address.
- Network Folder: Donation Tax Receipt will be generated and stored into a shared network folder.
- SharePoint: Donation Tax Receipt document will be generated and stored into a SharePoint document library.
- Notes Attachment: Donation Tax receipt document will be generated and stored as a note (Attachment) in the Donation Tax receipt record.
Reprinting a Receipt
When someone loses a receipt and needs a new copy, users have the ability to recreate the document based on the internal processes.
1. If a new number needs to be created, simply click on the ... button and select Start Dialog.
2. Select the DE — Donation Tax Receipt — Reissue Number dialog and Add.
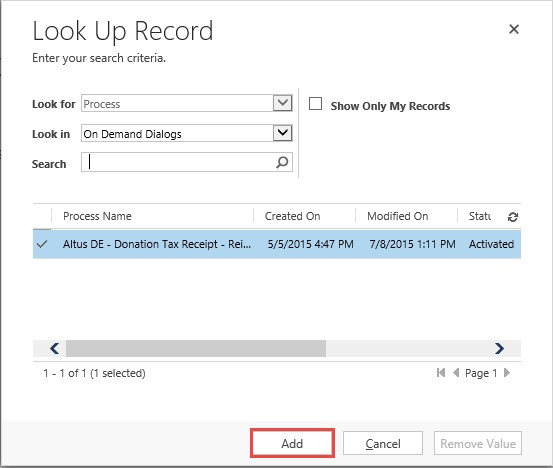
3. Follow the steps to record the reason and the date of reissue. This will create a new number and the receipt is ready for reissuing.
Batch Print Receipting
Batch Print Receipting enables you to select a set of individual receipts from one or multiple Donors and consolidate those receipts into a single PDF document.
- Click on the Donor Engage Setup tile in the navigation bar and select the Batch Receipts icon.

- Click on New to create a Batch Receipt record.
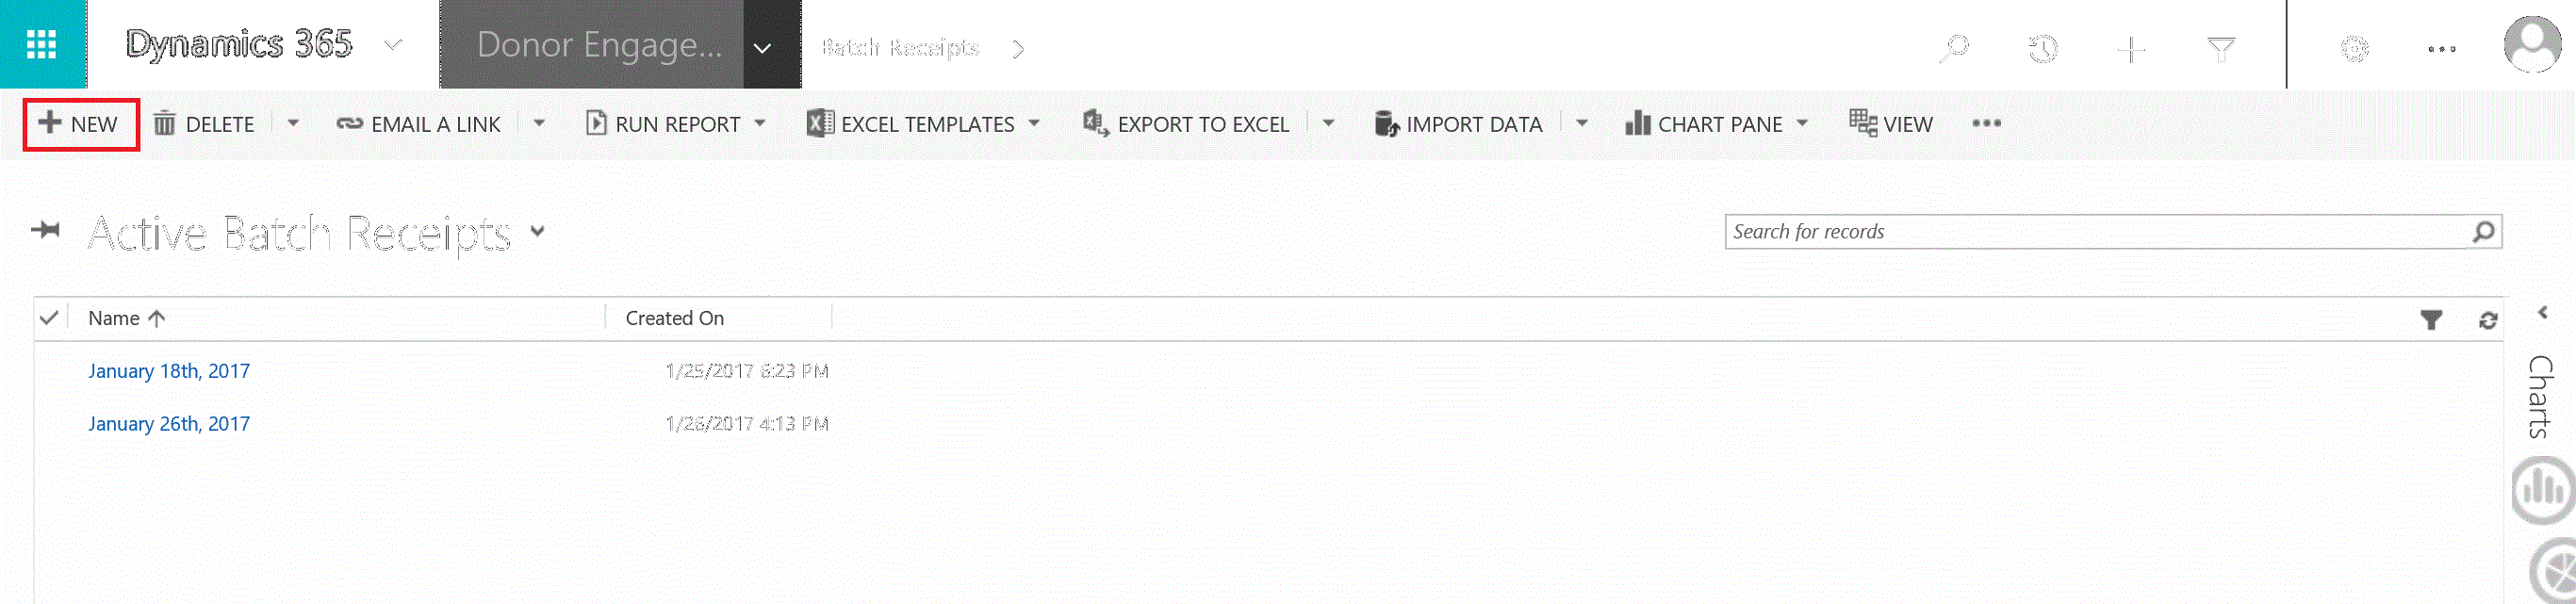
- Select the Name field and add an appropriate title for the Batch Receipt record and click Save.
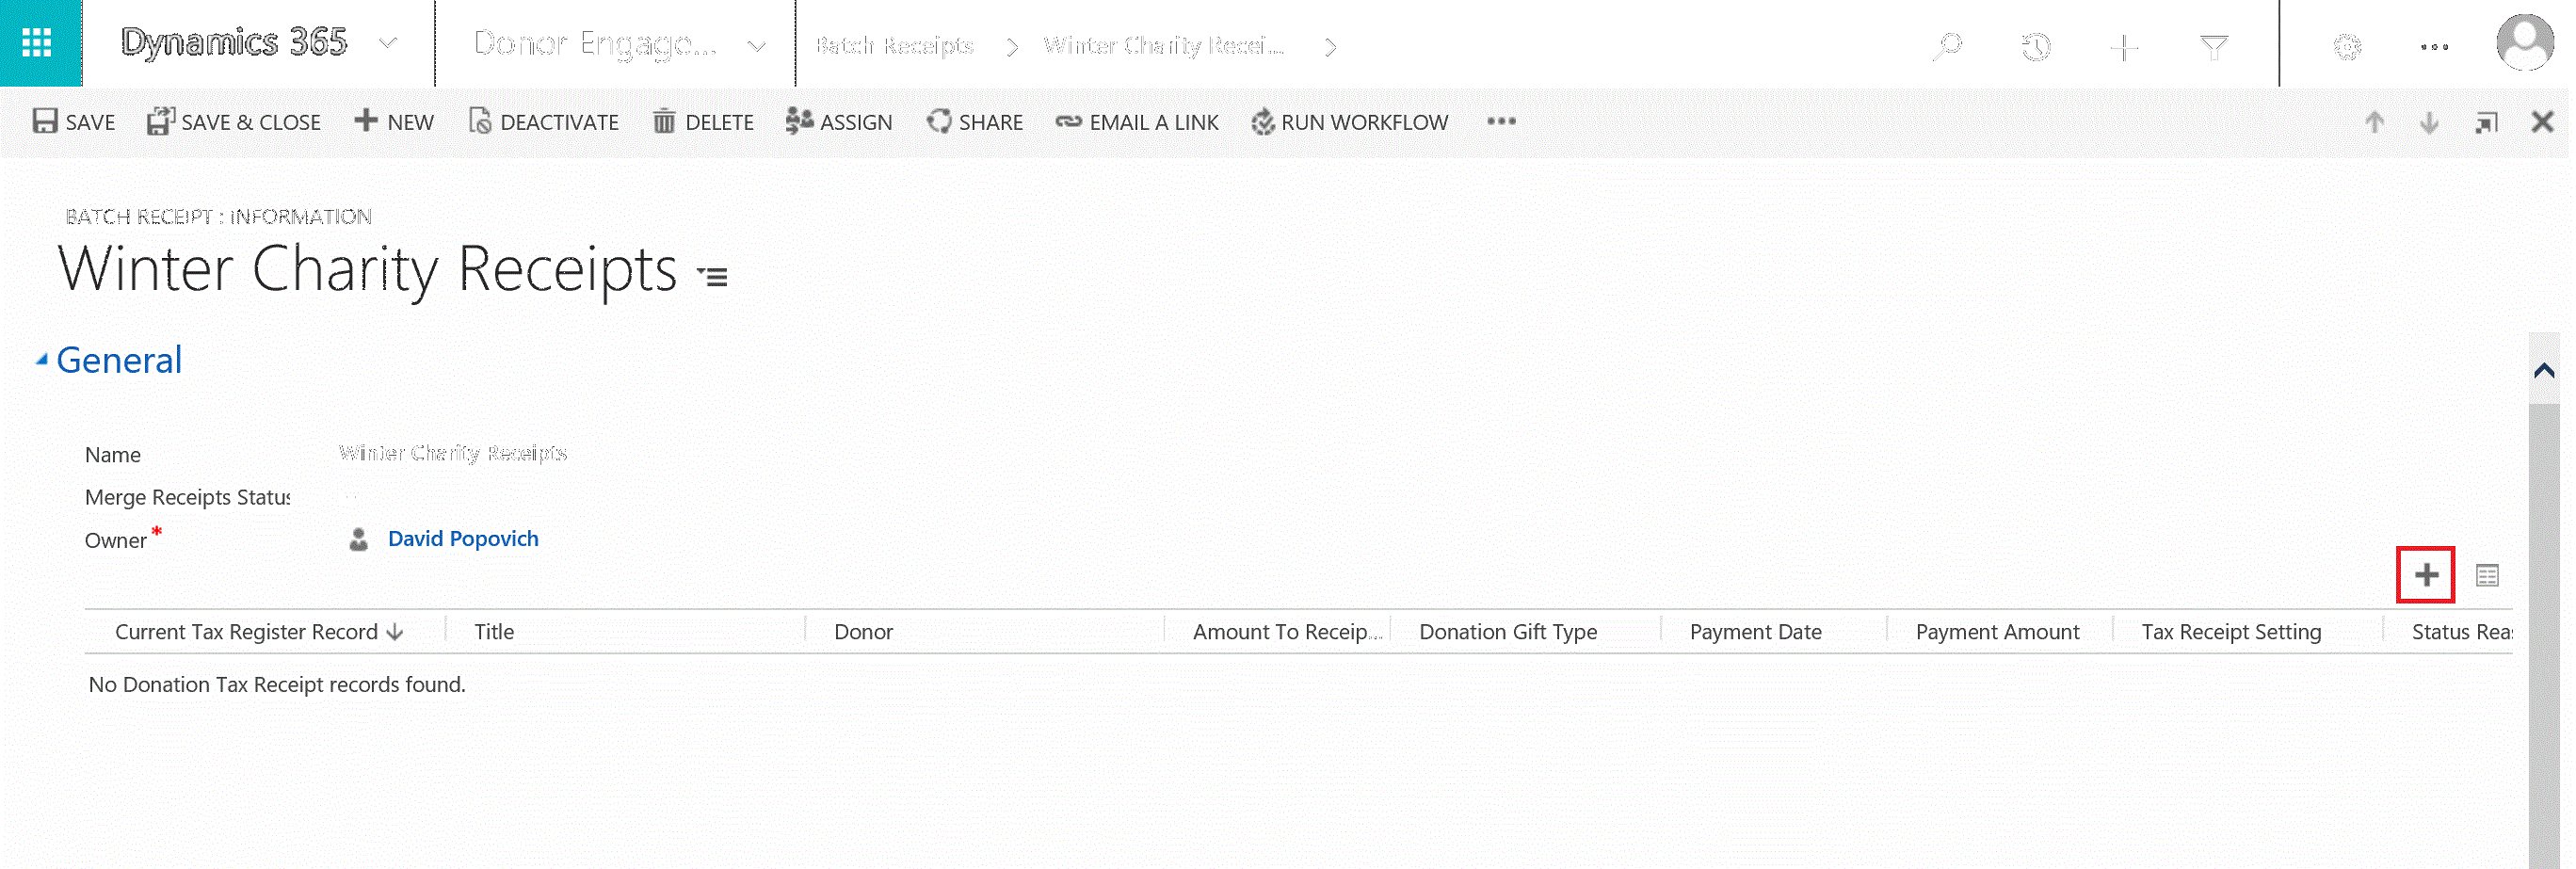
Adding Receipts to a Batch Receipt Record
There are two options for adding receipts to the Batch Receipt record.
Option 1: Manual Search
Advantage: In the case where you would like to consolidate a limited number of receipts together, and you know the specific receipt names when administering the search.
- Click the Search (magnifying glass) on the right side of the Tax Register Record list.
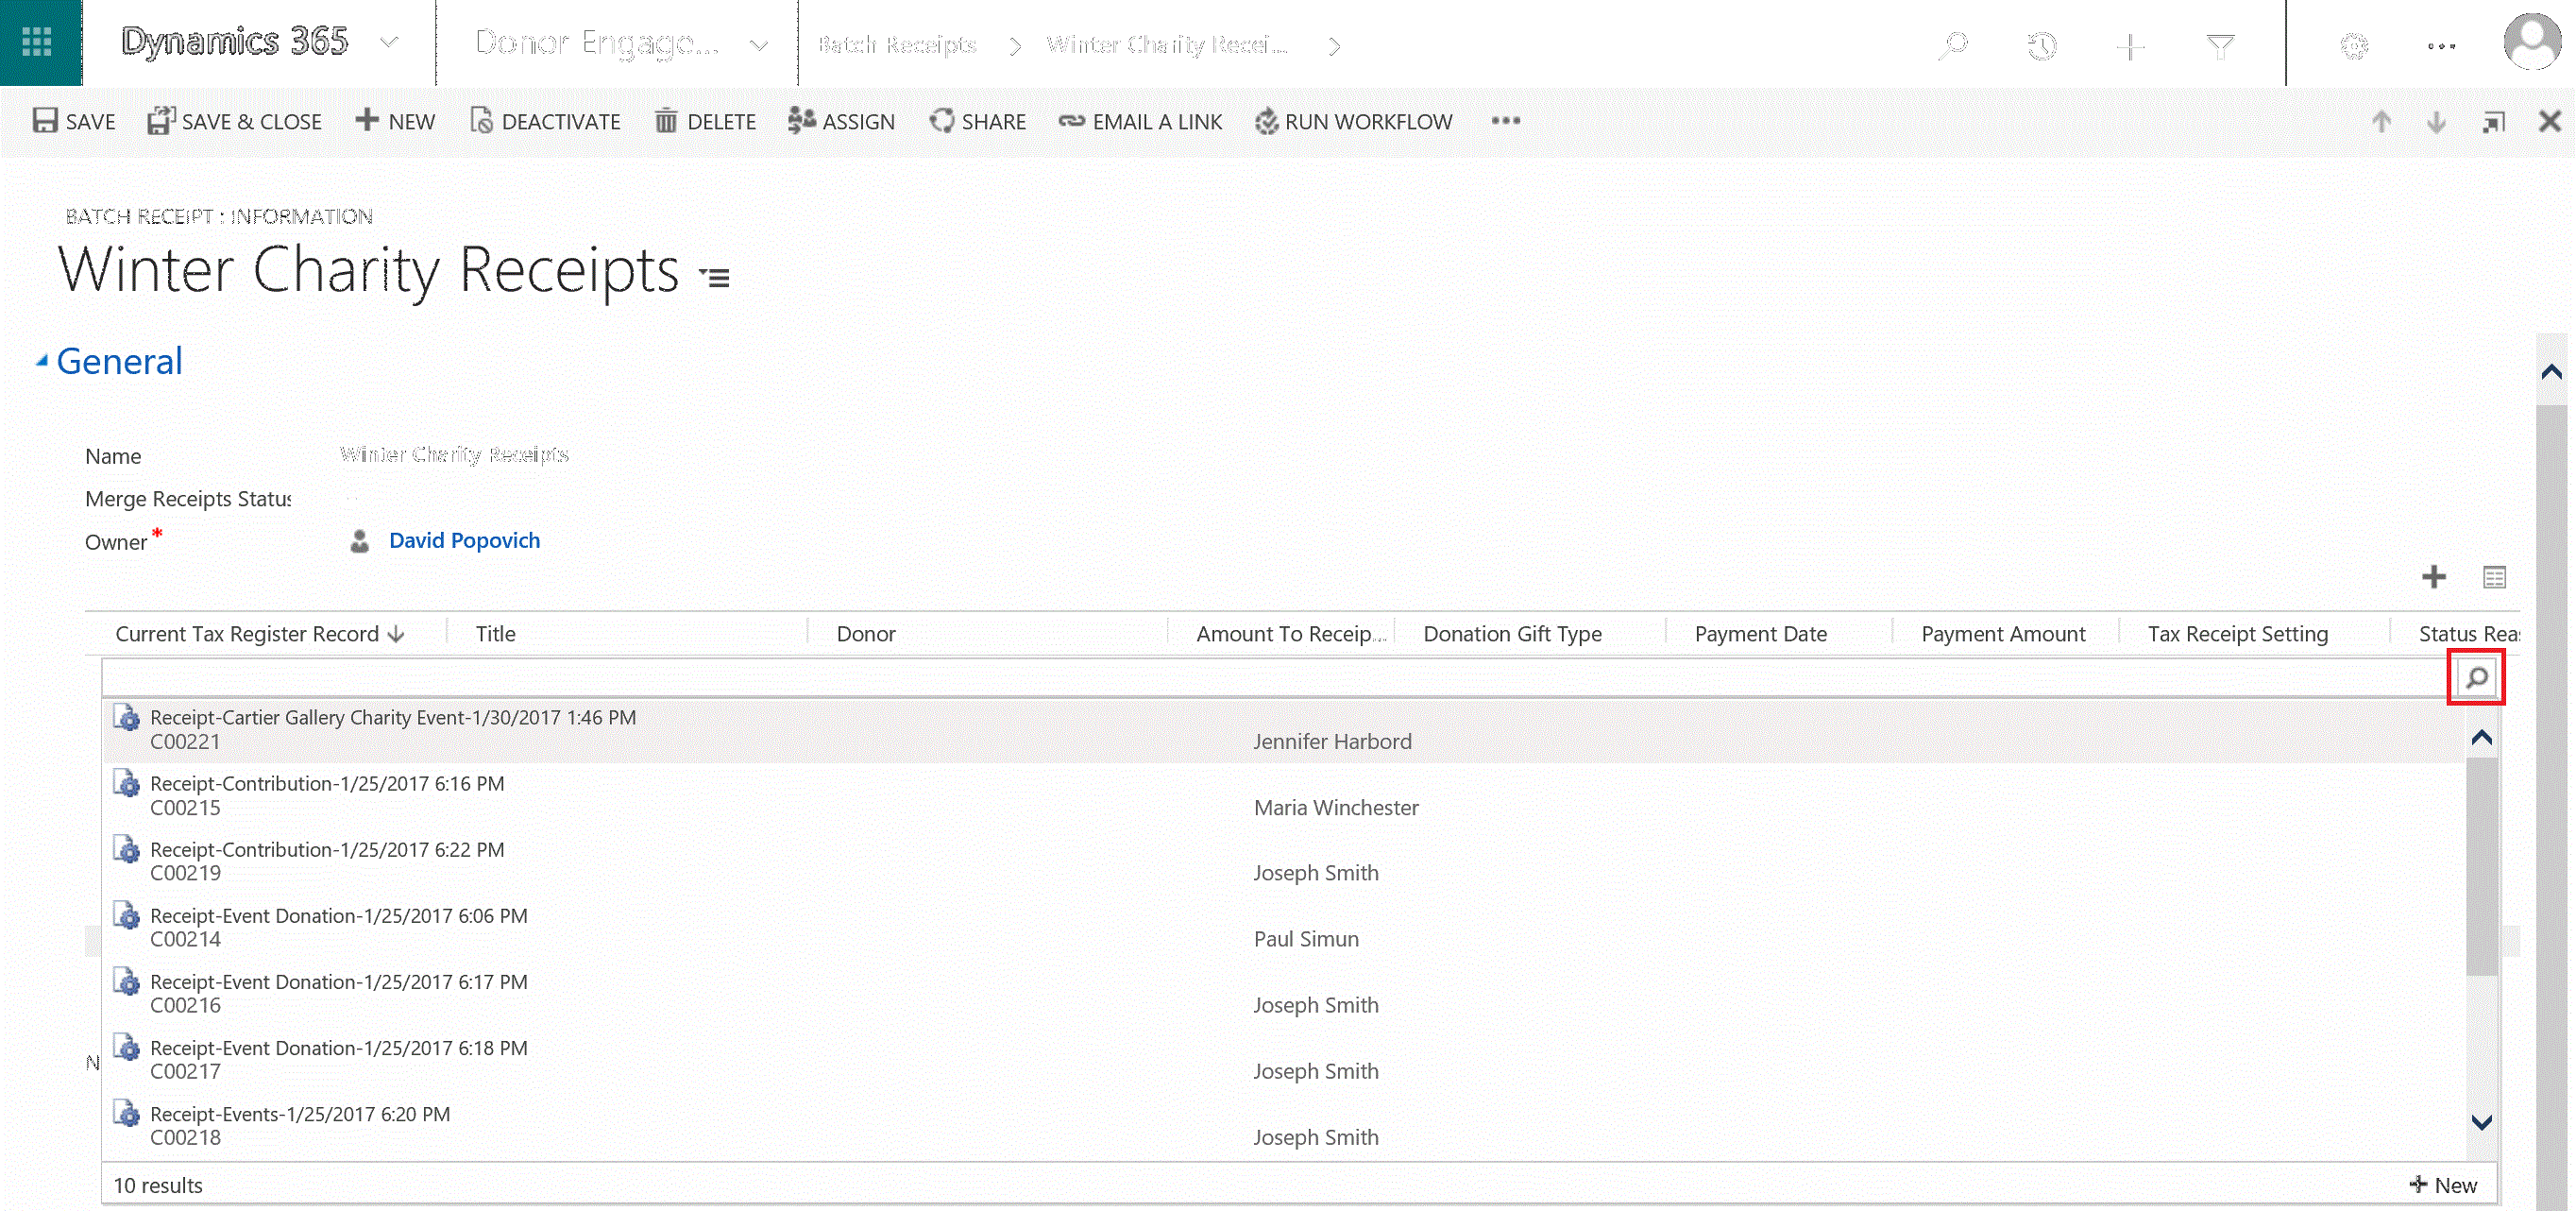
- Select the individual receipts from the list.
- Add to the record.
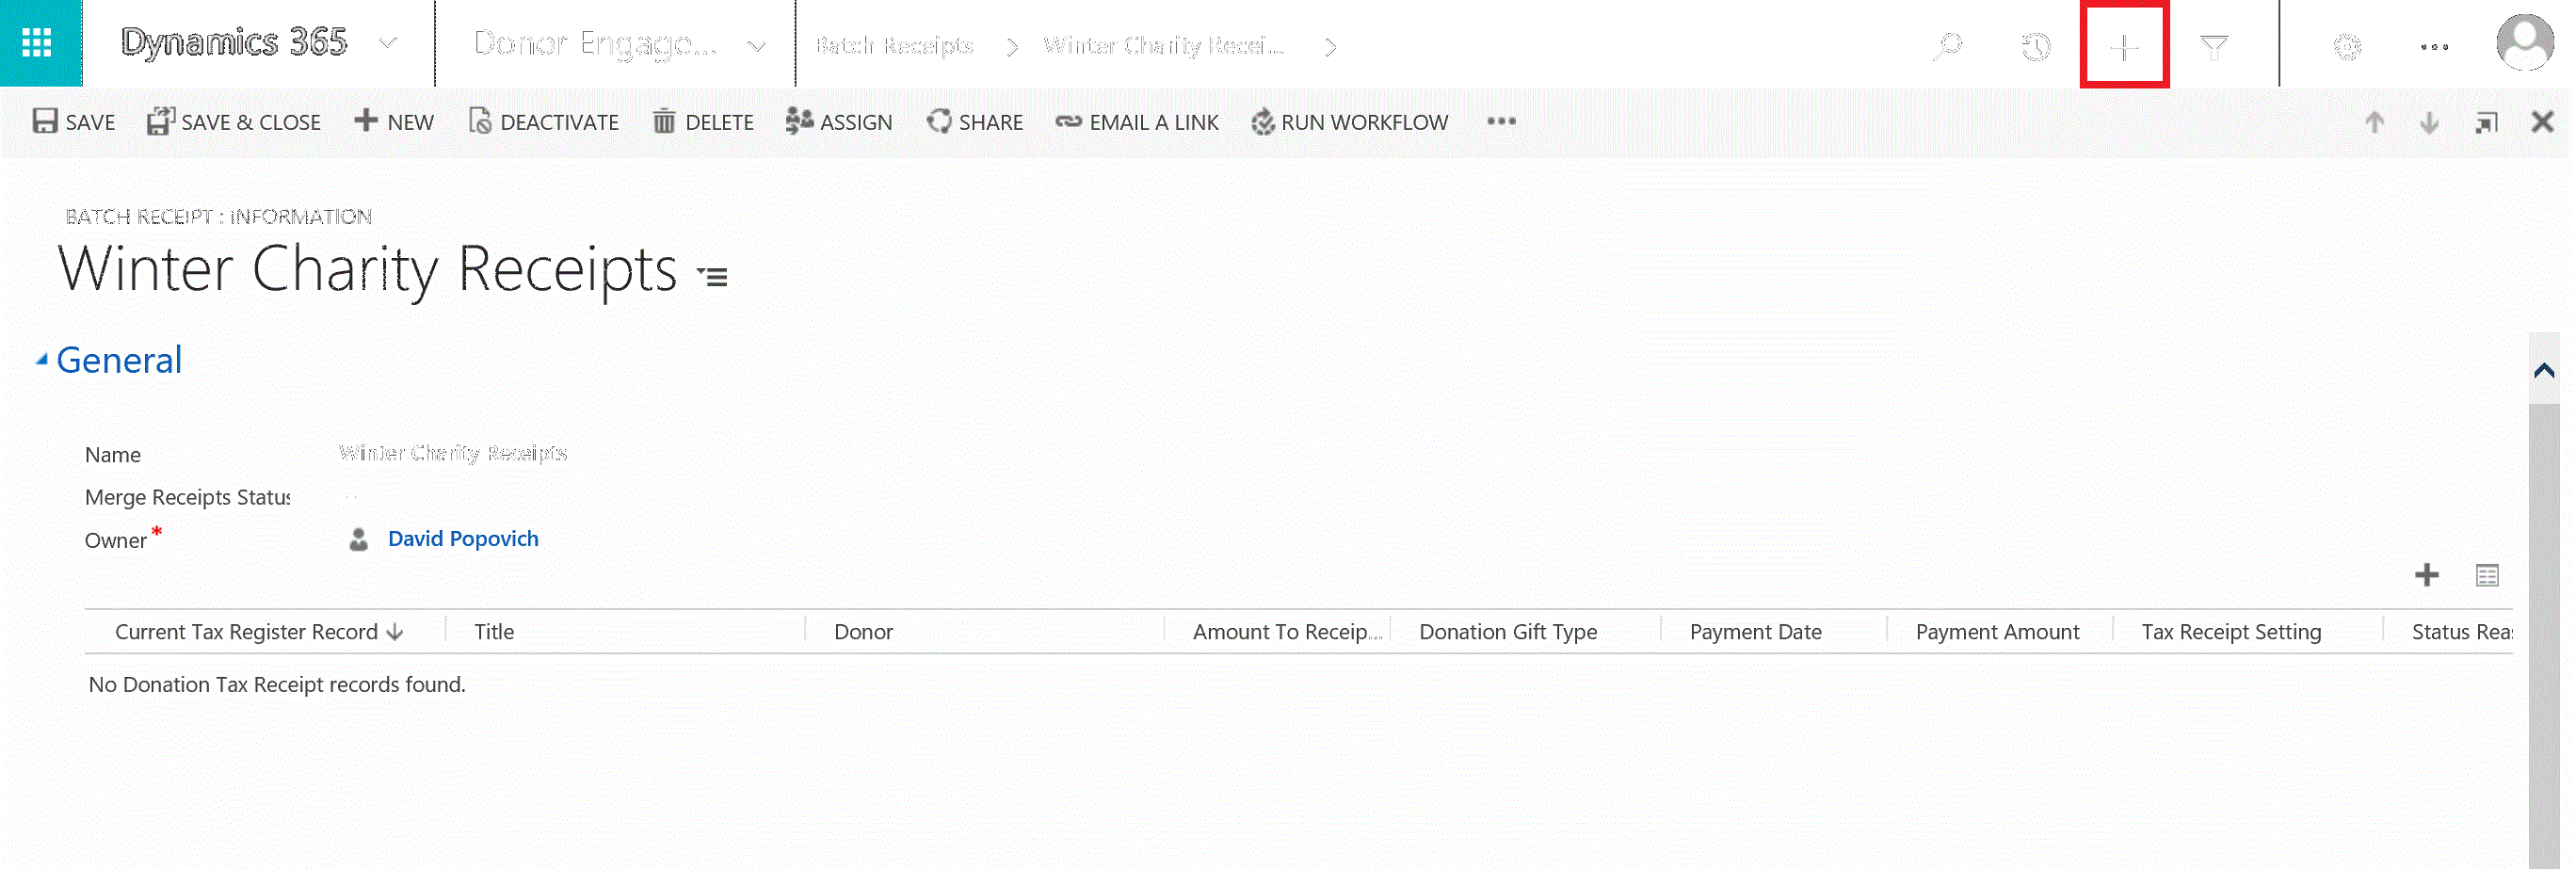
Option 2: Advanced Find
Advantage: Using the Advanced Find offers greater flexibility in the search as multiple filters can be applied.
- Click the + in the toolbar located at the top right of the application.
- In the Look for dropdown select Donation Tax Receipts from the option set.
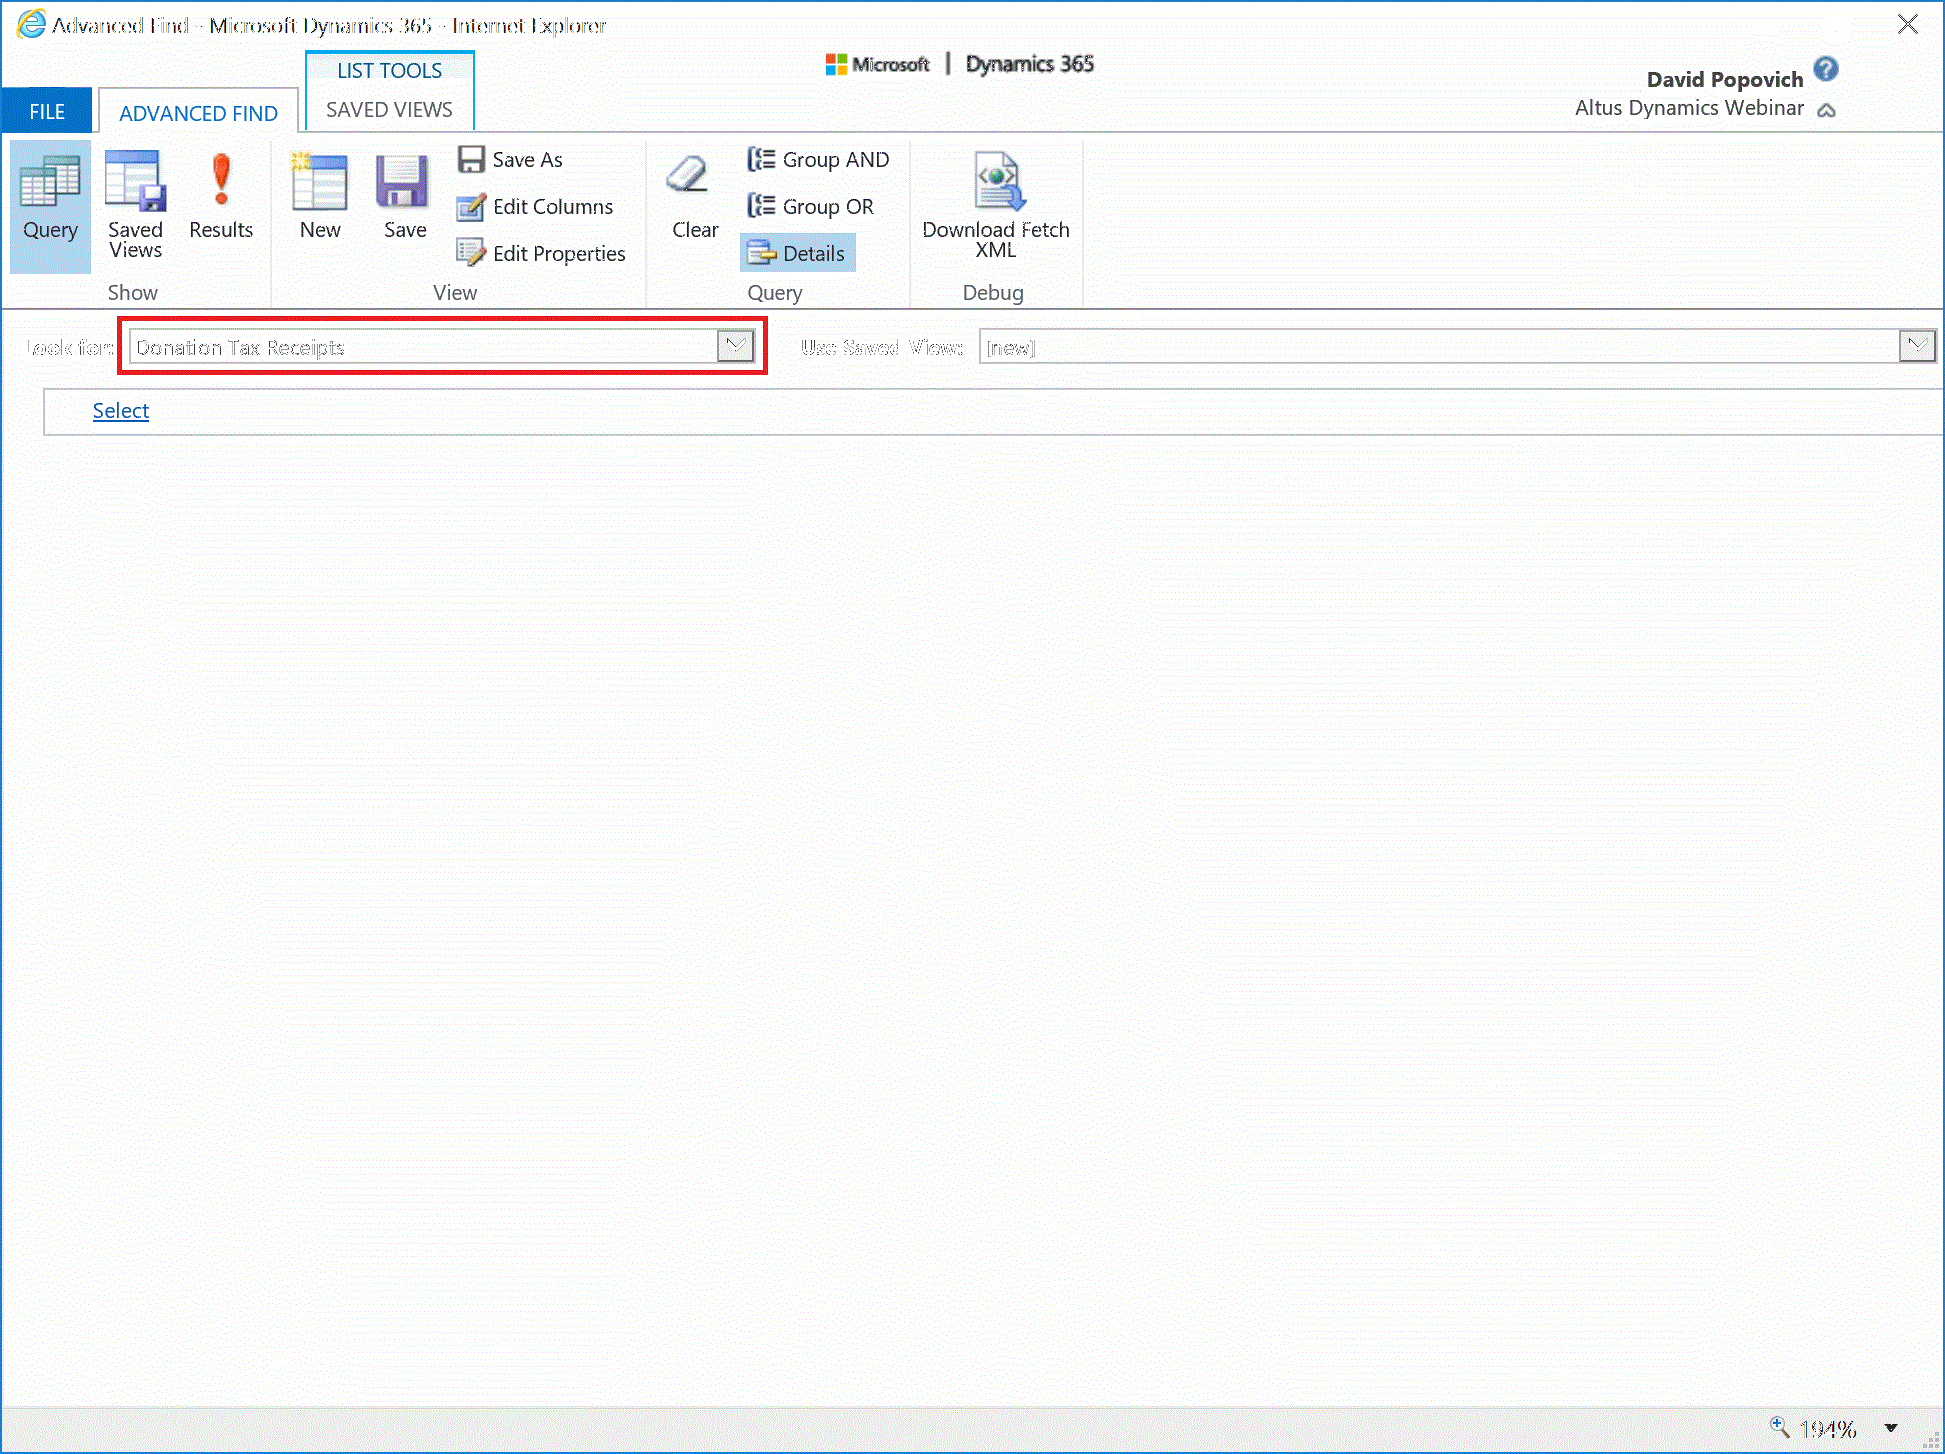
Note: Users can select additional filter criteria (e.g. Created by) to further narrow the search by clicking the Select link.
- Click the Results (!) button to search based on the filter settings.

- The system will generate a list of all receipts based upon your search criteria.
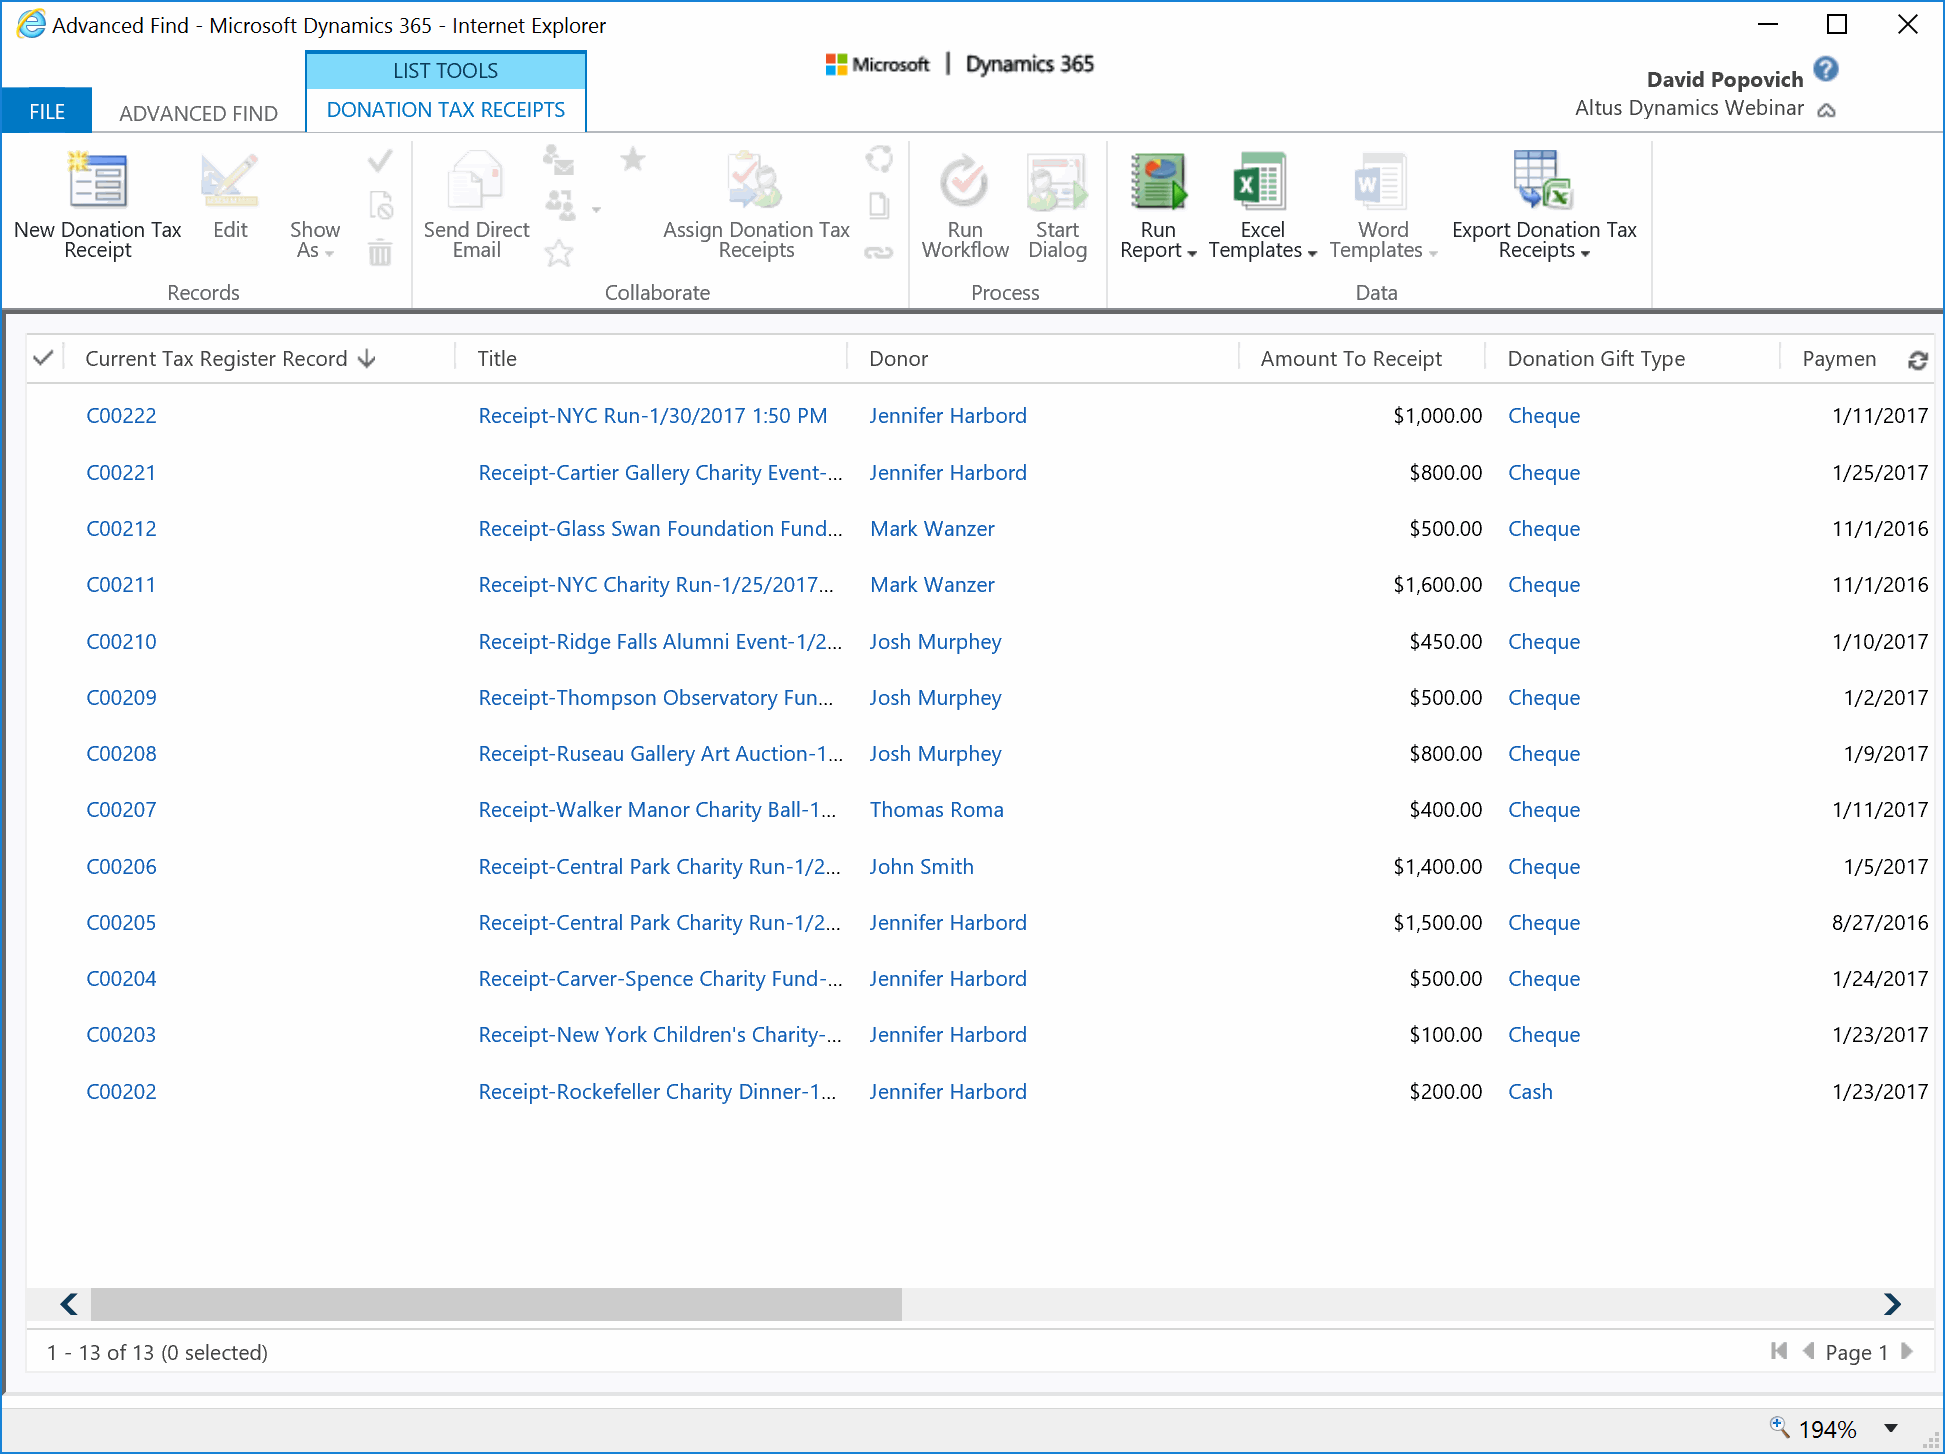
- You can highlight the receipts you want to consolidate into the single PDF or further narrow your list and click Edit.
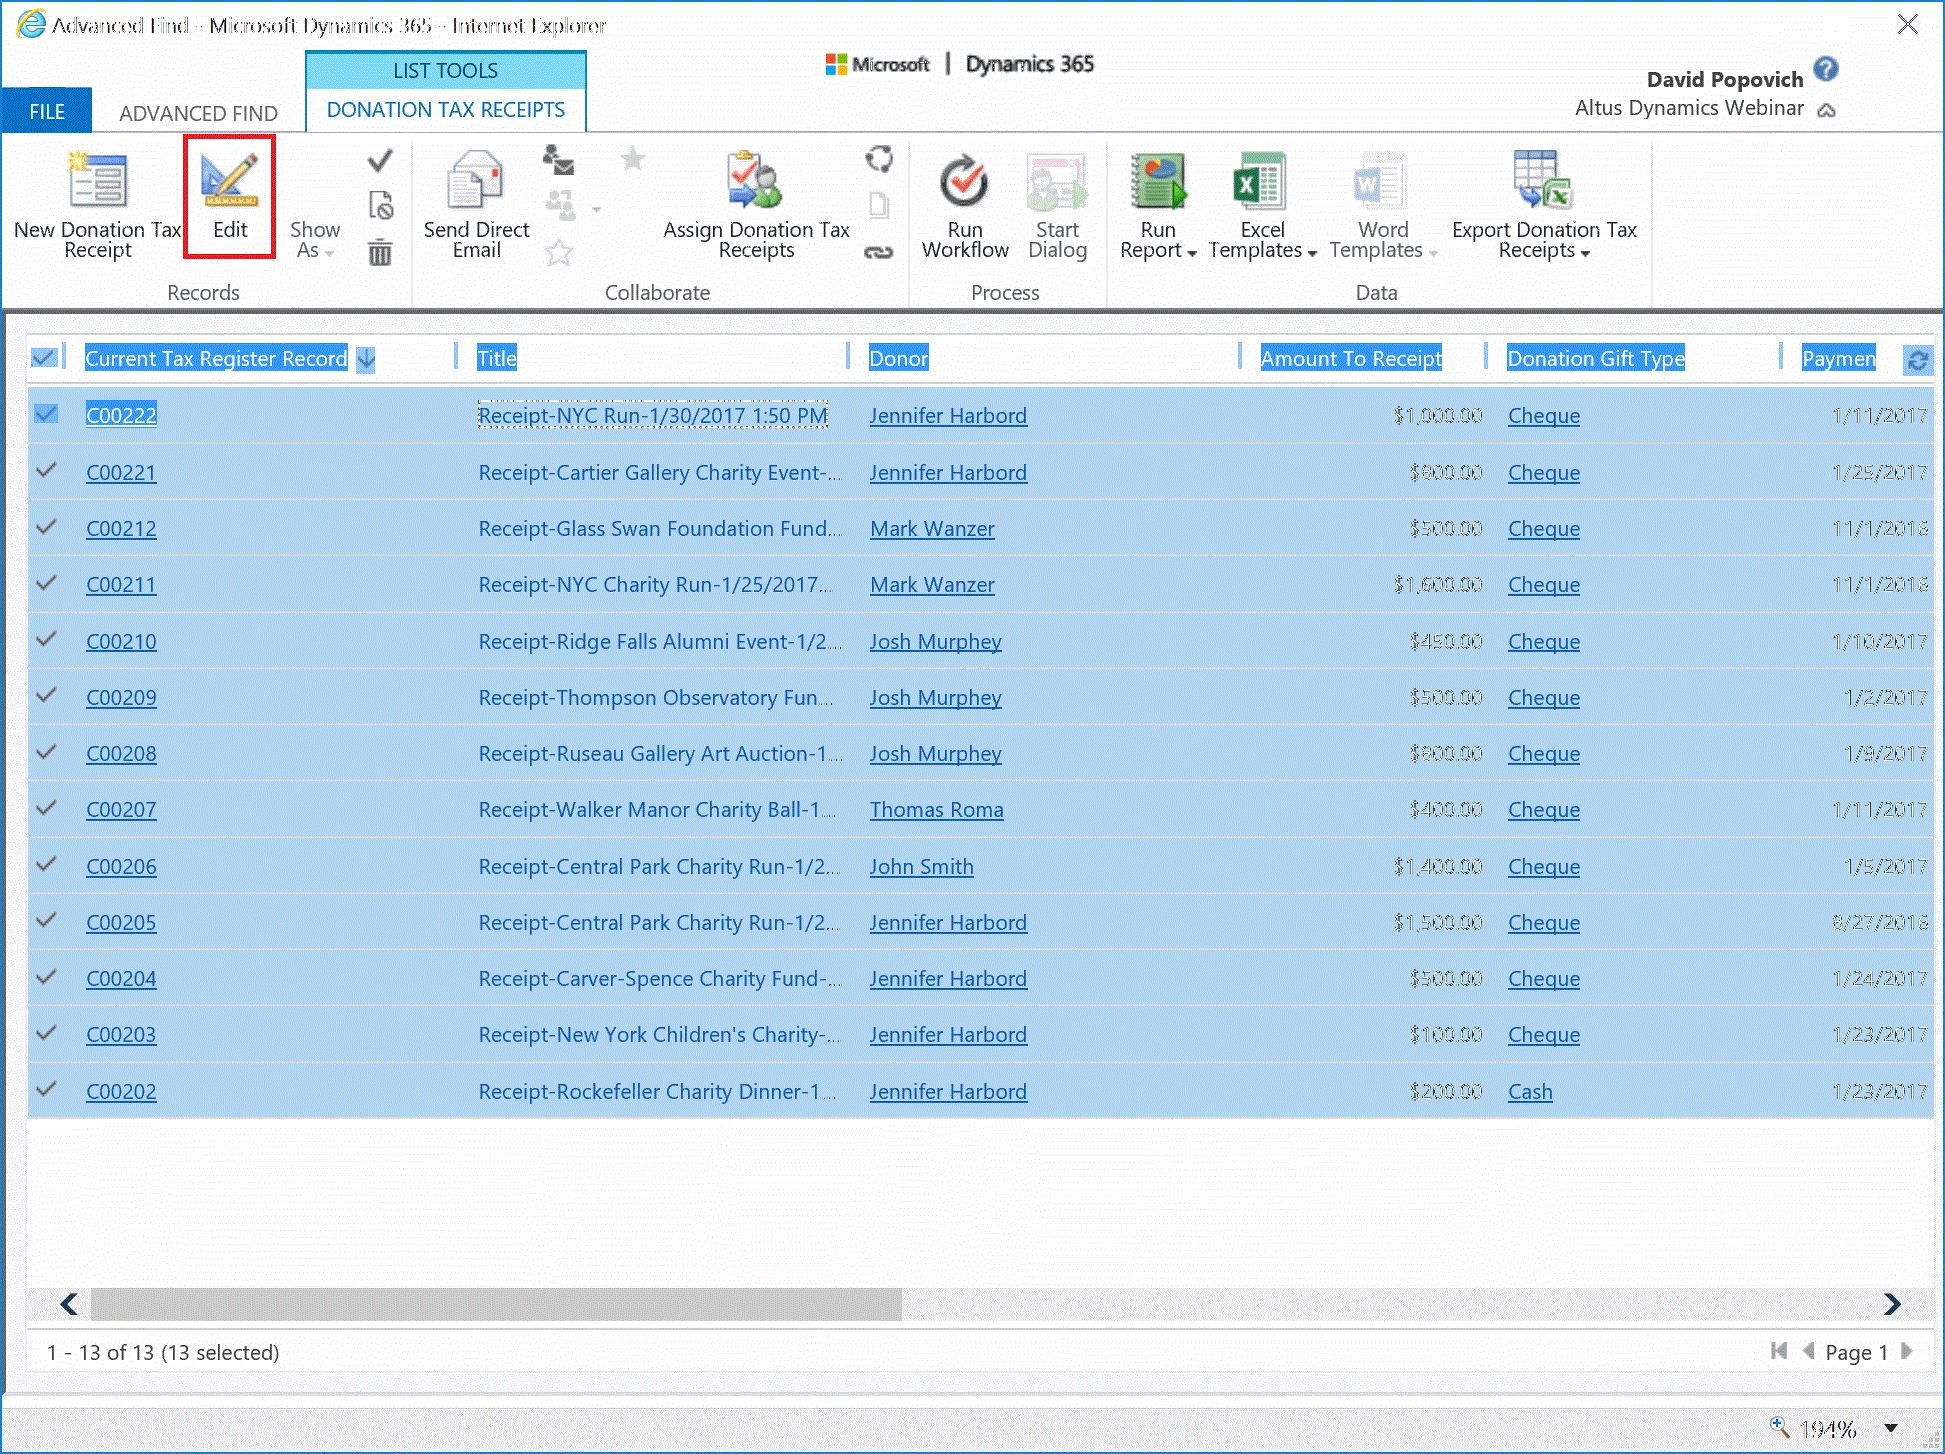
- By selecting the Batch Receipt dropdown choose the name of Batch Receipt record.
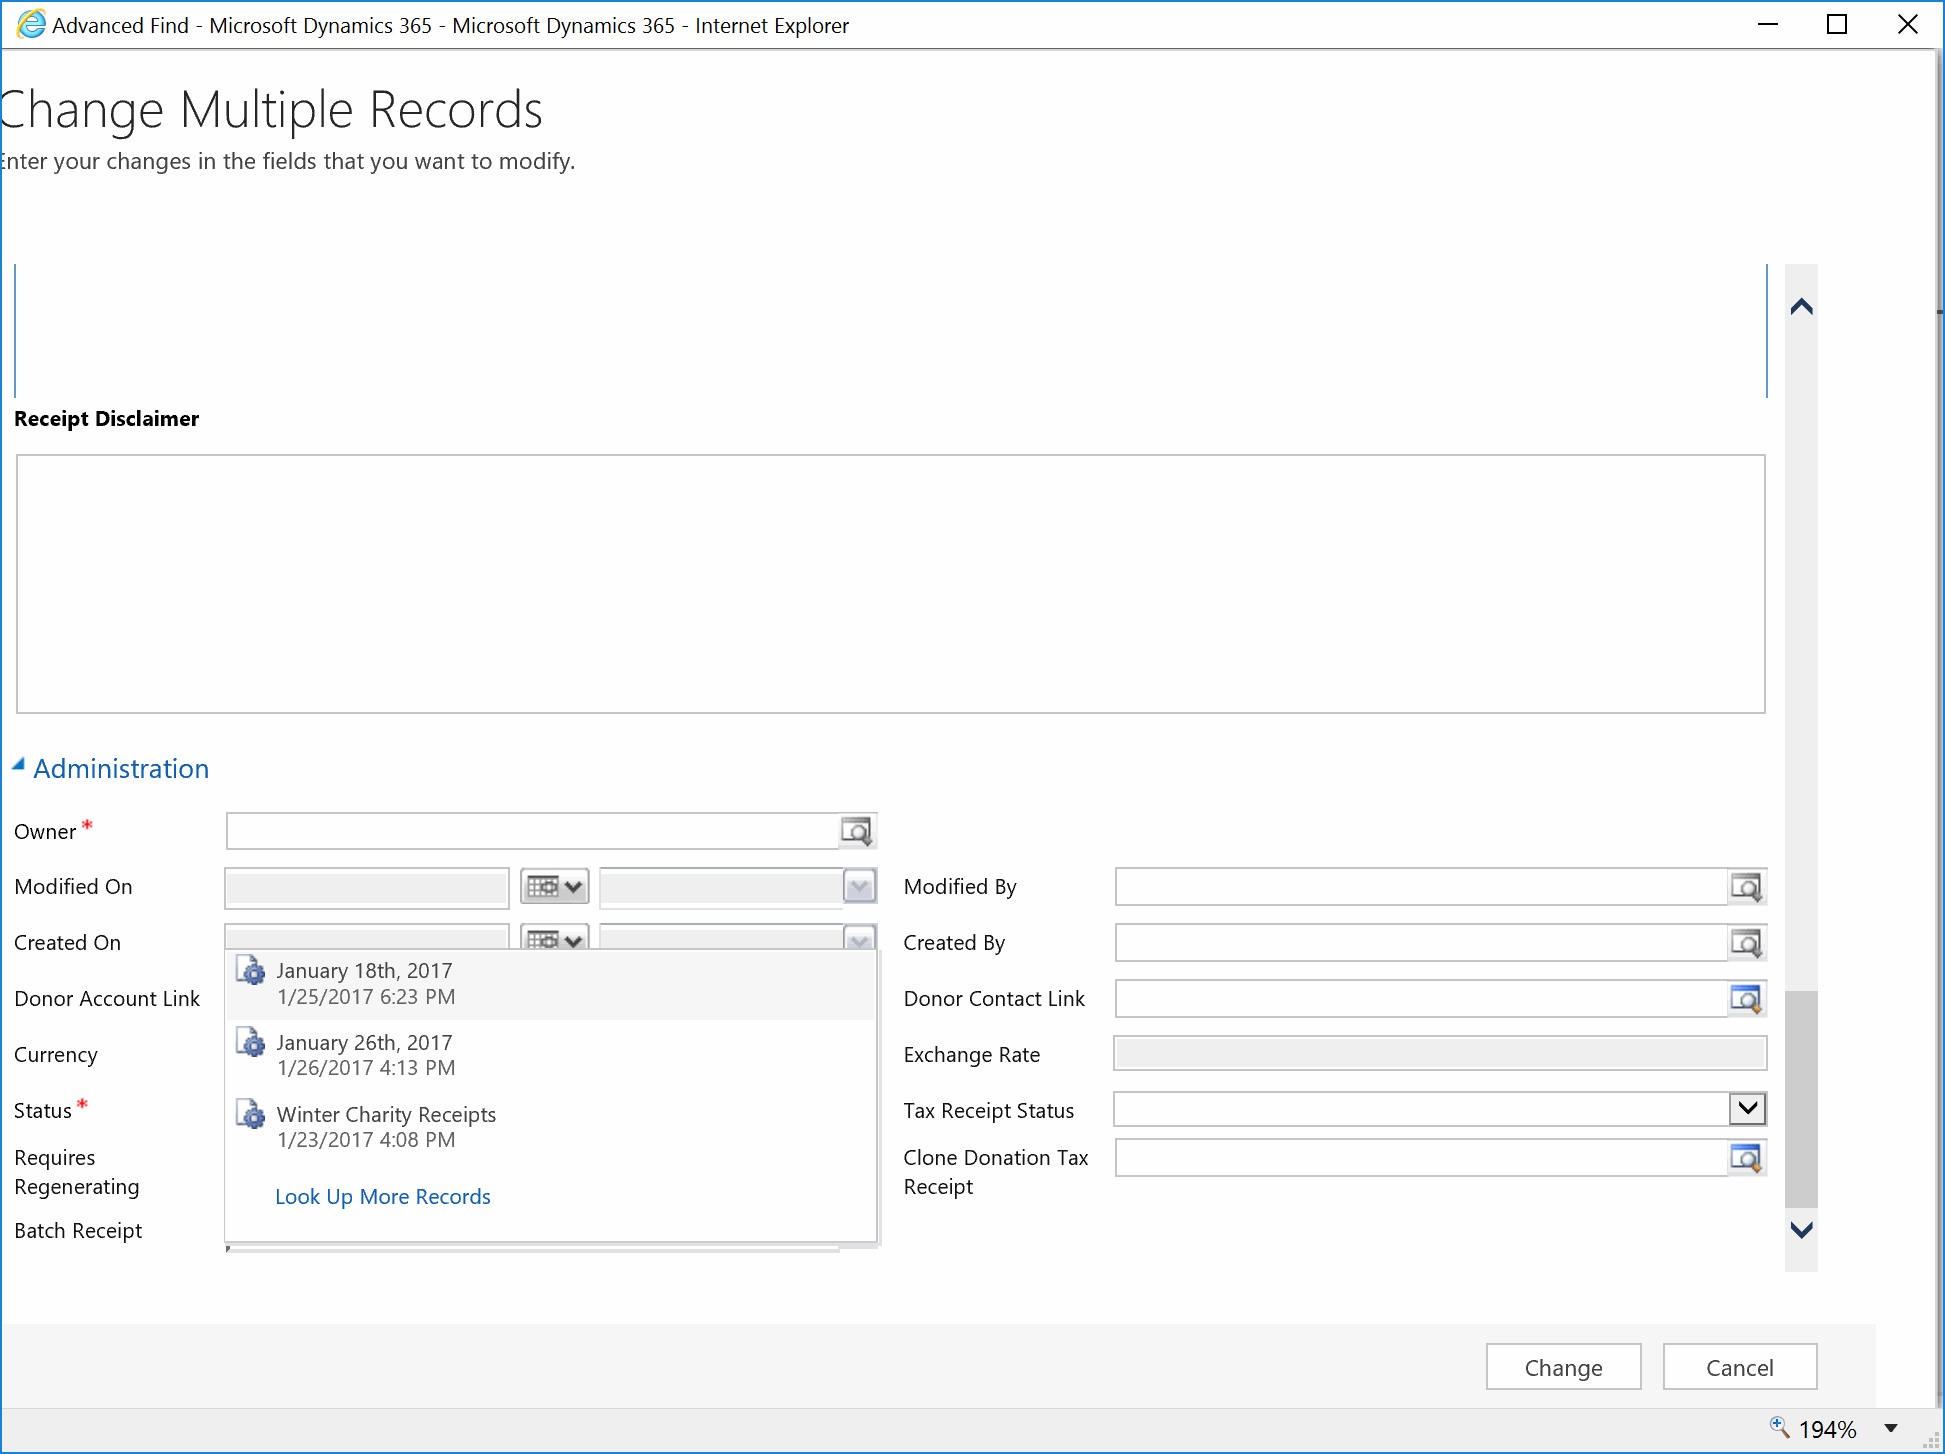
- Click the Change button at the lower right of the dialog to complete the process.
Viewing the Consolidated Receipt File
- Click on the Donor Engage Setup tile and select Batch Receipts.
- Under the list of Active Batch Receipts select a record.

The Batch Receipt detail page will appear.
- Click on the Notes tab at the lower section of the form.
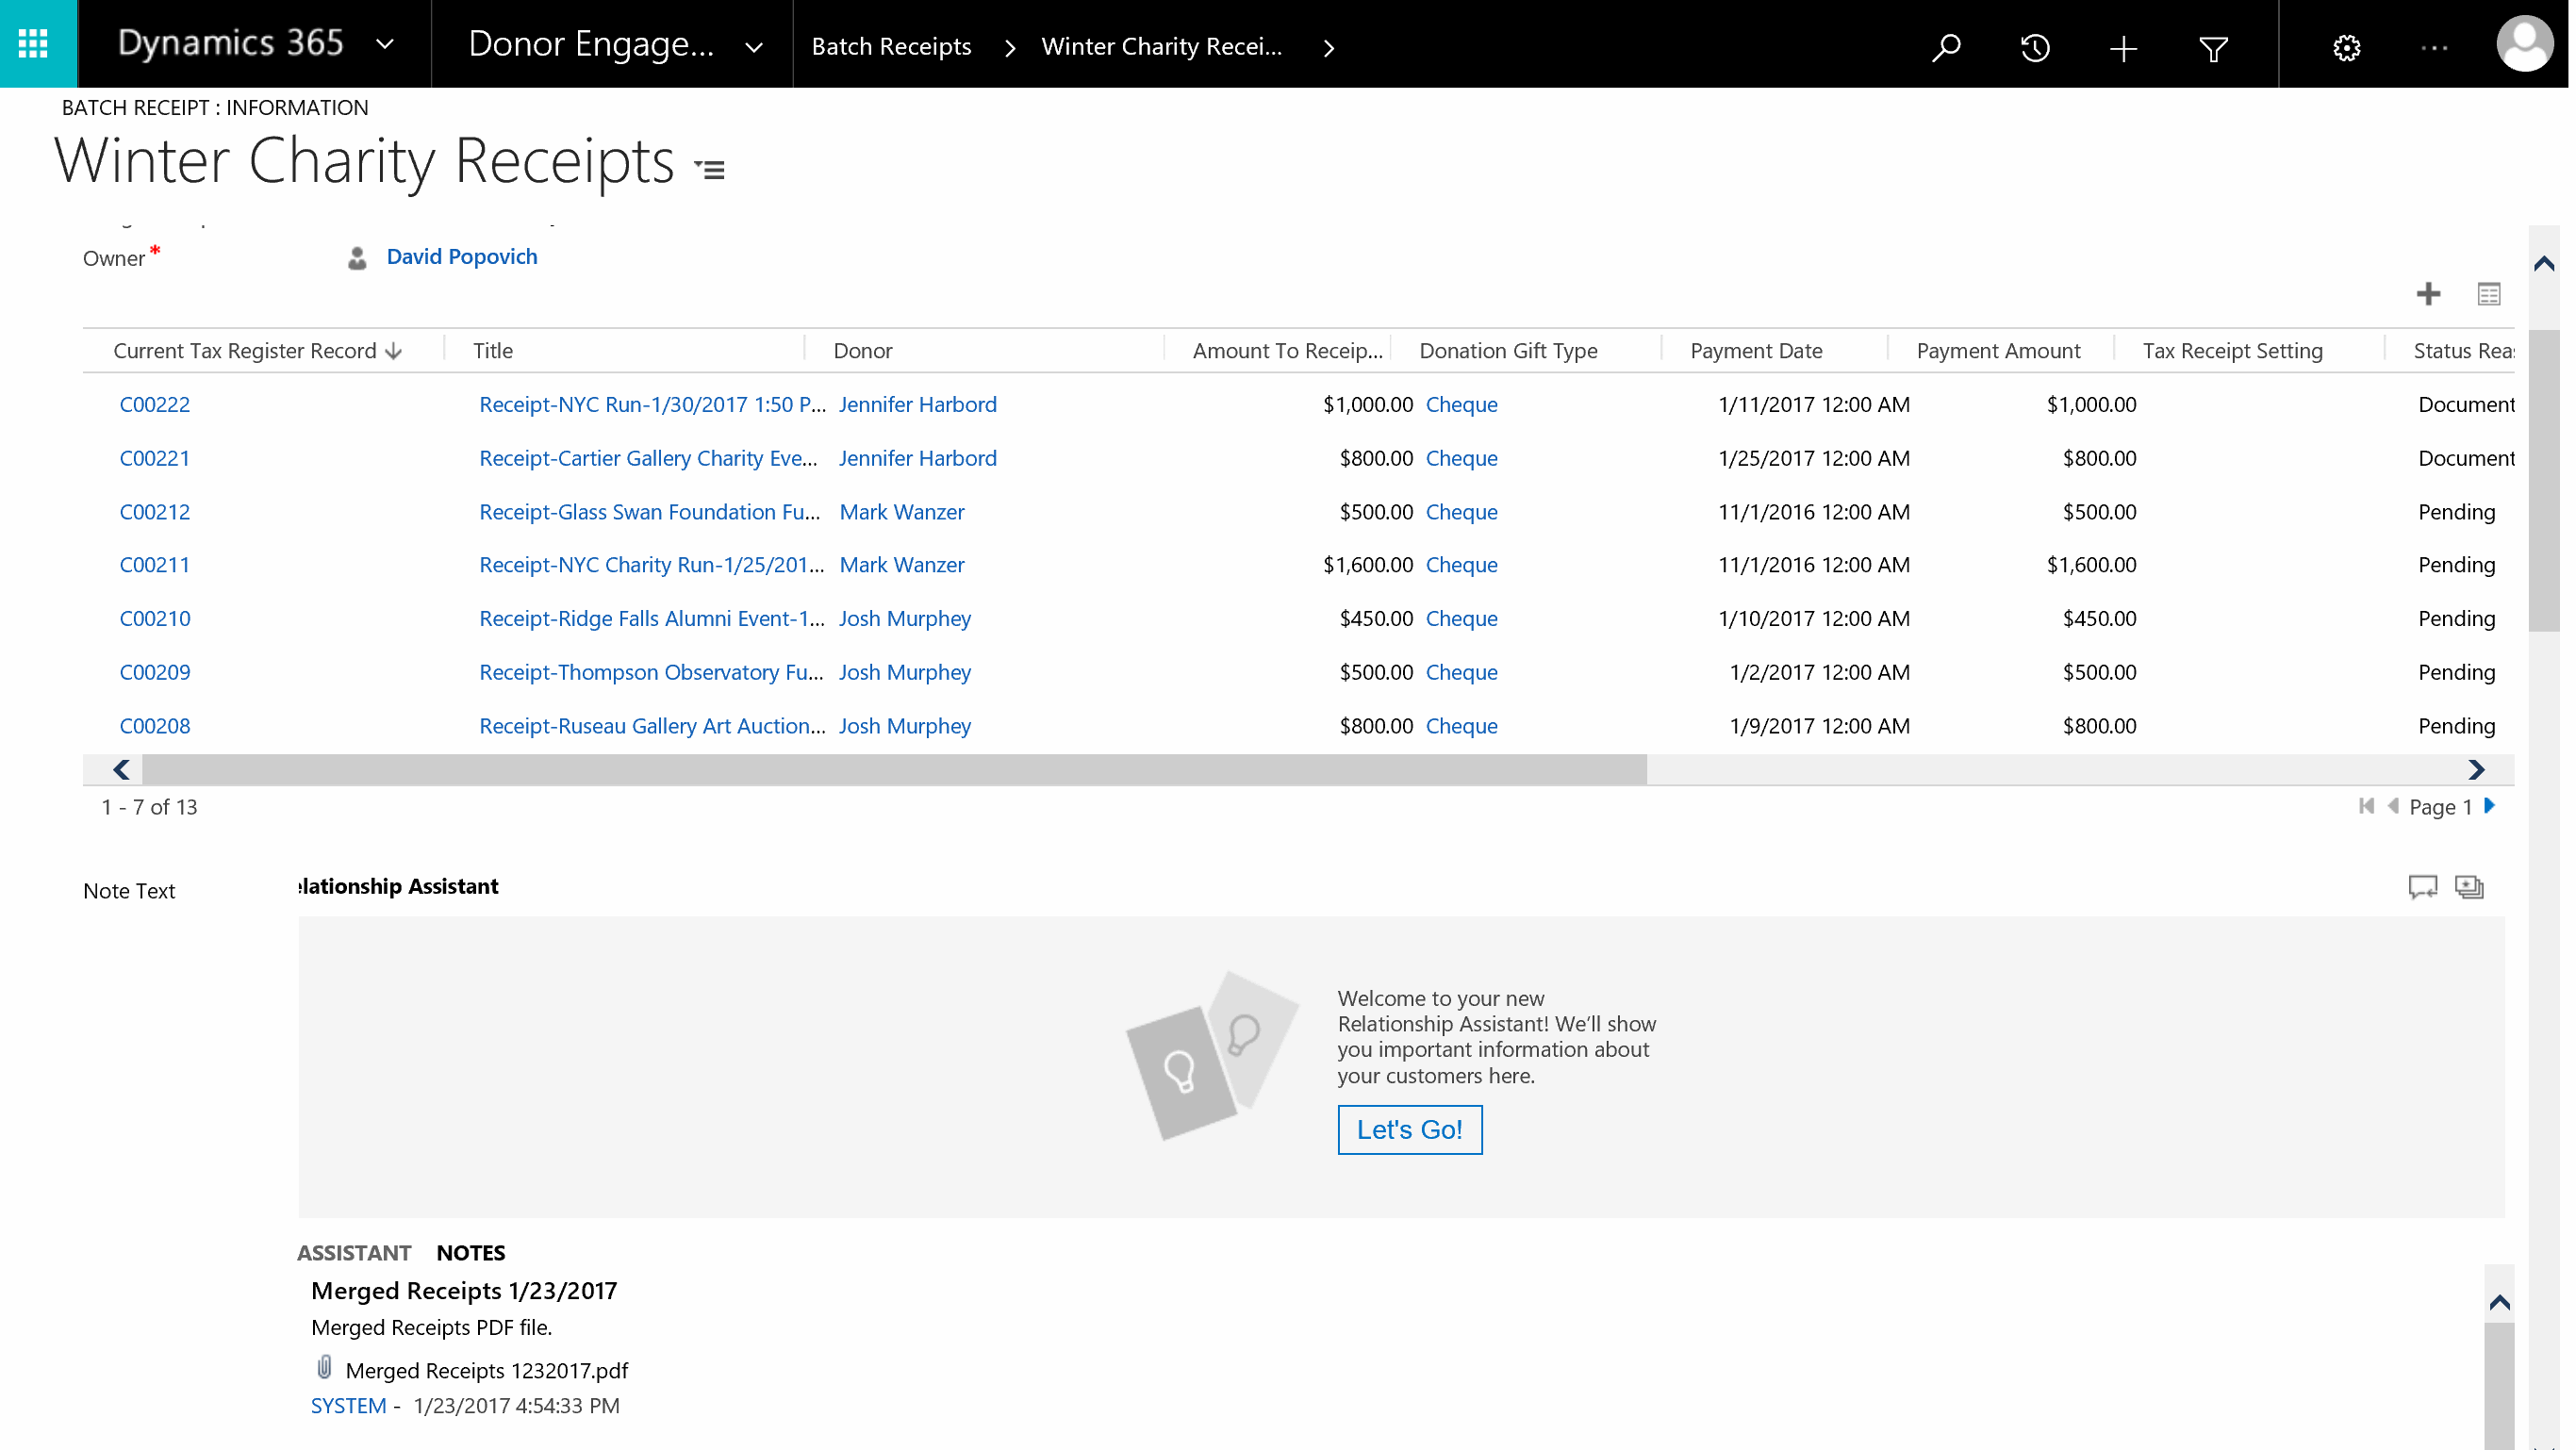
- Select the PDF and click to preview.
