

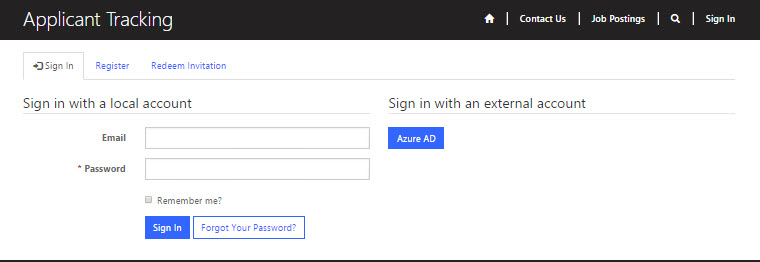
Applicant Self-Service is an interface that offers you the option to view, filter, and search for active Job Postings. The main login page provides three options to access the portal. The three tabs are as follows:
- Sign In
- Register
- Redeem Invitation

Existing Applicant Sign In
If you already are a user in the system you will use your credentials to sign in.
To sign in as an existing user:
- Navigate to Applicant Self-Service.
- Select Sign In tab.
- Enter your Username.
- Enter your Password.
- You may checkmark Remember me to cache your credentials.
- Click Sign In.
- The Job Postings page will open.
NOTE: If you have misplaced your password, click Forgot Your Password to recover.
New Applicant Registration
To register as a new applicant:
- Navigate to Applicant Self-Service.
- Select Register tab.
- Enter an email address.
- Enter a password.
- Confirm the password.
- Click Register.
- The Profile page will open.
NOTE: Passwords must be at least 8 characters. Passwords must contain characters from at least three of the following four classes: uppercase, lowercase, digit, and non-alphanumeric (special).

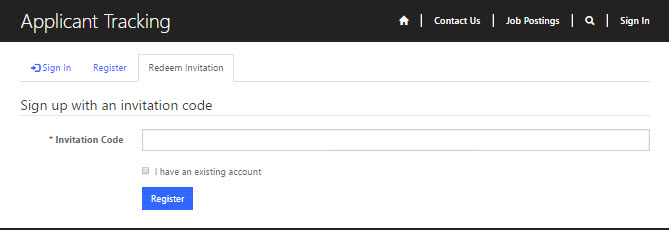
Redeem Invitation
To Redeem an Invitation:
- Navigate to Applicant Self-Service.
- Select Redeem Invitation tab.
- Enter Invitation Code.
- Click Register.
Managing the Applicant's Profile
To Manage your profile:
- In the navigation menu select the dropdown arrow beside your name and select Information.

Adding Information
Upon registering, the Profile page will open by default displaying the Information section of your profile. For convenience, you can update this information at any time.
To add information:
- Select Information from the Applicant Self-Service menu.
Any information that exist will display.
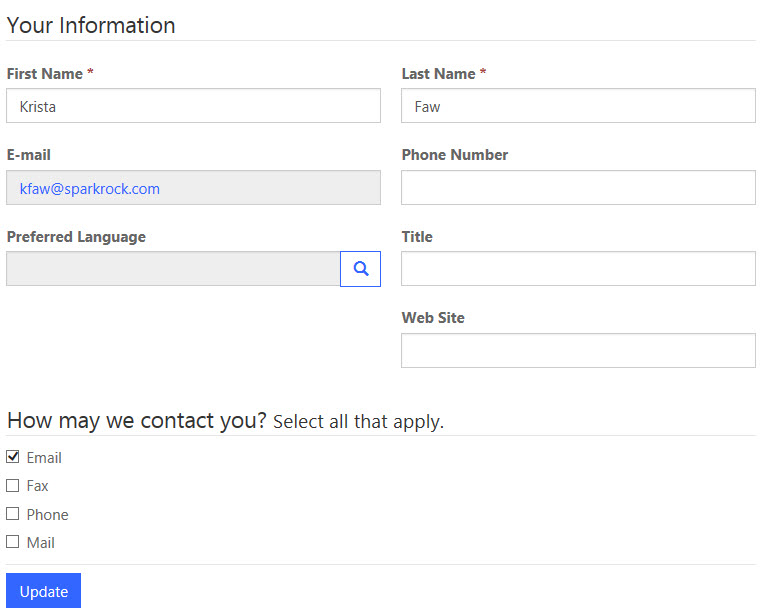
- Add or adjust your information using the guidelines in the table below.
| Information Field Name | Field Type |
| First Name* | Text |
| Last Name* | Text |
| Default | |
| Phone Number | Text |
| Preferred Language | Lookup |
| Title | Text |
| Website | Text |
| How may we contact you? Select all that apply. | Checkbox |
- Click the Update button.
Adding Profiles
As an applicant, a profile enables you to create a summary of your career and educational details as it pertains to a specific type of role. You can create and manage multiple profiles to select from when applying for a job posting.
Step 1 – APPLICANT PROFILE
To create a specific applicant profile:
- Select Profiles from the Applicant Self-Service menu.
- The list view will display any Profiles that exist.
- Click Create to add a new Profile.
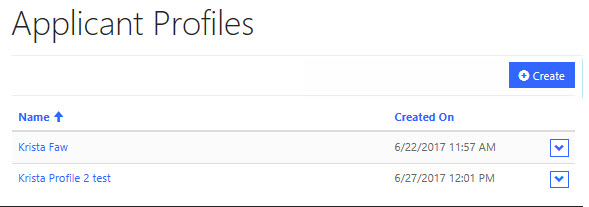
- Applicant Profile Create form appears open to the General section.
- Complete the fields using the guidelines in the table below.
NOTE: Any mandatory field is denoted by a red asterisk*.
| Applicant Profile Field Name | Field Type |
| Eligible to work in United States | Toggle |
| Willing to work – Day | Toggle |
| Willing to work – Evening | Toggle |
| Willing to work – Overnight | Toggle |
| Willing to work – Per Required Need | Toggle |
| Willing to work – Weekend Day | Toggle |
| Willing to work – Part Time | Toggle |
| Willing to work – Full Time | Toggle |
| When available to start | Option Set |
| Available Start Date | Date Picker |
| Have vehicle? | Toggle |
| Have Driver License | Toggle |
| Driver License Number | Text |
| Driver License State | Text |
| Driver License Expiry Date | Date Picker |
| Convicted in motor vehicle violation? | Toggle |
| Motor vehicle violation details | Text |
| Convicted in criminal violation? | Toggle |
| Criminal violation details: | Text |
| Under investigation for felony charges? | Toggle |
- Click the Next button.
Step 2 – QUALIFICATIONS
To add Qualifications:
- Click Create.
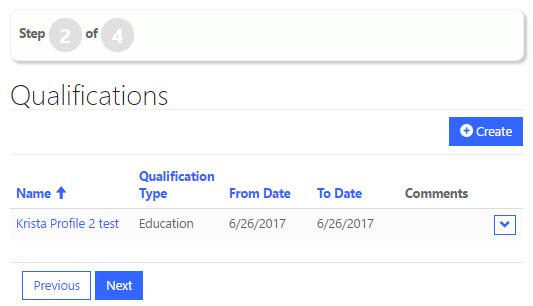
- There are three types of Qualifications. By selecting a Qualification Type from the list, the fields in the dialog will update to reflect the appropriate fields.
- Complete the fields as required using the information in the table below.
NOTE: Any mandatory field is denoted by a red asterisk*.
| Qualifications Field Name | Field Type |
| Name* | Text |
| Qualification Type | Option Set |
| From Date | Date Picker |
| To Date | Date Picker |
| Description | Text |
| Comments | Text |
- Click the Add button.
Step 3 - EMPLOYMENT HISTORY
To add Employment History:
- Click Next at the bottom of the Qualifications table.
- Click Create from the Employment History table.

- Complete the fields as required, using the information in the table below.
NOTE: Any mandatory field is denoted by a red asterisk*.
| Employment History Field Name | Field Type |
| Employer Name* | Text |
| Job Position | |
| City | Text |
| Province/ State | Text |
| Country | Text |
| Start Date | Date Picker |
| End Date | Date Picker |
| Reason For Leaving | Text |
| Supervisor Name | Text |
| Supervisor Phone Number | Text |
| Supervisor Email | Text |
| Duties | Text |
| Can Contact Employer if Final Candidate? | Radio Button |
- Click the Add button.
Step 4 - REFERENCES
- Click Next at the bottom of the Employment History table.
- To add References click Create.
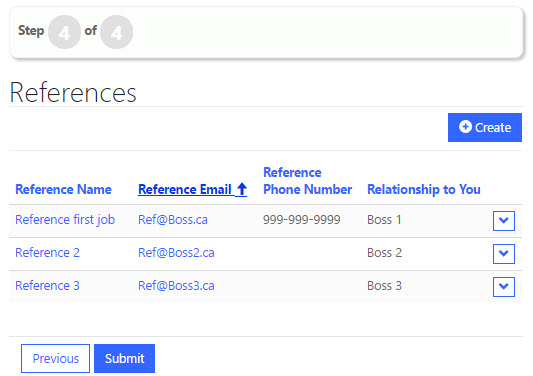
- Complete the fields as required using the information in the table below.
NOTE: Any mandatory field is denoted by a red asterisk*
| Reference Field Name | Field Type |
| Name* | Text |
| Reference Name | Text |
| Relationship to You | Text |
| Reference Phone Number | Text |
| Reference Email | Text |
- Click the Add button.
- Click Submit at the bottom of the References table.
View My Active Job Applications
As an applicants you can monitor the status of submitted job applications.
To monitor the status of a submitted job application:
- On the Applicant Self-Service menu select My Active Job Applications.
- A list view will display all job applications.
- Clicking on a specific job application will provide read-only summary of the application.
Change Password
There are cases where you may want to change your existing applicant password and this can be done.
To change you password:
- On the Applicant Self-Service menu select Change Password.
- The existing email will be displayed by default.
- Enter the old password.
- Enter a new password.
- Confirm the password.
- Click the Change Password button to commit the update.
Change Email
You many need to update your existing applicant email.
To update your email:
- On the Applicant Self-Service menu select Change Email.
- The existing email will be displayed.
- Enter a new email.
- Click the Change and Confirm Email button to commit the update.
Manage External Authentication
The Applicant Self-Service external authentication setting allows you to authenticate the log in through Azure.
To authenticate this external authentication:
- On the Applicant Self-Service menu select Manage External Authentication.
- On the Azure AD panel located to the right select +Connect.
- You will be connected to the external account.
- If you wish to disconnect from the external account on the Azure AD panel select +Disconnect.
NOTE: External authentication through Azure is optional.
Search Job Postings
You are able to search for job postings.
To search for job postings:
- In the Applicant Self-Service navigation bar select Job Postings.
- The Job Postings page opens displaying all active job postings.
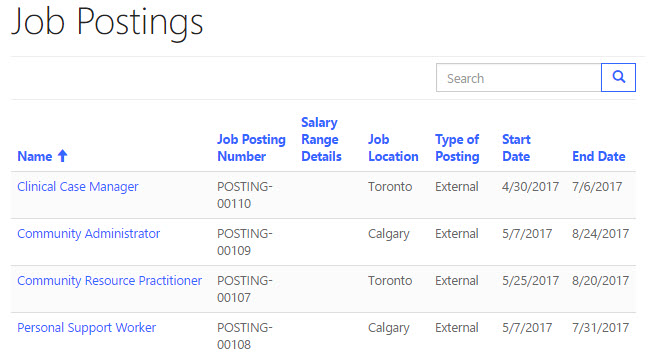
- Using the Search box at the top of the list applicants can filter the job postings.
NOTE: To search on partial text use the asterisk (*) wildcard character.
Applying to a Job Posting
You may want to apply for one particular job posting.
To apply:
- Click on the name of a job posting from the list.
- The Job Posting View page opens displaying all details regarding the posting.

- Click the Apply button.
- Select the profile from the lookup that is best suited for the job posting.
- Click Continue.
- A Job Application Wizard opens to guide the applicant through the job application process that includes:
- Applicant Profile Details
- Qualifications
- Employment History
- References
- Supporting Documents (e.g. cover letters, resumes, certifications, transcripts)
NOTE: The applicant can amend or include any additional details to the profile during this process.
- Once completed an application summary will be available for review and any changes can be made at this time.
- If all content is satisfactory select the Confirmation checkbox.
- To apply for the job posting select the Submit Application button.
- The system will confirm that the application has been successfully submitted.
- A Thank You email will be sent to the your email address by the system once the Job Application has been submitted.
Applying to a Job Posting from the Applicant Tracking Work Area
Traditionally, a job application is submitted by you, the applicant, through the Applicant Self-Service based upon your search. However, there are instances where as an internal user, you may want to submit an application on behalf of a colleague or applicant. In this case the application can be added by you through the following process.
To apply for a job posting for someone else:
- Select the Applicant Tracking work area from the navigation bar.
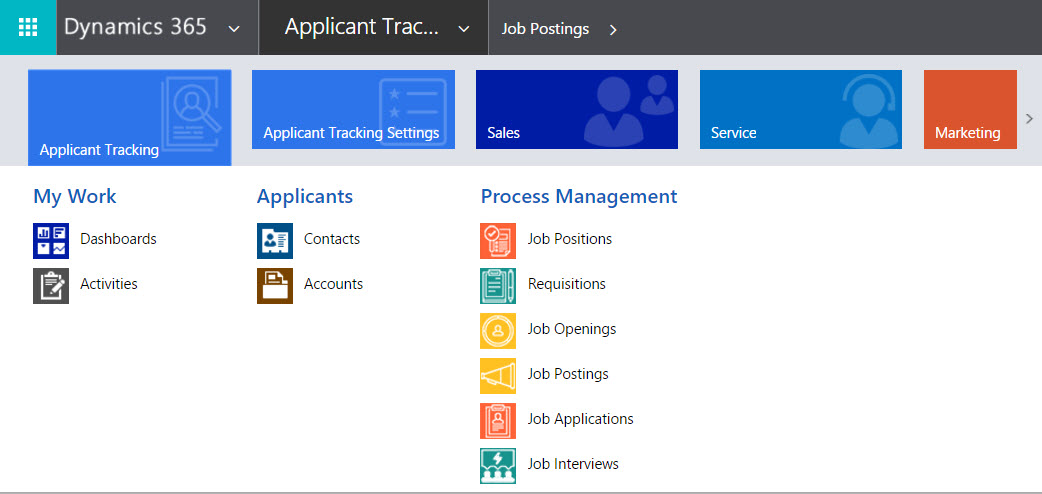
- Click on the Job Postings item.
- The Job Postings view displays a list of all Active Job Postings by default.
- Click +New in the command bar to create a job posting.
- The New Job Posting form opens.
- Complete the fields as required.
- Once fields have been entered, select Save or Save & Close from the command bar.