

Requisition Status
A requisition status will be updated throughout the hiring process. Triggers are a dynamic tool for transitioning the status of a requisition without the need for one of your team to manually update the status within the solution.This not only helps to ensure that specific tasks are completed, but also provides transparency to all members of the hiring team, and enables the system to track metrics that reflect transition times between stages.
| Status | State |
| New | Requisition has been created |
| In Development | Ancillary information is being added to the requisition (e.g. job postings) |
| Posted - Accepted Applications | Job Postings have been published and applications are being accepted |
| Reviewing Applications | Applications are being reviewed and vetted |
| Inactive - Closed | Requisition has been closed |
| Inactive - Canceled | Requisition has been canceled |
Adding a Requisition from Requisitions
There are several locations where you can add a requisition based upon the business process. Optimally, the job position is the prime location. There may be cases where you may wish to add a requisition directly from the Requisitions item in the Applicant Tracking work area. If you use this method to create a requisition this will omit the automatic link to a job position.
note: Linking to a job posting can be done after creating a requisition, however it involves more steps. If you know you want the requisition linked to a job posting the ideal way to create a requisition is as described in the section below: Adding a Requisition from a Job Position.
To add a requisitions from Requisitions:
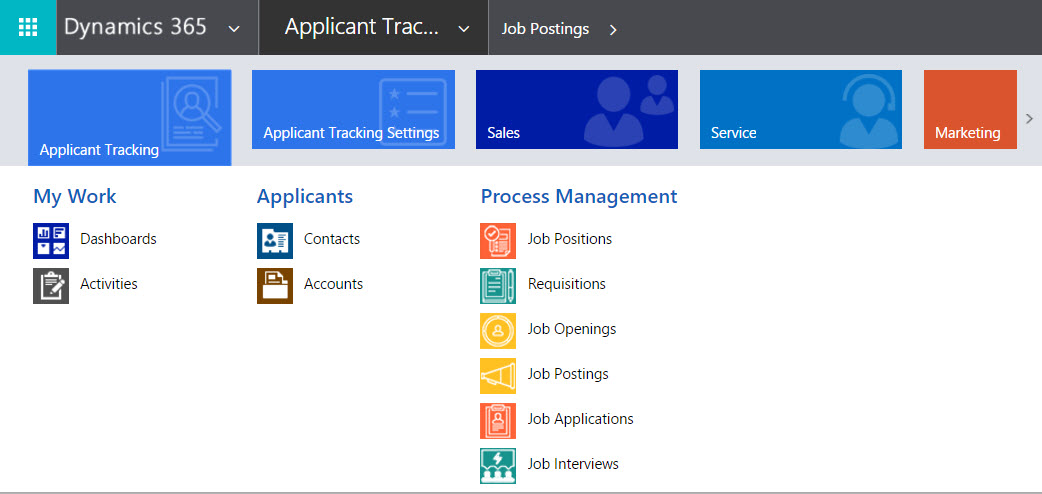
- Select the Applicant Tracking work area from the navigation bar.
- Click on the Requisitions item.
- The Requisitions view displays a list of all Active Requisitions by default.
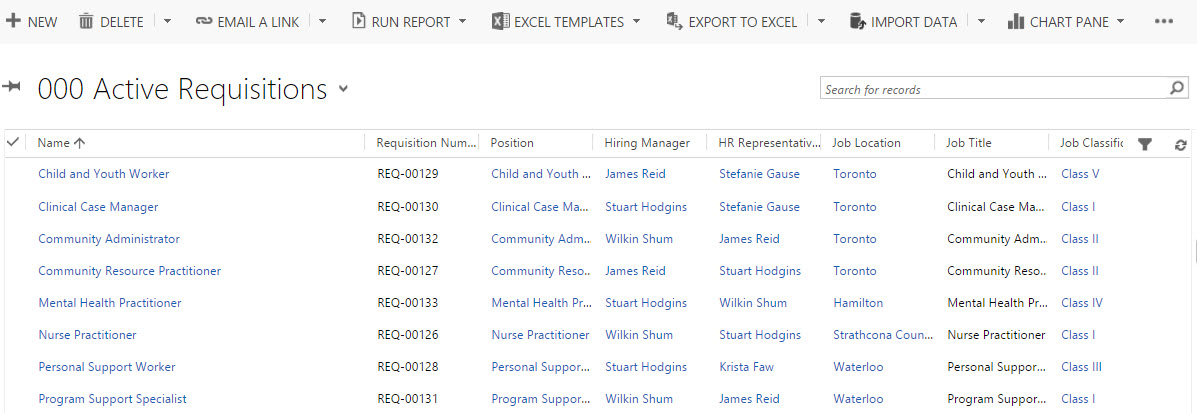
- Click +New in the command bar to create a Requisition.
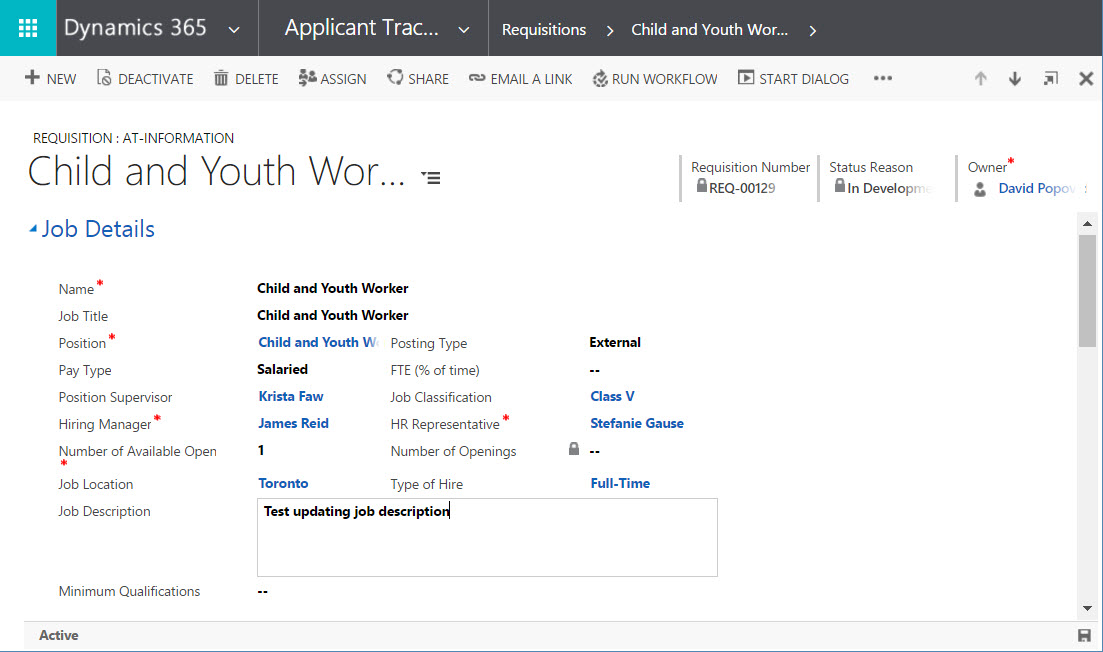
- The New Requisition form opens.
- Complete the fields as required.
- Once fields have been entered, select Save or Save & Close from the command bar.
| Requisition Field Name | Field Type |
|
Name*
|
Text |
| Job Title | Text |
| Position* | Lookup |
| Pay Type | Option Set |
| Position Supervisor | Lookup |
| Hiring Manager | Lookup |
| Number of Available Openings* | Text |
| Job Location | Lookup |
| Job Description | Text |
| Posting Type | Toggle |
| FTE (% of time) | Text |
| Job Classification | Lookup |
| HR Representative | Lookup |
| Number of Openings | System Generated |
| Type of Hire | Lookup |
| Minimum Qualifications | Text |
|
Date and Closures (HEADING)
Status Reason |
Dropdown |
| Requisition Approval Date | Date Picker |
| Posting Start Date | Date Picker |
| Requisition Planned Close Date | Date Picker |
| Requisition Closure | Toggle |
| Last Posting Start Date | Date Picker |
| Requisition Actual Close Date | Date Picker |
|
Requirements Checklist (HEADING)
Will Drive Consumers? |
Toggle |
| Annual TB Test Required? | Toggle |
| Education Required | Toggle |
| Education Required List | Text |
| License Required? | Toggle |
| License Required List | Text |
NOTE: Any mandatory field is denoted by a red asterisk*.
Adding a Requisition from a Job Position
To add a Requisition form a Job Position:
- Select the Applicant Tracking work area from the navigation bar.
- Click on the Job Positions item.
- The Job Positions view displays a list of all Active Job Positions.
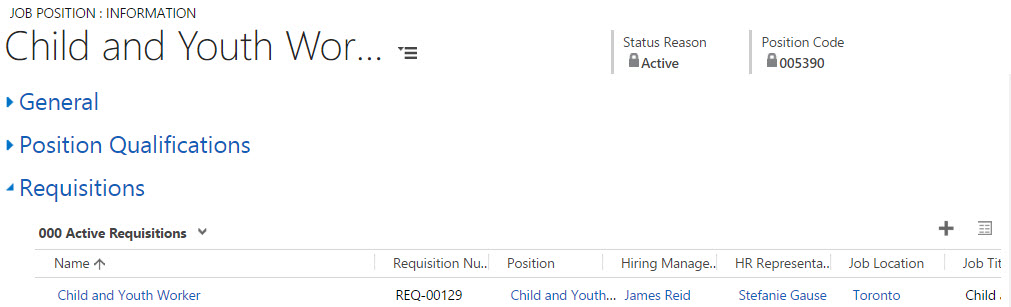
- Select a Job Position from the list.
- The Job Position detail view opens.
- Click + in the Requisitions section to create a new requisition.
- The New Requisition form opens.
- Complete the fields as required using the table below for help.
- Select Save or Save & Close from the command bar once you are done.
| Requisition Field Name | Field Type |
|
Name*
|
Text |
| Job Title | Text |
| Position* | Lookup |
| Pay Type | Option Set |
| Position Supervisor | Lookup |
| Hiring Manager | Lookup |
| Number of Available Openings* | Text |
| Job Location | Lookup |
| Job Description | Text |
| Posting Type | Toggle |
| FTE (% of time) | Text |
| Job Classification | Lookup |
| HR Representative | Lookup |
| Number of Openings | System Generated |
| Type of Hire | Lookup |
| Minimum Qualifications | Text |
| Date and Closures Section | |
|
Status Reason
|
Dropdown |
| Requisition Approval Date | Date Picker |
| Posting Start Date | Date Picker |
| Requisition Planned Close Date | Date Picker |
| Requisition Closure | Toggle |
| Last Posting Start Date | Date Picker |
| Requisition Actual Close Date | Date Picker |
| Requirements Checklist Section | |
|
Will Drive Consumers?
|
Toggle |
| Annual TB Test Required? | Toggle |
| Education Required | Toggle |
| Education Required List | Text |
| License Required? | Toggle |
| License Required List |
Text |
NOTE: Any mandatory field is denoted by a red asterisk*
Modifying a Requisition
You may need to update or modify the details of a requisition.
To modify a requisition:
- Select the Applicant Tracking work area from the navigation bar.
- Click on the Requisitions item.
- The Requisition view displays a list of all Active Requisitions by default.
- Click the requisition that you would like to edit.
- The requisition detail form opens.
- Select the field that you would like to update.
- Once fields have been edited, click the Save icon on the bottom right of the form.
Deleting a Requisition
You may need to delete a requisition. However, be aware that before deleting a requisition all associated job applications must be depositioned.
To delete a requisition:
- Select the Applicant Tracking work area from the navigation bar.
- Click on the Requisitions item.
- The Requisition view displays a list of all Active Requisitions by default.
- Click on the requisition record.
note: You can use the Search field (magnifying glass in the top right corner) to narrow your search. - On the requisition detail form select Delete from the command bar.

- A dialog will render to confirm the deletion of the single record.
- Click OK to delete.
NOTE: Deleting a record is permanent and the data cannot be recovered once the action has been performed.
Deactivating a Requisition
Once created, a requisition is by default set to active.
To deactivate a requisition:
- Select the Applicant Tracking work area from the navigation bar.
- Click on the Requisitions item.
- The Requisitions list view displays Active Requisitions by default.
- Select the requisition that you wish to deactivate from the list.
- The requisition detail form will open.
- Click Deactivate in the command bar.
- A confirm deactivation dialog will appear.
- Select Deactivate.
- The requisition will be deactivated.
Note: Once a requisition has been deactivated it can be reactivated using the same method.
Activating a Requisition
You can reactivate a deactivated requisition.
To activate a deactivated requisition:
- Select the Applicant Tracking work area from the navigation bar.
- Click on the Requisitions item.
- The Requisitions list view displays Active Requisitions by default.
- Click the view (down arrow) to the right of the Active Requisitions, and from the list select Inactive Requisitions.

- The list will refresh to display only requisitions that have been deactivated.
- Select a requisition from the list that you wish to activate.
- The requisition detail form will open.
- Click Activate in the command bar.
- A confirm activation dialog will appear.
- Select OK.
- The requisition will be activated.
Adding a Job Opening on a Requisition
You are able to add a job opening to a requisition.
In order to add a job opening to a requisition:
- In the Job Opening section on the requisition click + to add a new job opening.
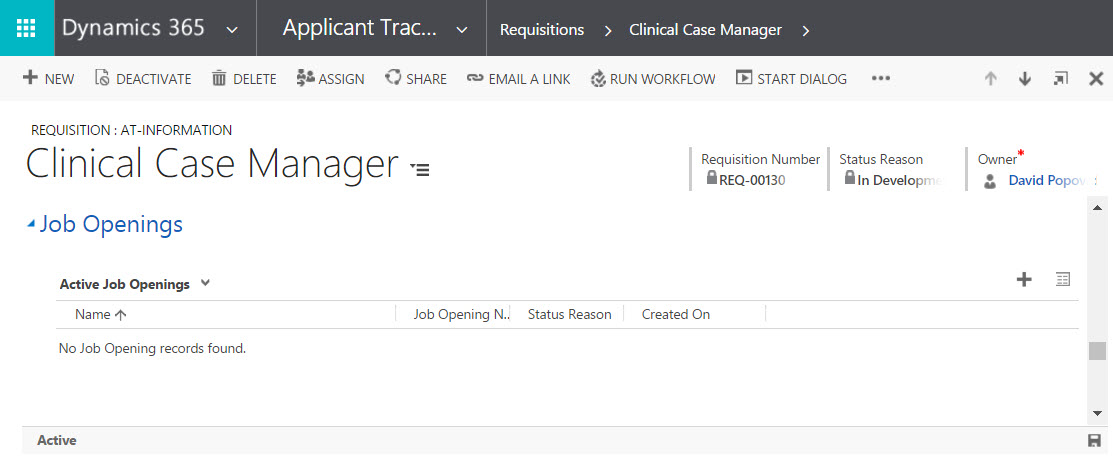
- The Job Opening quick form opens from the top of the page.
- Complete the fields as required.
Note: The name will default from the Requisition Name, however can be modified (if required). - Once fields have been entered, select Save.
- The new job opening will appear in the Active Job Openings list on the requisition detail form.
| Job Opening Field Name | Field Type |
| Name* | Text |
| Date Opened | Date Picker |
| Who Assigned Contact? | Lookup |
| Requisition* | Lookup |
| Job Opening Number | System Generated |
| Owner* | System Generated |
Adding a Job Posting on a Requisition
You are able to add a job posting to a requisition.
In order to add a job posting to a newly created requisition:
- Find the Job Posting list on the upper right side of the requisition detail form.

- Click + to add a new Job Posting.
- The Job Posting form opens.
- Complete the fields as required.
- Once fields have been entered, select Save or Save & Close from the command bar.
- The new job posting will appear in the Job Posting list of the Requisition detail form.
| Job Posting Field Name | Field Type |
| Name* | Text |
| Start Date* | Date Picker |
| Type of Posting* | Lookup |
| Job Posting Number | System Generated |
| End Date* | Date Picker |
| Location* | Lookup |
| Salary Range | Text |
| Owner* | Default |
NOTE: Any mandatory field is denoted by a red asterisk*.
Adding Media Costs on a Requisition
You are able to add media costs to a requisition.
In order to attach a media cost to a newly created requisition:
- Find the Media Cost list on the upper right side of the requisition detail form, located under the Job Postings list.
- Click + to add new Media Costs.
- The Media Costs form opens.
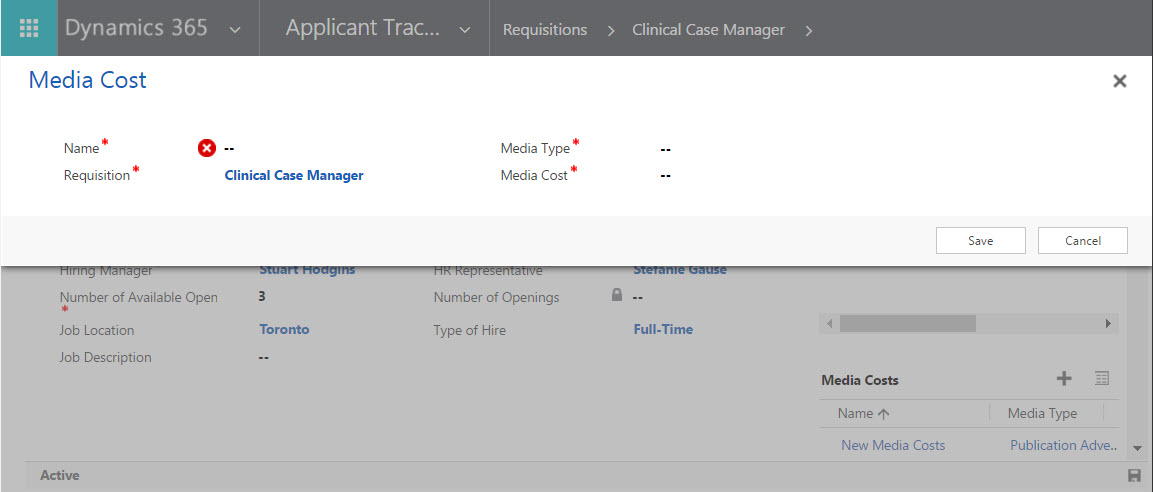
- Enter the primary details into the fields.
- Once fields have been entered, click Save.
- The new media cost will appear in the list on the Requisition detail form.
| Media Costs Field Name | Field Type |
| Name* | Text |
| Requisition* | Text |
| Media Type* | Lookup |
| Media Cost* | Numeric |
NOTE: Any mandatory field is denoted by a red asterisk*.
Adding a Position on a Requisition
- Click on the lookup control (magnifying glass) of the Position field.
- Select from the list of existing positions.
- The position will be added.
If the position is not listed a new position can be added by performing the following steps:
- Click on the lookup control (magnifying glass) of the Position field.
- To create a new position click on +New in the lower right of the dropdown.

- The New Position dialog opens.
- Complete the fields as required.
- Once fields have been entered, select Save or Save & Close from the command bar.
| Position Field Name | Field Type |
| Name* | Text |
| Position Code | Text |
| Centre | Lookup |
| Default Hours Per Day | Text |
| Description | Text |
| Owner* | Default |
| Program RU | Lookup |
| Program Area | Lookup |
| Default Hours Per Week | Text |
NOTE: Any mandatory field is denoted by a red asterisk*