

WordMerge Web Service Prerequisites and Setup
There are three (3) options available when hosting Word Merge for CRM On Premise or Dynamics 365 Cloud. This section will detail the procedure for each of the following deployment options that include:
- On Premise – IIS server
- Client Azure Web Services
- Sparkrock Azure Web Services
All options are supported by both CRM On Premise or Dynamics CRM. The following are the requirements and setup process for each option.
On Premise Deployment
The following system requirements are required in order to support an On Premise deployment:
- IIS 7 +
- Windows Server 2012 +
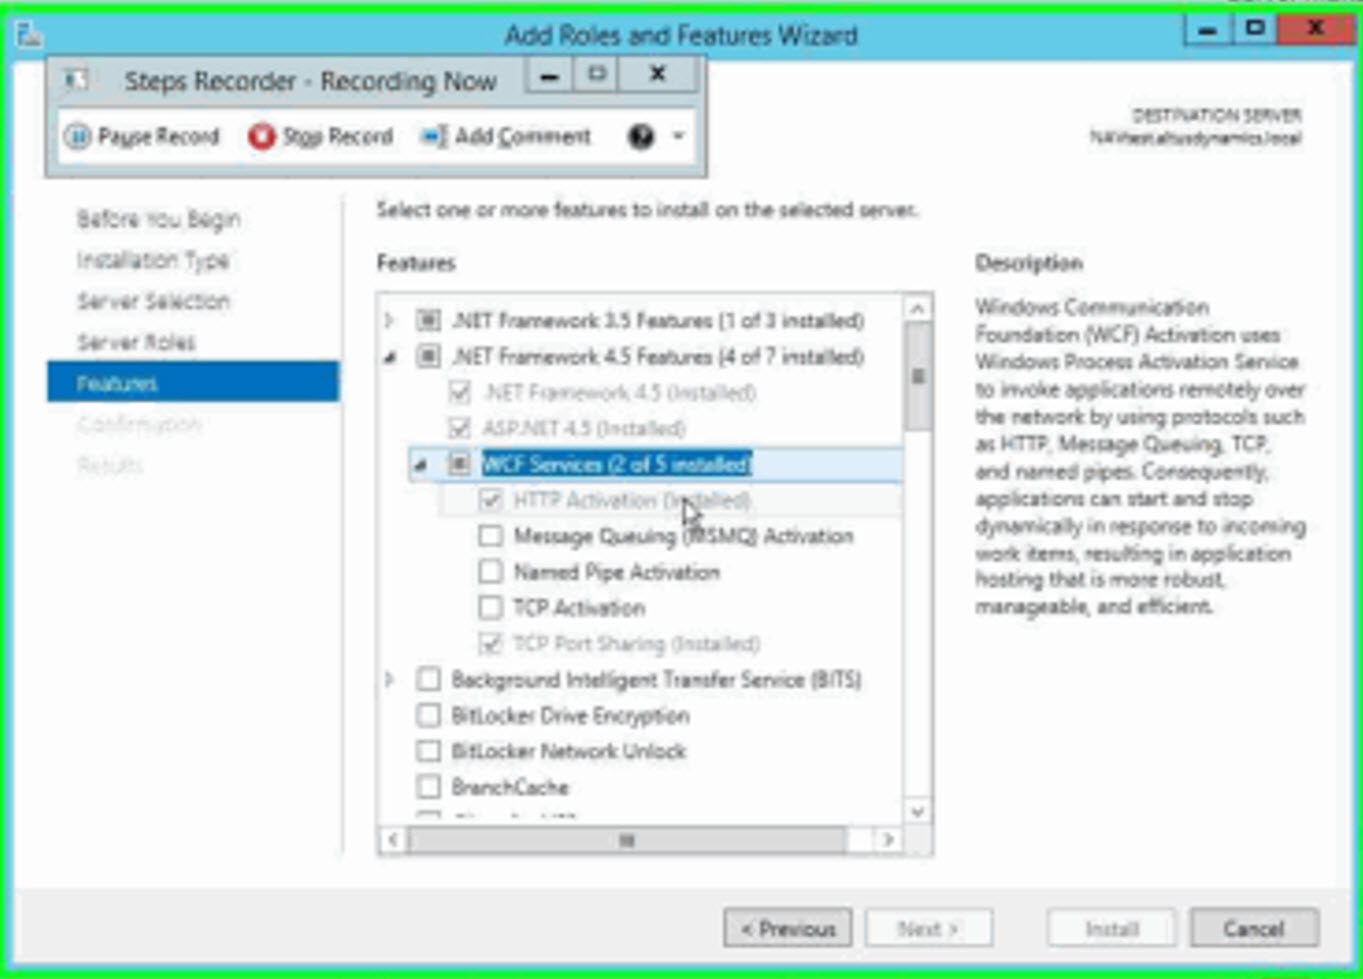
- NET Framework 4.5
- NET Framework 4.5 Feature – HTTP Activation
Preparing the WordMerge Package
- Download the WordMerge Zip file
- Extract the WordMerge file
NOTE: Please ensure you record the extracted folder location
Create a IIS Site
- Open the IIS Manager

- Navigate to the Connections frame on the left side of the Internet Information Services (IIS) Manager screen
- Right click in the panel and from the popup menu select Add Website…
- On the Add Website dialog enter the Site name: WordMerge

- Beside the Physical Path field click the ‘…’ to create the IIS path
- The Browse For Folder dialog will appear providing the option to select a directory for the application
- Navigate down the folder structure to create the default path as follows: c:\inetpub\wwwroot\
- Select the Make New Folder button at the lower left of the dialog to create a folder
- When the new folder appears update the default name to WordMerge
- Click OK to close
- On the Add Website dialog select the Port field and enter a port number which is not in use by any other site on the same IIS

NOTE: The new site will now be created
Adding Files
- To add files to the new folder open the extracted folder from Preparing the WordMerge Package

- Select all items within this folder and paste in WordMerge folder created in Configuration Settings for WordMerge

Final Test
- Navigate to the Internet Information Services (IIS) Manager screen
- From the Connections panel select the WordMerge site
- Select the Content View

- From the WORDMERGE Content list select the DocumentMerge.svc file
- Click Browse from the Actions panel

The following page will open
Testing Access from the CRM Server
- On the URL replace the localhost with the server name and test the URL from the CRM server

Client Host Azure App
The following system requirements are required in order to support the Client Host Azure App deployment:
- Microsoft Azure Subscription
- SSL Certificate
- Visual Studio to deploy the solutions
NOTE: WordMerge will require Visual Studio to deploy Azure Web App Services
Setup
- Login to the Azure Portal
- Click on the App Services
- Under App Services Click +Add
- Select Web App
- Select Create

- Enter a name in the App name field
- Create a new Resource Group or use an existing one if already set up
NOTE: It will take a few minutes for the Web App to be created
- Navigate back to App Services
You should be able to see the newly create Web App
- Select the newly created Web App
Please document the information from the following screen

- URL will be your WordMerge URL
- Download the Get Publish Profile for Visual Studio to deploy the solution to the Web App
- Click Get Publish profile and save the publish setting

- Please send Publish Profile to Sparkrock and we will deploy it to the newly created Web Service
- Requirement for Sparkrock to deploy the solution to Web Services
- Setup a new Sparkrock Azure AD account
- Access permission to Web Services as Contributor
- Under the Web Services Setting
- Go To Access Control (IAM) and select Roles
- Select Contributor and click Add

- Type in the newly created Sparkrock Account and add to Contributor Roles
- Pass the User credentials to Sparkrock before we can start the deployment
In Conclusion
Sparkrock requires the following items before we can deploy the Client Hosted Azure App
- Azure AD subscription
- Azure Web Services deployment
- Publishing settings file
- An account for Sparkrock to access and deploy solutions
- Account permission to deploy solutions on Web Services
Sparkrock Hosted WordMerge Services
Sparkrock Hosted WordMerge Services Overview
- Sparkrock will be responsible for the implementation and publishing of the WordMerge App
- The WordMerge App will be hosted within Canada or a U.S. data center based upon the location of your organization
- Sparkrock will provide all security certificates
- Sparkrock will be responsible for all future performance monitoring, backups and upgrades
Create Tax Receipt Setting
Users need to create a Donation Tax Receipt Setting record to enable Tax Receipt document generation.
To create a Donation Tax Receipt Setting record:
1. From the navigation bar, hover over Donor Engage Setup tile.
The work area tiles display.
2. Click the Donation Tax Receipt Settings tile.
The list of Active Donation Tax Receipt Settings displays.
3. From the command bar, click on New to create a new Donation Tax Receipt Setting record.
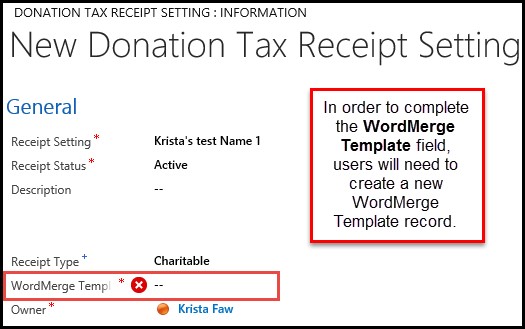
The New Donation Tax Receipt Setting displays.
4. Create a name for the Receipt Setting field.
5. Select Active from the drop down in the Receipt Status field.
6. In the Receipt Type field, select Charitable or Non-Charitable from the drop down.
In order to complete the WordMerge Template field, users will need to create a new WordMerge Template record. Steps on how to do this can be found in the Create WordMerge Template section.
7. Once you have created a WordMerge Template, select it from the drop down.
8. Click the Save button at the bottom right of the page.
The New Donation Tax Receipt Setting displays.

Create WordMerge Template
To complete the New Donation Tax Receipt setting record, users will also have to create a new WordMerge template record.
To create the WordMerge Template:
1. From the WordMerge Template field of the New Donation Tax Receipt Setting record, click the look up icon
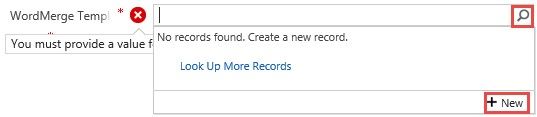
2. Click New.
3. The New WordMerge Template (Altus) displays.
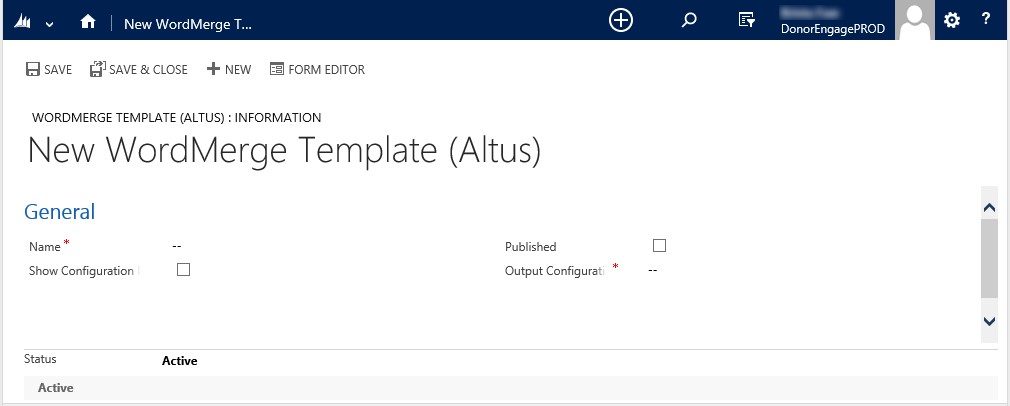
4. In the Name field, add a WordMerge Template name.
5. Place a checkmark in the box next to the Published field.
6. To complete the Output Configuration field, users will have to create a New Output Configuration record. For instructions on this please go to Create WordMerge Output Configuration.
7. Click Save and refresh the page.
Create WordMerge Output Configuration
To complete the WordMerge Template record, users will also have to create a new WordMerge Output Configuration record.
To create the WordMerge Output Configuration:
1. From the Output Configuration field of the New WordMerge Template record, click the look up icon.
2. Click the Search button and then click New.
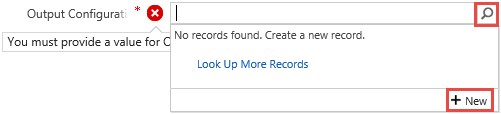
3. The New WordMerge Output Configuration displays.

4. In the Name field, add an Output Configuration name.
5. From the drop down in the Document Format field, choose the desired output document format (.pdf or .docx).
6. In the WordMerge Cloud Service URL field, use the Web Service that has to be hosted in the client's server. For trial purposes, you can use the following web service URL:
http://wordmerge.altusdynamics.com:5545/Cloud/DocumentMerge.svc/DocumentMerge
7. From the drop down in the Output Location field, select from one of the following options:
- Notes (Attachment)
- Network Folder
- SharePoint 2013 Document Library
WordMerge Email Output Configuration
When the Email output option is selected, the system will prompt the user to enter additional fields on the Output Configuration form.
To complete the Output Configuration form when the Email option is selected:
1. In the Email Sender field, enter the system email that will send emails.
2. In the Email template Title field, enter the Email template title that will be used by WordMerge to populate the email that is going to be sent to the donor.
3. In the To Email Attribute Name field, enter the attribute of the entity on the Tax Receipt entity that is going to be emailed the Tax Receipt (in the To field in this email). For example, it should be set to Donor if the recipient of the email is the donor.

Create Email Template
Users will have to create an Email Template.
To create an Email Template:
1.On the Microsoft Dynamics CRM select the Settings tile, then click the Templates tile.

2. Click the Email Templates link.
3. Create a new Email Template record by clicking New in the command bar, then choose the email template type Global.

The New Email Template displays.

4. In the Title field, add Email template title.
NOTE: Use the same title that was used when setting up the WordMerge output configuration. As a reminder, see WordMerge Email Output Configuration.
5. You can add an explanation in the Description field.
6. In the Subject field, you can insert dynamic fields from the Tax Receipt to be populated automatically when sending the tax receipt email. This can be accomplished by inserting the field's schema name between square brackets. For example, if you would like the email subject to be "Thank you (donor name) for your donation!", then the subject should be "Thank you [altus_donor] for your donation!".
NOTE: Only [altus_donor] is allowed on the subject field.
7. In the Body field, you can insert dynamic fields from the Tax Receipt to be populated automatically when sending the email by inserting the fields' schema names between square brackets (See table below for field schema name options).
8. Click Save and Close to save your email template.
The table below provides a list of the fields from the Tax Receipt entity that can be inserted along with their corresponding schema names.
| Display Name | Schema Name |
|---|---|
| Advantage Amount | altus_advantageamount |
| Advantage Description | altus_advantagedescription |
| Amount To Receipt | altus_amounttoreceipt |
| Appeal Code | altus_appeal |
| Cancelled Tax Register | altus_cancelledtaxregister |
| Current Tax Register Record | altus_currenttaxregisterrecord |
| Description | altus_description |
| Donation Gift Type | altus_donationgifttype |
| Send Preference | altus_donationreceiptsendmethod |
| Date Sent | altus_donationtaxreceiptdatesent |
| Donor | altus_donor |
| Donation Gift Name | altus_giftname |
| Payment Date | altus_paymentdate |
| Receipt Addressee | altus_receiptaddressee |
| Receipt Disclaimer | altus_receiptdisclaimer |
| Receipt Salutation | altus_receiptsalutation |
| Soft Credit (Contact) | altus_softcreditcontact |
| Split Donations Summary | altus_splitdonationssummary |
| Recipient Address | altus_taxreceiptrecipientaddress |
| Tax Receipt Total Amount | altus_TaxReceiptTotalAmount |
| Times Printed | altus_TaxRectTimesPrinted |
| Total Pledged | altus_totalpledged |
WordMerge Notes (Attachment) Output Configuration
There are no extra fields to set. The system will create the Tax Receipt document and attach it to the Tax Receipt record in CRM as a note.

WordMerge Network Folder Output Configuration
When the Network Folder output option is selected, specific fields should be set.
To set up the Network Folder option:
1. Add the Network Path of a Shared Network Folder to the URN field. For example: \\AltusCRM\Users\Admin\TaxReceipts
2. Place a checkmark in the Use Credentials field if the network folder needs specific credentials to be accessed.
NOTE: If a checkmark is placed in the Use Credentials field, additional fields display that require completion.
3. In the Username field, select a username from the Active Directory Username that has access to the network folder. Enter only the username without the Domain prefix.
4. Enter the Password of the username that has access to the network folder in the Password field.

WordMerge SharePoint 2013 Document Library
When the SharePoint 2013 output option is selected, specific fields should be set.
To set up the SharePoint 2013 Document Library option:
1. Enter the SharePoint site URL in the SharePoint Server URL field.
2. Enter the Document list name for the SharePoint List that will be used to store Tax Receipt documents in the Document List Name field.
3. Enter the Document List URL for the SharePoint List that will be used to store Tax Receipts in the Document List URL field.
4. Check the Use Credentials field if the SharePoint List needs specific credentials to be accessed.
5. in the Username field, select a SharePoint Username that has access to the SharePoint List. The username can have the following formats depending on whether the SharePoint environment is hosted on premises or through an Office 365 Offering.
- On Premises: Enter username only without domain prefix
- Office 365: Enter username login email
For example: username@organizationname.onmicrosoft.com
6. In the Password field, enter the password of the Username that has access to the SharePoint list.

Congratulations, you are now ready to use Donor Management and WordMerge.